Blog
Barbecue is one of the oldest ways humans have prepared food, yet it remains one of the most rewarding skills to learn in the kitchen or on the patio. Whether you are cooking your first burger on a small charcoal kettle or trying your hand at a slow-smoked brisket, understanding the fundamentals of heat, fuel, and technique will transform your results from inconsistent to reliably delicious. This pillar page gathers the essential concepts every cook should know, explained in simple terms and connected to practical advice you can apply at your next cookout.
What Is Barbecue, Exactly?
Many people use the words grilling and barbecue interchangeably, but in the culinary world they describe two distinct approaches. Grilling means cooking food quickly over direct, high heat, usually at temperatures above 400°F (200°C). Barbecue, in the traditional sense, means cooking slowly over low, indirect heat, often with wood smoke, for hours at a time. Think of grilling as searing a steak and barbecue as braising it in a smoky atmosphere.
Both methods belong to the broader family of live-fire cooking, and a good cook benefits from understanding each. A gas grill set up for indirect heat can produce tender ribs, while a charcoal grill can deliver a beautifully seared crust on a burger. The key is matching the method to the food.
Choosing Your Fuel: Charcoal, Gas, and Wood
The fuel you choose shapes the flavor, the pace, and the learning curve of your cooking. Each option has clear strengths and trade-offs, and none is objectively better than the others.
- Charcoal briquettes burn steadily and predictably, making them ideal for beginners who want consistent temperatures and longer cook times.
- Lump charcoal, made from charred hardwood, lights faster and burns hotter, but its temperature can be less even and it responds quickly to airflow changes.
- Gas offers push-button convenience and precise control through adjustable burners, which is excellent for weeknight grilling and indirect setups.
- Wood and wood chunks are the traditional choice for slow barbecue, providing deep smoke flavor, but they demand the most attention and experience.
A common approach for newcomers is to start with gas or briquettes, build confidence with heat management, and then experiment with wood smoke once the basics feel natural. Flavor preferences are personal, and there is no single right answer.
Direct vs. Indirect Heat: The Core Skill
If you learn only one barbecue concept, make it this one. Direct heat means placing food directly above the coals or burners. Indirect heat means cooking beside the heat source with the lid closed, letting hot air circulate around the food like a smoky oven.
A simple rule of thumb: tender, quick-cooking foods such as steaks, burgers, thin pork chops, shrimp, and vegetables do well with direct heat. Tough, thick cuts such as pork shoulder, beef brisket, whole chickens, and larger roasts need indirect heat and time for their connective tissue to break down into rich, tender texture.
Setting up a two-zone fire solves most of these challenges in one move. Pile the coals on one side of the grill and leave the other side empty. You can sear over the hot zone, then move food to the cool zone to finish cooking gently without burning the exterior.
A Basic Two-Zone Setup in Five Steps
- Light your charcoal in a chimney starter rather than with lighter fluid, which can leave off-flavors.
- Once the coals are ashed over, arrange them on one half of the grill grate area.
- Leave the other half empty to create your cool zone.
- Place the lid on with vents positioned so air flows over the coals and out the far side.
- Adjust the bottom and top vents to control temperature: wider vents mean a hotter fire, narrower vents mean a cooler one.
Managing Temperature and Smoke
Temperature control is mostly about airflow. Fire needs oxygen, and small adjustments to the vents have a large effect. Think of the vents as the throttle of your grill: open them to accelerate the fire, close them slightly to slow it down. Avoid constantly lifting the lid, as every peek releases heat and lengthens cooking time.
Smoke adds the signature flavor of true barbecue, but thin blue smoke is what you want. Thick, white smoke usually means the wood is smoldering too coolly and can make food taste bitter. Use hardwood chunks or chips that have been soaked for about thirty minutes, add them to the hot coals, and aim for a light, almost transparent smoke. Mild woods such as apple and cherry suit poultry and pork, while stronger woods like hickory and oak pair well with beef.
Essential Tools Worth Having
You do not need a shed full of gadgets to cook well, but a few inexpensive items make a real difference in consistency and confidence.
- A reliable instant-read thermometer, arguably the single most useful tool, removes guesswork about doneness.
- Long-handled tongs for turning food without piercing it and losing juices.
- A grill brush or scraper for keeping grates clean, ideally used while the grill is hot.
- A chimney starter if you cook with charcoal, which speeds up and simplifies lighting.
- Heavy-duty aluminum foil for wrapping ribs or tenting cooked meat to rest.
Doneness and Food Safety
Color is a poor indicator of doneness, especially with poultry and ground meat. Internal temperature, measured at the thickest part of the cut, is the dependable standard. Knowing a few target temperatures covers the majority of backyard cooking.
- Chicken and other poultry: 165°F (74°C).
- Ground beef, pork, and lamb: 160°F (71°C).
- Whole cuts of beef, pork, or lamb cooked medium: around 145°F (63°C) with a brief rest.
Two habits protect food quality as much as any recipe. First, avoid cross-contamination by using separate plates and utensils for raw and cooked meat. Second, let large cuts rest after cooking so the juices redistribute, typically ten minutes for steaks and up to an hour for a whole smoked shoulder wrapped in foil and towels.
Building Flavor: Rubs, Marinades, and Sauces
Flavor building in barbecue follows a logical order. Dry rubs, usually a mix of salt, pepper, paprika, garlic, and brown sugar, are applied shortly before cooking and form the savory crust prized on smoked meats. Marinades work best on thinner cuts and add moisture as well as flavor, but they should not be confused with brines, which use salt water to season deeply from the inside.
Barbecue sauce deserves special timing. Sugary sauces burn quickly over direct heat, so apply them during the final minutes of cooking or serve them at the table. A useful analogy: the rub is the main storyline of the flavor, while the sauce is the final sentence, not the whole paragraph.
Common Mistakes and How to Avoid Them
Every cook makes mistakes, and most of them are easy to correct once you know what to look for.
- Crowding the grill traps steam and prevents browning; give each piece space for air to circulate.
- Flipping food constantly interrupts crust formation; most items need only one or two turns.
- Ignoring preheating leads to sticking and pale, unappetizing surfaces; allow ten to fifteen minutes for grates to come up to temperature.
- Skipping the rest period causes juices to run out onto the cutting board instead of staying in the meat.
- Chasing perfection too early with complicated cuts; start with burgers, chicken thighs, and sausages before attempting a brisket.
Where to Go From Here
Barbecue rewards patience, curiosity, and repetition more than expensive equipment. Start with a simple two-zone fire, cook familiar foods, and rely on a thermometer until your instincts develop. From there, you can branch into specific topics such as smoking large cuts, cooking with a rotisserie, mastering different regional flavor traditions, or adapting classic recipes for gas, charcoal, or ceramic cookers. Every cookout is a chance to refine one small detail, and over time those details add up to food worth gathering around.
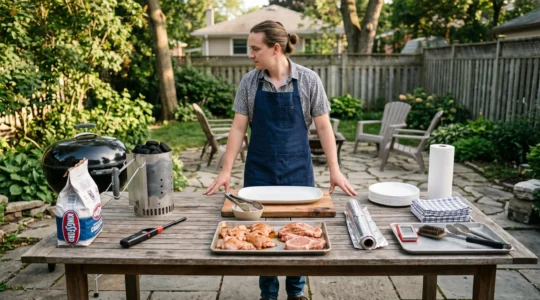
How to Prep for a BBQ So You Don’t Run Inside 12 Times While the Fire Is Lit
A successful barbecue starts long before the first sausage hits the grill. The problem with a rushed BBQ is rarely that the host has not prepared enough food. More often, ingredients are ready but the charcoal is missing, the clean…
Lire la suite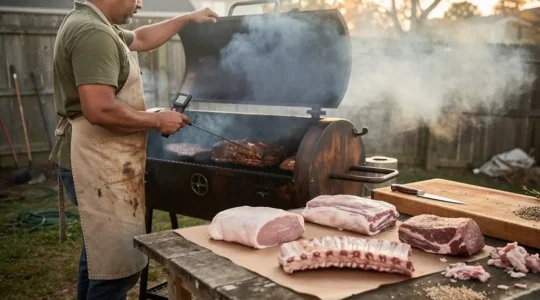
Which Barbecue Cut Should You Choose When You Only Have 4 Hours to Cook ?
Four hours is enough to produce excellent barbecue, but not enough to turn every tough cut into tender, pull-apart meat. A thick brisket, a whole pork shoulder and a rack of ribs respond differently to exactly the same cooker temperature….
Lire la suite