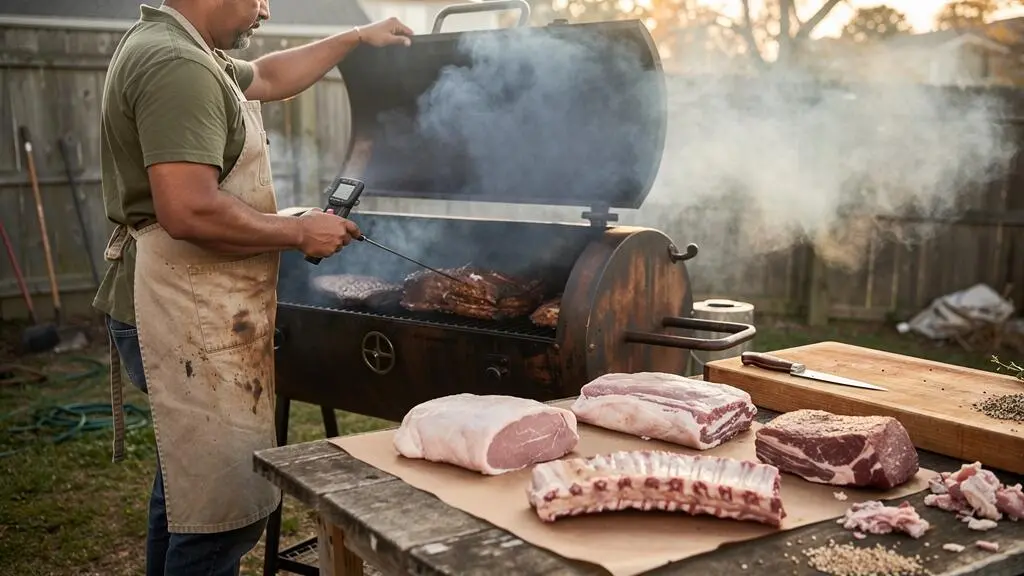
Four hours is enough to produce excellent barbecue, but not enough to turn every tough cut into tender, pull-apart meat. A thick brisket, a whole pork shoulder and a rack of ribs respond differently to exactly the same cooker temperature. Choosing the wrong cut can leave you serving something chewy, dry or simply unfinished.
For a British home cook working with a kettle barbecue, gas grill, ceramic cooker or smoker, the safest starting point is a reasonably thin, evenly shaped cut with an achievable target texture. Pork ribs, smaller steaks from the chuck, tri-tip and properly prepared boneless chicken thighs can all be more practical than a large traditional smoking joint, depending on the equipment.
But the decision goes beyond cooking time. The meat’s thickness, connective tissue, fat distribution, usable yield and price all matter. A cheaper cut is not automatically suitable for a short cook, and an expensive cut is not automatically forgiving. The objective is to buy meat that can reach its intended texture, rest and reach the table before the deadline.
Four-hour barbecue: the essential decisions
- Choose for thickness and texture: manageable ribs, marbled steaks and smaller roasting cuts are generally more realistic than whole briskets or large shoulders.
- Budget for the entire session: preheating, cooking, checking doneness and resting must all fit within four hours.
- Protect your serving time: use a thermometer, control the cooker and choose an alternative menu rather than relying on last-minute heat increases.
- Why Do Some Cuts Stay Tough When You Only Cook Them for 3–4 Hours?
- How to Pick a Barbecue Cut Using a 3-Question Checklist at the Butcher Counter?
- Brisket, Pork Shoulder, or Ribs: Which Is Least Risky for 8 Guests?
- The Lean-Cut Mistake That Leaves You With Dry BBQ Even When Cooked Low
- When Should You Buy Cheaper Cuts Because They Perform Better on Low Heat?
- How to Use Your First Hour — Setup, Sealing, and the Point of No Return
- Brisket, Pork Shoulder, or Ribs — Reading Doneness Instead of Watching the Clock
- What the 12-Hour Brisket Teaches You — and When to Abandon It for a Faster Cut
Why Do Some Cuts Stay Tough When You Only Cook Them for 3–4 Hours?
Some barbecue cuts remain tough after three or four hours because their connective tissue has not had enough time to soften. Brisket, beef chuck and pork shoulder contain collagen that gradually changes into gelatin during cooking. Reaching a high internal temperature is not sufficient on its own: the meat must spend enough time cooking for the desired texture to develop.
Muscle fibres and connective tissue behave differently under heat. As meat becomes hotter, its muscle fibres generally contract and lose moisture. Meanwhile, collagen-rich connective tissue can soften as cooking continues. This creates a difficult balance: a large cut can reach a temperature associated with cooked meat while remaining unpleasantly firm.
Texas A&M‘s explanation of barbecue science describes this distinction and identifies approximately 85–91 °C (185–195°F) as a relevant range in traditional connective-tissue-rich barbecue. That range is a tenderness reference, not a universal finishing target or a substitute for food-safety guidance.
Raising the smoker temperature can shorten cooking, but it changes the trade-off. The exterior may cook more aggressively, moisture losses can increase, and the centre may still lack the time required for connective-tissue breakdown. Faster cooking is possible; identical results are not guaranteed.
A further complication is the barbecue stall. Surface evaporation cools the meat and can slow its internal temperature rise, particularly during a long uncovered smoke.
The useful distinction is between cuts that require extended tenderisation and cuts that are already tender enough for a shorter cook. A chuck steak of manageable thickness can be served sliced at an appropriate doneness, whereas a large chuck roast intended for shredding needs substantially more time. Fat improves eating quality but does not magically dissolve collagen.
Before buying, consider four variables:
- Thickness: a thin steak and a thick joint of the same muscle do not cook alike.
- Starting condition: chilled meat, frozen meat and unevenly thawed meat behave differently.
- Cooker stability: temperature fluctuations make finishing times less predictable.
- Target texture: sliceable meat and fully shreddable meat may require very different cooking strategies.
If the available hours cannot deliver the texture a cut needs, change the cut or the intended serving style before cooking begins. That decision is more reliable than trying to rescue a fundamentally unrealistic schedule.
How to Pick a Barbecue Cut Using a 3-Question Checklist at the Butcher Counter?
Choose a barbecue cut by answering three questions: how much usable cooking time remains, what temperature your cooker can maintain, and how many portions you need. Then inspect the actual piece of meat for thickness, marbling and trimming requirements. These factors are more useful for a four-hour deadline than relying on the cut name alone.
Question one: How much time is genuinely available? Four hours between arriving home and serving dinner is not four hours of smoking. Lighting the barbecue, stabilising heat, cooking and resting all consume part of the window. If the schedule is fixed, prioritise a thinner piece that can be cooked to a suitable slicing temperature rather than a large joint intended for pulling.
Question two: What can the cooker reliably do? A kettle barbecue with a stable indirect zone can handle ribs or a compact roast. A gas barbecue can offer controlled indirect heat, although some models struggle with consistent low temperatures. An offset smoker offers smoke and cooking capacity but demands attention to fuel and airflow.
Question three: How many people are eating? Count portions after allowing for bones, trimming and cooking losses. A large rack of ribs may look generous in the display but contains substantial bone. A boneless piece of beef has a different usable yield.
Once the three answers are clear, inspect the meat itself. Evenly distributed marbling is usually more useful than a thick external fat cap when seeking a juicy slice. Uniform thickness promotes predictable cooking, while dangling thin sections are more susceptible to drying. Check whether a membrane needs removal and how much fat will be discarded.
At a UK butcher’s counter, ask whether the joint can be divided into smaller, evenly thick pieces, whether the bone contributes enough flavour to justify reduced usable yield, and whether the meat is suitable for slicing rather than long braising or pulling. Terms such as chuck, featherblade, beef ribs and pork shoulder can cover substantially different preparations.
Requesting trimming can also change the choice. Removing excessively thin edges may help with consistency, but removing all surface fat from a naturally lean piece can make moisture management harder.
Five checks to complete before paying
- Write down the serving deadline: record the time dinner must be on the table and reserve time for resting.
- Name your cooking method: confirm whether the meat will cook over direct or indirect heat and identify the temperature range your cooker can maintain.
- Check the actual thickness: ask the butcher to show the thickest part and establish whether the piece can be divided evenly.
- Confirm usable portions: note the raw weight, bone content and expected trimming so the purchase covers your guest count.
- Agree on the finished texture: identify whether the cut will be served sliced, carved or pulled, and record a realistic alternative if the planned cut is too thick.
When the best-marbled cut is plainly too large, do not let appearance override the clock. Ask for a smaller piece that serves the same purpose. If nothing suitable is available, change the menu to steaks, chops or another cut that can finish reliably.
Once the meat has passed these checks, the next consideration is the financial and practical risk of serving it to a group.
Brisket, Pork Shoulder, or Ribs: Which Is Least Risky for 8 Guests?
For eight guests and only four hours, manageable pork rib racks are generally a less risky traditional barbecue choice than a whole brisket or full pork shoulder. Pork shoulder can be forgiving during a longer cook and hold well once tender, but a large raw joint is not automatically a four-hour option. Brisket carries particularly high timing and cost-of-failure risks.
The comparison changes when the meal can be prepared ahead, the equipment holds heat reliably or the guests’ arrival time is flexible. A properly cooked shoulder can be easier to hold and serve later than ribs. A whole brisket becomes more realistic when the schedule allows an extended cook and adequate resting.
The practical comparison is not simply which cut tastes best. It is which cut has the lowest probability of missing the serving deadline or producing too little usable meat.
| Decision factor | Whole brisket | Pork shoulder | Pork ribs |
|---|---|---|---|
| Four-hour suitability | Generally unsuitable whole | Large joints generally unsuitable for pulled pork | Manageable racks may be suitable, depending on thickness and method |
| Timing flexibility | Limited when a complete tender brisket is required | Better when cooked ahead and held properly | Often easier to schedule in a short session |
| Usable yield | Losses from cooking and trimming | Losses from bone, fat and cooking | Significant bone weight |
| Failure cost | Potentially substantial, especially for a large purchase | Depends on joint size and local price | Can be spread across separate racks |
| Best planning advantage | Advance preparation and long resting allowance | Cook-ahead and temperature-controlled holding | Smaller portions and flexible serving |
Raw weight is not equivalent to portions served. Texas A&M Meat Science’s barbecue meat selection resource reports approximately 50% cooked, trimmed lean yield for brisket. This is a specific yield measure, not a universal percentage for every brisket recipe.
Approximately 50%
Cooked, trimmed lean brisket yield as a proportion of raw brisket weight, according to Texas A&M. Actual portions depend on the cut, preparation and trimming.
Texas A&M AgriLife, Department of Animal Science — Meat Selection
There is no equivalent universal percentage in the supplied evidence for pork shoulder or ribs. For eight guests, ask the butcher to estimate usable portions for the exact joint or racks being purchased. Factor in appetites, side dishes and whether guests expect ribs as the main course or one part of a mixed barbecue.
A practical decision rule follows:
- Choose ribs if cooking begins on the day, the deadline is fixed and the cooker can accommodate the racks without crowding.
- Choose shoulder if the meat can be cooked well ahead and kept safely hot until service.
- Choose brisket if there is sufficient time, reliable temperature measurement and flexibility for a long cook and rest.
A probe thermometer improves control, but it cannot guarantee that connective tissue will soften on schedule. Likewise, an insulated cooler is not a substitute for verified safe hot holding.
For a strict four-hour session, avoiding a whole brisket or shoulder is often the sensible decision. But choosing a smaller cut brings another risk: selecting meat so lean that gentle cooking dries it out.
The Lean-Cut Mistake That Leaves You With Dry BBQ Even When Cooked Low
A lean cut can become dry during low-temperature barbecue because gentle heat does not prevent muscle fibres from losing moisture. Pork tenderloin, eye of round and similarly lean cuts contain relatively little intramuscular fat and may not benefit from extended cooking. They are usually better treated as roasting or grilling cuts, finished at an appropriate internal temperature rather than cooked until they shred.
Traditional low-and-slow barbecue rewards the gradual tenderisation of connective tissue. Lean, relatively tender muscles have a different requirement: reach the intended doneness without unnecessarily extending heat exposure.
This explains why the word « roast » can mislead supermarket shoppers. A beef roasting joint might be relatively lean and suited to carving, while another roasting cut contains enough connective tissue to favour slow braising. The label describes a broad use, not a guaranteed barbecue method.
Watch for three shopping traps:
- Assuming a product labelled « lean » or « extra lean » will remain juicy during a long smoke.
- Treating a thin grilling steak as though it were a thick barbecue joint.
- Believing that a lower cooker temperature always compensates for excessive cooking time.
If the meat is already purchased, change the method rather than trying to make it behave like brisket. A suitable brine can improve seasoning and moisture retention for some cuts; injection may be appropriate for larger pieces but adds complexity and requires careful hygiene. Neither method replaces temperature control.
Cook the meat according to the species, cut and desired doneness, using appropriate food-safety guidance. Pork tenderloin and lean beef should not automatically be taken to the high finishing temperatures associated with pulled pork or collagen-rich brisket. For UK home cooking, follow the applicable Food Standards Agency guidance and the cut’s preparation requirements rather than assuming American barbecue finishing temperatures are universal safety targets.
After cooking, allow a suitable rest and carve across the grain. Resting helps manage the moisture released during slicing, although it cannot restore water already lost through excessive cooking.
Sauce deserves its own distinction. A finishing glaze adds flavour and surface character. Pouring sauce over dried-out meat may make each bite feel wetter, but it does not reverse moisture loss or restore the original muscle texture.
Once that principle is understood, the cheapest suitable cut can become a much stronger purchase than a premium joint chosen for the wrong cooking conditions.
When Should You Buy Cheaper Cuts Because They Perform Better on Low Heat?
Buy a cheaper barbecue cut when its connective tissue, fat distribution and portion size suit the cooking method and available time. Working muscles such as chuck and shoulder can deliver excellent results under prolonged gentle heat, but that does not make every inexpensive joint suitable for four hours. A bargain is only worthwhile if the meat can reach a pleasing texture before service.
Traditional barbecue has long relied on turning less naturally tender cuts into enjoyable food. Their muscles often contain more connective tissue because of how the animal used them. Given enough time at a suitable temperature, that tissue can soften substantially.
However, supermarket pricing is variable. Beef chuck, featherblade, short ribs and spare ribs may be competitively priced in one shop and comparatively expensive in another. Compare the displayed price per kilogram with the usable portion and preparation needed, rather than treating any cut name as a guarantee of value.
For a shorter session, the distinction between small pieces and intact joints is especially important.
| Cut or alternative | Useful physical characteristic | Four-hour decision |
|---|---|---|
| Chuck steak or chuck eye | Marbling; manageable thickness when cut as a steak | Consider for sliced beef, not guaranteed pulled beef |
| Featherblade steak | Strong flavour with connective tissue through the muscle | Consider if prepared thinly and served appropriately; thick pieces need more time |
| Spare rib sections or trimmings | Smaller pieces with fat and bone | Potentially practical when evenly sized and cooked through |
| Thick beef short ribs | Marbling alongside substantial connective tissue | Usually a poor choice for fully tender four-hour barbecue |
| Whole shoulder clod or large chuck roast | Large, connective-tissue-rich muscles | Better reserved for a longer session |
| Very lean roasting joint | Little intramuscular fat; often uniform shape | Use a controlled roast-style method rather than an extended smoke |
Chuck eye can be worth asking for as an alternative to ribeye when the butcher has it available. Similarly, spare rib trimmings may offer useful portions without the price or presentation of a complete rack. Neither is inherently cheaper in every market.
Be careful with beef plate ribs and thick chuck short ribs. They may look attractive and well-marbled, but their connective tissue can still demand extended cooking. A thin flanken-style short rib is a different proposition: its geometry supports a quick, hot cooking method rather than traditional low-and-slow smoking.
Preparation can turn an awkward inexpensive piece into a more predictable one:
- Pat the surface dry for more consistent browning.
- Trim loose, thin edges that would cook much faster than the centre.
- Divide the meat into more uniform pieces when appropriate.
- Retain useful marbling and avoid removing fat indiscriminately.
- Season consistently and select a cooking method for the finished texture.
A cut with excessive surface moisture, irregular thickness or large inedible sections may offer less value than the shelf price suggests. Judge the purchase by the likely plate of food, not simply the raw weight.
With the correct piece purchased, execution becomes the next limiting factor. In a four-hour session, the first hour can determine whether the original plan remains realistic.
How to Use Your First Hour — Setup, Sealing, and the Point of No Return
The first hour of a four-hour barbecue should establish stable heat, place the meat on a correctly configured cooker and confirm that the intended cooking method is working. Preheating, fuel preparation and temperature monitoring deserve attention before the meat goes on. Lost time is difficult to recover, particularly with thick cuts whose centres heat slowly.
Start with a cooker that can maintain the chosen temperature without repeated lid opening. For indirect barbecue, position the meat away from the main heat source and allow the cooking chamber to stabilise. Arrange enough fuel for the intended period while following the cooker’s operating instructions.
Texas A&M’s cooking and smoking barbecue guidance describes traditional low-and-slow smoking at approximately 93–121°C (200–250°F), particularly for large briskets and pork shoulders. This describes a traditional technique, not a required temperature for every short-session cut.
For a four-hour meal, a somewhat hotter indirect method may be appropriate for certain ribs or small cuts. The correct temperature depends on the recipe, cooker and meat. Increasing heat should be a deliberate method choice, not a desperate late adjustment.
Consider this illustrative schedule for a manageable cut selected specifically for the session. It is a planning framework, not a validated cooking-time guarantee.
| Session stage | Priority action | Decision required |
|---|---|---|
| Opening stage | Prepare fuel, preheat, stabilise the cooker and position the meat | Is indirect heat stable enough to begin? |
| First hour | Monitor chamber temperature and start checking internal temperature as appropriate | Is the meat progressing consistently? |
| Middle stage | Assess surface colour, moisture and whether wrapping suits the chosen method | Will wrapping help, or would it compromise the intended finish? |
| Final cooking stage | Verify internal temperature and physical doneness | Is the meat genuinely ready, or must the serving plan change? |
| Reserved finishing period | Rest as appropriate, carve and serve | Can service begin safely and on schedule? |
The so-called point of no return is not a fixed minute on the clock. It is the stage at which the remaining time is insufficient for the cut to reach its required texture and still rest before serving. That point varies with meat thickness, cooker conditions and the desired result.
The stall can complicate matters. Research discussed in AmazingRibs’ investigation of the barbecue temperature stall identifies evaporative cooling as the principal mechanism. Foil wrapping can reduce evaporation and sometimes accelerate cooking; adding surface moisture can have the opposite effect through cooling. Neither technique guarantees that a large, tough joint will become tender within four hours.
Avoid continual vent adjustments and repeated lid opening. Check temperatures as needed, preferably with a reliable probe that reduces unnecessary disturbance. Change airflow deliberately, allow the cooker to respond and avoid chasing every small fluctuation.
Once cooking is underway, the remaining question is not simply how long the meat has been on the grill. It is whether the physical signs of doneness match the texture you intend to serve.
Brisket, Pork Shoulder, or Ribs — Reading Doneness Instead of Watching the Clock
Judge barbecue doneness using internal temperature together with the physical texture expected from the cut. A thermometer helps establish cooking progress and safety, but tenderness requires a separate assessment. Brisket should offer little resistance to a probe when fully tender; pulled pork should separate readily; ribs should bend and show appropriate tenderness without relying on the clock alone.
Two pieces of meat with the same weight can finish differently because of their shape, collagen content, fat distribution and starting temperature. Weather, fuel condition and cooker stability introduce further variation. A cooking schedule is useful for planning but cannot replace an actual doneness check.
For brisket, probe the thickest relevant sections and evaluate resistance rather than treating a single internal temperature as proof of success. A properly tender brisket should yield under the probe, while a firm, resistant centre suggests that further tenderisation may be needed. The lean flat and fattier point can also behave differently.
For pork shoulder intended for pulling, the meat should separate readily after sufficient connective-tissue breakdown. Reaching a temperature associated with traditional pulled pork does not guarantee that the entire joint has softened.
For ribs, look at the rack as a whole. Surface shrinkage may expose some bone, but bone pull-back alone is not a reliable finish test. A gentle bend and an appropriate bite provide more information. Ribs should not necessarily collapse completely off the bone unless that is the intended texture.
Use those tactile cues alongside suitable thermometer readings. Appearance or softness alone cannot establish microbiological safety. Check the thickest appropriate part, avoiding bones and pockets of fat that may distort the reading.
When guests are arriving and the meat is still tough, the response depends on how far it has progressed. Raising cooker temperature or wrapping may help some cuts finish faster, but continued cooking must still be sufficient for the intended texture.
If a properly cooked piece can be served safely as slices but will not pull apart, a sliced presentation may be the better option. This approach only works where the cut is appropriate for slicing and its actual tenderness and safety have been established. It does not turn undercooked brisket into a good steak.
When meat has gone beyond its ideal texture, immediate action can prevent further deterioration. Remove it from the heat, allow an appropriate rest and serve carefully. Very soft meat can sometimes be chopped for sandwiches or combined with sauce, although the original texture cannot be recovered.
Resting also matters under deadline pressure. Large joints generally benefit from more resting time than thin steaks. During this period, heat continues moving through the meat and juices redistribute, although the effect depends on cut size and cooking conditions.
Do not shorten a rest automatically to zero. Instead, reserve a realistic finishing period when planning the cook. For food safety, avoid leaving cooked meat at unsuitable temperatures for extended periods; use proper hot holding or prompt serving.
The essential skill is recognising when the chosen cut has reached its useful texture. This leads to the final purchasing lesson: an ambitious brisket cannot be forced to behave like a quick-cooking joint.
Key takeaways before choosing a long-cook cut
- Cooking faster is not the same as tenderising faster: hotter heat and wrapping may shorten a cook, but connective-tissue-rich meat still needs adequate time.
- Flexibility changes the decision: advance preparation, reliable hot holding and an adjustable serving time can make large joints more practical.
- Protect the meal rather than the tradition: when the schedule cannot accommodate brisket, a smaller or naturally more tender cut is often the stronger choice.
What the 12-Hour Brisket Teaches You — and When to Abandon It for a Faster Cut
A traditional 12-hour brisket illustrates why barbecue cut selection must begin with the clock. The large joint needs sustained cooking to soften substantial connective tissue while protecting its leaner sections from excessive moisture loss. Techniques such as wrapping and heat management can improve the result, but they do not make an entire brisket reliably achievable in a four-hour session.
Brisket contains two notably different muscles. The flat is relatively lean, while the point carries more intramuscular fat. Their different structures help explain why maintaining moisture in the flat can be challenging during extended cooking.
The 12-hour figure is a useful reference, not a guaranteed recipe duration. Some briskets take less time; others take substantially longer. Thickness, weight, shape, cooker temperature and desired tenderness all affect the outcome.
Traditional techniques address different parts of the problem. Fat-side orientation can help manage exposure to heat, depending on cooker design. Spritzing affects the surface and may increase evaporative cooling. Wrapping with foil, commonly called the Texas crutch, reduces evaporation and can help the meat progress through a stall.
Experimental observations reported in AmazingRibs’ investigation of the barbecue temperature stall include a brisket whose stall began after approximately two to three hours and lasted roughly six hours. That is a specific experimental observation, not a timetable every brisket follows.
Experimental evidence: why brisket cooking can stall
Professor Greg Blonder’s experiments, reported by AmazingRibs, examined temperature behaviour during barbecue cooking, including comparisons involving beef fat and a water-soaked sponge.
The observed temperature plateau was explained primarily by evaporative cooling rather than collagen conversion or fat rendering. The findings support wrapping as a way to reduce evaporative cooling, but they do not establish a guaranteed shortcut to fully tender brisket.
If a whole brisket has already been purchased and dinner is only four hours away, there are several possible decisions.
- Separate the point and flat: this changes portion size and cooking geometry, but the point still contains connective tissue and is not guaranteed to become fully tender within the remaining window.
- Consider hot-and-fast cooking: higher heat and appropriate wrapping may reduce total cooking time, but the exterior, bark and final texture may differ from a traditional long smoke.
- Change tonight’s menu: refrigerate the raw brisket safely and cook it during a session that genuinely allows enough time, provided storage conditions and use-by dates permit.
For a home cook shopping in a UK supermarket or butcher’s shop, a small tri-tip, manageable marbled steak, appropriately sized pork ribs or another cut intended for shorter cooking may provide a more dependable dinner. The finished texture will differ from slow-smoked brisket, but reliability is the point.
Budget reinforces that decision. Spending more on a large brisket increases the amount at stake if the meal misses its serving deadline. Purchasing only the meat that the available cooker can finish properly often makes better economic sense than buying an impressive joint and attempting to accelerate it.
Before the next barbecue, write down the serving time, choose the intended finished texture, assess the cooker’s capabilities and compare the butcher’s available cuts against those limits. Buy the piece that fits all four conditions, including the budget. The best barbecue cut is not necessarily the one celebrated in a long-smoking recipe; it is the one that can be cooked, rested and served properly in the session available.
Can a four-hour barbecue still develop a noticeable smoke flavour?
Yes. Shorter cooking sessions can develop smoke flavour when suitable wood, controlled combustion and appropriate airflow are used. The intensity will vary by cooker, fuel, food surface and exposure. More smoke is not automatically better; excessive smoke can make meat taste harsh.
Should I choose bone-in or boneless meat when cooking time is limited?
Choose according to the meat’s thickness, presentation and usable yield rather than assuming one option always cooks faster. Boneless meat is often easier to portion and can be shaped more uniformly. Bone-in cuts may provide attractive presentation, but the bones reduce edible weight and complicate portion estimates.
Does wrapping meat in foil always make barbecue faster?
No. Foil can reduce evaporative cooling, particularly during a stall, and may shorten cooking time. Its effect depends on the cut and cooking conditions. Wrapping can also soften the bark and cannot guarantee that thick, collagen-rich meat becomes tender before a fixed deadline.
Is a digital probe thermometer worth buying for occasional barbecue cooking?
A reliable food thermometer is a useful tool because it provides information that colour, elapsed time and surface appearance cannot. It helps verify internal temperatures and monitor progress, especially with thicker pieces. For traditional low-and-slow cuts, combine thermometer readings with a separate tenderness check.
Can meat be partially smoked in advance and finished at the barbecue?
Advance cooking can help with time management, but partially cooking meat and storing it for later finishing creates food-safety risks if temperatures and cooling procedures are not properly controlled. For home entertaining, a safer planning approach is to cook meat fully ahead when appropriate, cool and refrigerate it safely if necessary, then reheat thoroughly using suitable food-safety guidance. Do not assume that a short smoking session makes partially cooked meat safe to store.