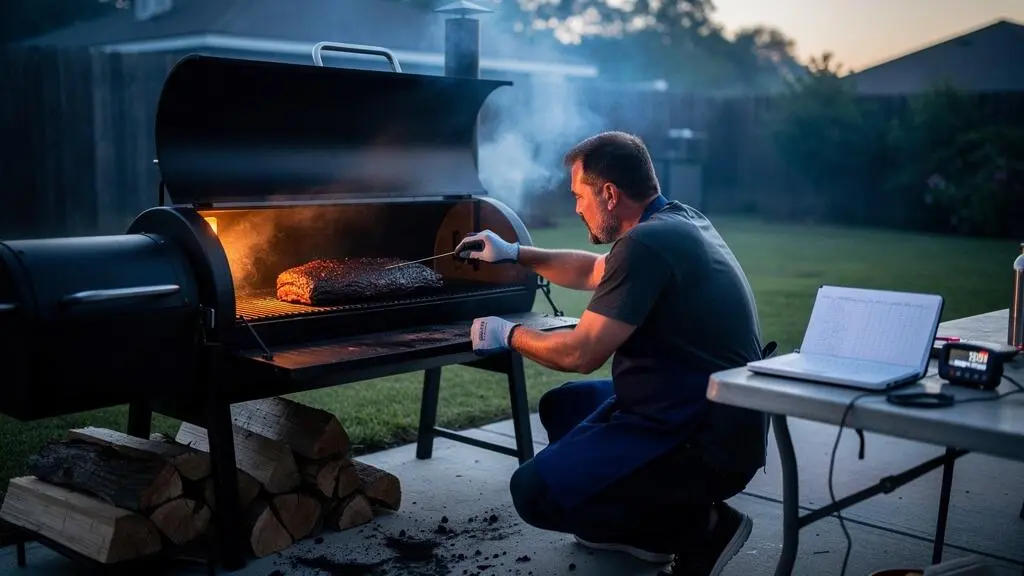
A 12-hour smoked brisket can come out tender, evenly cooked and easy to slice, but only if the lean flat is protected from unnecessary time at heat. Holding a smoker at 225°F (107°C) is not enough on its own. The important decisions are when to wrap, when to begin checking tenderness and when to remove the meat.
For a typical 5 kg whole packer brisket, the most dependable approach combines consistent pit temperature, separate monitoring of the flat and point, and a serving schedule with room for an unpredictable stall. The brisket should finish when its texture is right, not simply when a timer reaches 12 hours.
This matters particularly when cooking for 6–12 guests. An expensive cut offers little margin for error, and a late finish can disrupt the meal. A properly planned holding period provides flexibility without forcing the cook to continue heating already tender meat.
The following method uses observable temperature and texture cues rather than promising a universal cooking time.
12-hour brisket: the essential decisions
- Cook at a steady 225–250°F (107–121°C), track the flat and point separately, and judge completion by probe tenderness rather than temperature alone.
- Wrap according to bark development and timing: foil generally accelerates cooking, while butcher paper better preserves a firm exterior.
- Plan a temperature-monitored rest, keep extended hot holding at or above 140°F (60°C), and slice the flat against the grain immediately before serving.
- Why Does Brisket Dry Out After 10+ Hours Even at 225°F?
- How to Plan a Brisket Cook Backwards From Serving Time Without Panic?
- Butcher Paper or Foil: Which One Makes More Sense for a 5 kg Brisket?
- The One Slicing Mistake That Makes a Juicy Brisket Taste Dry in 30 Seconds
- Brisket Resting: How to Hold It for 2–6 Hours Without Turning the Bark Soggy?
- How to Choose Between 225°F and 250°F When You Have Only 9 Hours to Cook?
- How to Trim and Position the Fat Cap so It Renders Evenly Without Washing Out Flavour?
- How to Run a Low-and-Slow Smoke Overnight Without Waking Up Every Hour?
Why Does Brisket Dry Out After 10+ Hours Even at 225°F?
Brisket can dry out after ten hours at 225°F because a low cooking temperature does not prevent cumulative moisture loss. The flat contains less associated fat than the point, making it particularly vulnerable when cooking continues beyond tenderness. A successful long cook therefore depends on recognising the finishing window, not merely maintaining gentle heat.
Whole brisket contains two principal muscles with different characteristics. Texas A&M University‘s brisket anatomy reference identifies the flat with the deep pectoral muscle and explains that the superficial pectoral muscle, associated with the point, typically has more fat.
These structural differences matter during smoking. Collagen gradually changes as cooking progresses, helping tough connective tissue become more palatable. At the same time, muscle proteins contract and moisture is lost. A longer cook is not automatically a more tender or juicier cook.
Recognise the finishing window
A frequently used finishing range is approximately 200–205°F (93–96°C), although some briskets need a different endpoint. Begin checking the thickest part of the flat as the meat approaches this range.
Insert a thin thermometer probe into several positions. The probe should move through the meat with little resistance, similar to passing a warm knife through softened butter. A slight, smooth drag is acceptable; firm resistance suggests the connective tissue has not yet softened sufficiently.
Temperature indicates when to investigate; tenderness determines when to stop. The point may already feel soft while the flat still needs time, which is why one reading cannot describe the entire cut.
Understand the stall without chasing temperature
During the stall, evaporation from the meat’s surface removes heat and slows the internal temperature rise. A brisket may appear to stop progressing even while the smoker maintains a stable temperature.
Wrapping reduces surface evaporation and can shorten this phase. Spritzing adds surface moisture and may influence cooling, although its effect depends on application and smoker conditions. Neither technique guarantees that the flat will remain juicy if cooking continues too long.
The finishing window also affects scheduling. An early finish is not inherently damaging: a correctly managed hot hold can be useful. The problem arises when a finished brisket remains at an unnecessarily high temperature, continuing to cook while everyone waits to eat.
Once doneness is treated as a texture assessment rather than a fixed clock reading, the next task becomes scheduling the cook so it finishes with enough time to rest safely.
How to Plan a Brisket Cook Backwards From Serving Time Without Panic?
Start with the intended serving time, allow a realistic resting or hot-holding period, and work backwards using previous cooking records from your own smoker. Reserve additional time for an unpredictable stall. The objective is not to make brisket finish at an exact minute, but to create enough flexibility to avoid rushing an undercooked flat.
For a 5 kg brisket, generic minutes-per-pound charts are useful only as rough orientation. Shape, fat distribution, trimming, airflow, weather and pit temperature all influence how quickly the meat cooks.
ThermoWorks reports an experience-based range of eight to fourteen hours for brisket cooks, but that range does not guarantee a particular finishing time for a 5 kg cut. A 12-hour cooking target should therefore be treated as a plan to monitor, not a deadline that overrides tenderness.
Build a reverse timeline
Consider a hypothetical Saturday meal scheduled for 18:00. The following timetable illustrates how to organise a cook, rather than predicting how a particular brisket will behave.
| Planning point | Illustrative time | Decision |
|---|---|---|
| Serve and slice | 18:00 | Cut the rested brisket against the grain. |
| Target start of hot holding | 16:00 | Begin holding only after probe tenderness confirms doneness. |
| Estimated finishing phase | Before 16:00 | Check tenderness repeatedly rather than targeting one temperature. |
| Expected wrap assessment | During the stall | Inspect bark and internal temperature before deciding whether to wrap. |
| Illustrative cook start | 04:00 | Begin a nominal 12-hour cook, with contingency arrangements if it runs longer. |
Starting at 04:00 leaves no additional allowance if a nominal 12-hour cook runs late. For a fixed dinner, an earlier start or a different serving plan is more resilient. The target two-hour hold should never be treated as guaranteed spare cooking time.
Track four details after every cook: trimmed weight, pit temperature, wrap timing and actual probe-tender finish time. Add outdoor conditions and the approximate duration of the stall. Over several cooks, this log becomes more useful than a generic timing chart.
Prepare for an early or late finish
| Situation | Recommended response | Risk to control |
|---|---|---|
| Two hours ahead | Move the tender brisket into a monitored hot hold. | Excessive holding temperature can continue cooking the flat. |
| Two hours behind | Consider a modest, controlled pit-temperature increase and wrapping if the bark is established. | Higher heat requires earlier tenderness checks. |
| Stall lasts longer than expected | Check actual pit temperature, probe placement and wrapping options. | Repeated lid opening and unnecessary spritzing may prolong the cook. |
| Brisket remains firm near serving | Allow additional cooking time and adjust the meal schedule. | Removing tough brisket to satisfy the clock cannot complete the tenderisation process. |
If an overnight start is necessary, calculate when the stall is likely to occur using previous experience. A start that places the wrap decision during waking hours is easier to supervise than one requiring an unpredictable intervention at 03:00.
Once the schedule is realistic, wrapping becomes a considered response to bark development and remaining cooking time rather than an emergency measure.
Butcher Paper or Foil: Which One Makes More Sense for a 5 kg Brisket?
Choose foil when finishing speed and moisture retention at the surface are more important than a firm bark. Choose untreated butcher paper when you can allow more cooking time and want a less steamed exterior. For a 5 kg brisket, neither material is automatically better: the decision depends on bark development, the remaining schedule and the desired texture.
Wrapping is often called the Texas Crutch. Its primary purpose is to reduce evaporative cooling during the stall. AmazingRibs‘ explanation of the Texas Crutch describes how foil and butcher paper change moisture escape and cooking behaviour.
Foil is relatively impermeable, holding steam and liquid close to the meat. This can accelerate cooking, but prolonged contact with trapped moisture softens the bark and may create a more braised exterior. Butcher paper allows more moisture movement and generally preserves bark better, although it offers less protection against evaporation.
| Decision factor | Aluminium foil | Untreated butcher paper |
|---|---|---|
| Cooking speed | Generally faster after wrapping | Usually less acceleration |
| Bark preservation | More likely to soften | Generally better maintained |
| Moisture escape | Very limited when sealed | Greater than foil |
| When time is short | Often preferable | More suitable with schedule flexibility |
| When bark is already firm | Useful if speed dominates | Useful if exterior texture dominates |
Many techniques assess wrapping around 150–160°F (65–71°C) internal temperature. However, the bark should have developed enough to resist being rubbed away. Wrapping solely because the thermometer reaches a number may trap moisture against an underdeveloped crust.
Does a foil-first, paper-second method help?
A hybrid approach is possible: use foil during part of the stall, then transfer the brisket to butcher paper as cooking continues. The idea is to gain some speed initially while reducing prolonged steam exposure later.
However, this is a practical experiment, not a proven superior method for a 5 kg brisket. Switching materials cannot restore moisture already lost, and unwrapping introduces additional handling and heat loss. A brisket that is already progressing well may benefit more from remaining undisturbed.
Wrap tightly without soaking the bark
Use food-grade, uncoated butcher paper or suitable cooking foil. Fold the material snugly around the brisket, with overlapping seams underneath where practical. Loose pockets can collect steam or permit unnecessary evaporation, depending on the material.
A little rendered liquid is normal. Excess liquid pooling around the flat can soften the crust and shift the texture towards braised beef. Avoid adding liquid by habit when the goal is a firm bark.
Return the wrapped brisket to the smoker and continue checking the flat’s internal temperature. As it approaches the expected finishing range, assess resistance with a thin probe rather than waiting for a scheduled time.
Once the brisket has reached tenderness and rested properly, the final texture still depends on how its muscle fibres are cut.
The One Slicing Mistake That Makes a Juicy Brisket Taste Dry in 30 Seconds
Slicing brisket with the grain rather than across it is one of the quickest ways to make tender meat seem tough and dry. Long, uncut muscle fibres require more chewing even when the brisket retains moisture. Cutting across those fibres shortens them, improving perceived tenderness without changing how the meat was cooked.
The flat usually has a recognisable grain direction, but that direction can change near the point and where the two muscles overlap. Looking only at the first end of the brisket is therefore insufficient for every slice.
Before seasoning the raw brisket, inspect the direction of the visible fibres. A small reference cut at one corner of the flat can provide a useful reminder after the bark develops. Alternatively, photograph the grain direction during preparation.
After resting, position the brisket on a stable carving board and use a long, sharp slicing knife. Cut across the grain with smooth strokes rather than pressing down repeatedly. A dull blade can compress the meat and produce ragged slices.
Use one test slice before carving everything
Cut a single slice from the flat’s end and examine it before continuing. The fibres should appear short across the cut surface rather than running lengthwise through the slice.
Gently bend the test slice. Properly tender brisket should bend without feeling rubbery, while retaining enough structure not to collapse immediately. This is a practical texture check, not a definitive scientific test of doneness.
Keep the slices thick enough to handle comfortably. Very thin slices expose more surface area and can lose moisture quickly while waiting on a board. Very thick slices, meanwhile, can emphasise any remaining chewiness.
Slice only what is about to be served. Leaving the remaining brisket intact limits unnecessary exposure of freshly cut surfaces. If the grain changes as you approach the point, rotate the meat or adjust your knife direction.
A pink smoke ring can look attractive, but it does not prove that the centre is tender or moist. Judge the actual texture of the slice rather than relying on its colour.
Good slicing preserves the final result, but it cannot compensate for an inadequately rested brisket or for a flat that has been cooked too long.
Brisket Resting: How to Hold It for 2–6 Hours Without Turning the Bark Soggy?
For a two-to-six-hour brisket hold, maintain a verified safe internal temperature while limiting unnecessary steam contact with the bark. A preheated cooler may work for a shorter period if the meat remains sufficiently hot; a temperature-controlled holding oven provides more predictable conditions for longer periods. Neither method guarantees crisp bark without some compromise.
Resting and holding solve related but different problems. A short rest allows temperatures and liquid distribution within the meat to become less uneven. Extended hot holding keeps finished brisket available for serving without requiring another full cooking cycle.
A long hold is not a substitute for reaching tenderness first. Nor does holding continually make the meat juicier: excessive temperature can continue softening the structure and increase moisture loss.
Understand the food-safety limit
The USDA FSIS guidance on safe hot-holding temperatures specifies keeping cooked food held hot at or above 140°F (60°C). This is a food-safety recommendation, not an ideal temperature for brisket texture or bark.
For UK home cooks, local food-safety guidance and the intended duration of holding also matter. The UK commonly uses a higher hot-holding benchmark of 63°C for food-service operations, with specific rules for limited periods below that temperature. The USDA threshold should therefore not be presented as a universal UK legal standard.
Monitor the actual temperature within the brisket. The setting displayed on an oven or the warmth of a cooler’s exterior does not establish the meat’s internal temperature.
Cooler versus holding oven
| Factor | Preheated insulated cooler | Temperature-controlled oven |
|---|---|---|
| Heat source | Stored heat only | Active heating |
| Temperature stability | Depends on brisket size, insulation and time | Depends on actual low-temperature control and calibration |
| Long holds | Not reliably predictable without measurement | Generally easier to control if the appliance supports an appropriate setting |
| Bark protection | Steam can accumulate inside wrapping | Sealed wrapping can also soften the bark |
| Required check | Continuous or regular internal-temperature monitoring | Verify both oven environment and meat temperature |
For cooler holding, warm the cooler beforehand using an appropriate method, remove the warming water completely and place the properly wrapped brisket inside. Keep the lid closed and use a probe whose receiver can be checked without repeatedly opening it.
For a prolonged hold approaching six hours, a suitable temperature-controlled holding appliance is generally the more manageable option. An ordinary oven that cannot maintain a sufficiently low, steady temperature may continue cooking the flat, even though it keeps the food hot.
Protect the bark after holding
Foil tends to trap more steam than butcher paper. A brisket held tightly in foil for several hours may emerge with a noticeably softer exterior. Butcher paper can reduce that effect, but neither wrapping material eliminates it.
Allowing a short, supervised period for excess steam to escape before a controlled hold can help prevent unnecessary condensation. However, do not leave cooked meat cooling at room temperature for an extended period just to improve its bark.
If the bark has softened, a brief return to suitable cooking heat may improve surface texture, but this is a trade-off: additional heating can also dry an already finished flat.
With the rest planned, pit temperature becomes a practical scheduling choice rather than a test of loyalty to traditional low-and-slow cooking.
How to Choose Between 225°F and 250°F When You Have Only 9 Hours to Cook?
When only nine hours are available, 250°F (121°C) is generally the more practical choice than 225°F (107°C), but neither temperature guarantees a 5 kg brisket will finish on time. A higher pit temperature can shorten cooking by increasing heat transfer, provided you monitor bark development and begin tenderness checks early enough.
At 225°F, the brisket heats more gradually, allowing greater scheduling flexibility only when sufficient time is available. At 250°F, heat reaches the meat more quickly, and the cook may progress through the stall sooner. Moisture loss still depends on the total cooking process and endpoint.
A controlled cook at 250°F does not automatically produce a dry flat. The greater danger is continuing to apply heat after the flat has become tender or making a late, extreme temperature adjustment without understanding the meat’s condition.
In ThermoWorks’ brisket temperature and cooking guide, a 250°F smoker temperature is used alongside separate monitoring of the flat and point. The practical guidance emphasises checking tenderness independently of the thermometer’s finishing temperature.
| Consideration | 225°F (107°C) | 250°F (121°C) |
|---|---|---|
| Cooking pace | Generally slower | Generally faster |
| Nine-hour deadline | Greater scheduling risk | More practical, but not guaranteed |
| Bark development | Usually more gradual | May develop sooner |
| Flat monitoring | Still essential | Requires appropriately early checks |
| Best decision | Use when time is flexible | Use when the schedule is constrained |
For a nine-hour attempt, decide on the higher starting temperature before lighting the smoker. Allow the pit to stabilise, then place the prepared brisket inside with probes positioned correctly. Assess the bark during the stall and wrap if doing so suits the cooking schedule.
As the flat approaches the commonly used finishing range, begin checking probe resistance. Do not simply leave it until the ninth hour because that was the planned completion time.
If the brisket remains firm when the deadline approaches, the appropriate response is to allow further cooking. Increasing heat cannot instantly reproduce the connective-tissue changes that have not yet occurred.
Likewise, a brisket that finishes ahead of schedule should move into a safe, temperature-monitored hold rather than remaining in the smoker until guests arrive.
Whichever temperature is selected, trimming and positioning the fat cap affect how heat reaches the flat and how evenly the exterior develops.
How to Trim and Position the Fat Cap so It Renders Evenly Without Washing Out Flavour?
Trim the brisket’s exterior fat to a reasonably even layer, commonly around ¼ inch (6 mm), and remove large deposits of hard fat that are unlikely to render adequately. Position the fat cap according to the smoker’s strongest heat source. The aim is even cooking and bark development, not relying on melting fat to penetrate and moisturise the flat.
A 5 kg brisket may contain substantial exterior fat, particularly around the point and the seam between the two muscles. The flat itself has less associated fat, which makes the shape and thickness of the surrounding cut important.
Leaving very thick areas of exterior fat can prevent seasoning from contacting the meat and produce a soft, waxy bite. Removing virtually all surface fat can leave portions of the flat more directly exposed to radiant heat. A reasonably consistent trim provides a practical starting point, but ¼ inch is a common convention rather than a scientifically proven optimum for every smoker.
Match fat-cap position to heat direction
In an offset smoker, the end nearest the firebox may experience greater radiant heat, so brisket orientation and rotating the meat when necessary can matter more than a universal fat-up or fat-down rule.
In a kettle or pellet smoker where more heat reaches the underside, placing the fat cap down can provide some shielding. Where heat reaches the meat more evenly or predominantly from above, a different orientation may make sense.
Rendered exterior fat can run across the surface, but it does not reliably penetrate muscle fibres and replace moisture lost from the interior. The notion that fat-cap-up cooking continuously bastes the flat from within is therefore misleading.
Build bark without creating a wet seasoning paste
After trimming, pat the brisket dry before applying the rub. Distribute seasoning evenly over exposed meat and fat without working it into a heavy paste. Salt and pepper are sufficient for a traditional brisket, although other seasoning preferences can be accommodated.
Allow the seasoning to adhere and manage the pit so the surface develops gradually. Avoid repeated heavy spritzing before a crust forms. Excess moisture at the surface can delay bark development, while a thick, damp coating may become uneven as exterior fat renders.
Five checks before the brisket enters the smoker
- Inspect the raw cut: identify the flat, point and fat seam, then record the approximate grain direction with a photograph.
- Trim the fat: remove thick hard deposits and check for a reasonably even remaining fat layer, noting any thin exposed edges.
- Prepare the surface: pat the meat dry, apply the rub evenly and visually check that no thick seasoning paste remains.
- Map the smoker: identify the strongest heat direction and write down the planned fat-cap orientation.
- Verify the monitoring setup: position the flat and point probes, confirm the pit-temperature reading and record the starting conditions in the cooking log.
The quality of the fat trim should be judged alongside bark formation and the final bite. If a particular smoker consistently leaves thick unrendered patches, adjust the next trim rather than automatically extending cooking time after the flat is tender.
Good preparation reduces variables before the meat enters the smoker, which is especially valuable when the longest part of the cook must happen overnight.
Key takeaways before an overnight smoke
- Build the overnight schedule around the likely stall and wrap decision, so essential handling occurs while someone is awake.
- Verify fuel capacity and thermometer performance before committing to sleep; stable readings alone do not make every smoker suitable for unattended operation.
- Decide in advance how to respond to temperature alarms, then inspect the flat’s progress and overall cooking conditions in the morning.
How to Run a Low-and-Slow Smoke Overnight Without Waking Up Every Hour?
An overnight brisket cook needs a smoker capable of stable, safely managed operation, sufficient fuel and reliable remote temperature monitoring. High and low alarms can reduce unnecessary checks, but they cannot replace supervision or make an unsuitable cooker safe to leave unattended. Schedule the likely stall and wrap decision outside sleeping hours whenever possible.
The first requirement is understanding the smoker’s actual fuel consumption. A full charcoal basket does not guarantee a particular burn duration. Fuel use varies with equipment, airflow, weather and cooking temperature.
Before relying on an overnight setup, record how quickly the cooker consumes fuel during a supervised cook under comparable conditions. For charcoal equipment, ensure the fuel arrangement is appropriate to the manufacturer’s instructions. For pellet smokers, check hopper capacity, feed reliability and the likelihood of interruptions.
Stability also depends on safe placement. Keep outdoor smokers away from combustible structures and materials, follow manufacturer clearance requirements and never operate charcoal or other fuel-burning smokers inside an enclosed space. Carbon monoxide and fire hazards cannot be addressed by food-temperature alarms.
Use alarms for meaningful deviations
A remote thermometer with independently monitored pit and meat temperatures can provide early warning when cooking conditions change.
ThermoWorks documents an example using a 250°F (121°C) cooking target with pit-temperature alarms set at 225°F (107°C) and 275°F (135°C). These are illustrative settings for that cooking method, not universal safe limits for every appliance.
| Alarm or observation | What to investigate | Planned response |
|---|---|---|
| Pit temperature below the chosen lower limit | Fuel supply, airflow, fire condition and sensor position | Inspect the cooker safely and correct the cause before resuming the planned process. |
| Pit temperature above the chosen upper limit | Excess airflow, controller behaviour or unexpected fuel combustion | Restore stable control without abrupt, unsafe adjustments. |
| Flat temperature approaching the expected finish | Actual probe tenderness and temperature trend | Assess doneness and prepare the monitored holding arrangement. |
| Probe signal lost | Sensor placement, power and receiver connection | Restore reliable monitoring rather than assuming cooking conditions remain normal. |
Alarm thresholds should suit the selected pit temperature and equipment. Test the notification system before the cook, including whether it can be heard from the bedroom. Loss of connectivity or battery power should be treated as a monitoring failure, not evidence that temperatures are stable.
Schedule the stall around sleep
For an overnight smoke, aim to make the major wrapping decision either before bed or after waking. The stall itself does not automatically ruin a brisket, but an unexpectedly long period without assessment can disrupt timing and leave less flexibility later.
If the bark is already established and the chosen method calls for wrapping before bed, ensure the wrap is secure and return the brisket promptly to stable cooking conditions. If the stall is expected in the morning, leave sufficient time for that decision and the remaining cooking phase.
For cookers that require frequent manual fuel adjustments or have uncertain overnight safety characteristics, staying awake to supervise them or shifting the cooking schedule is safer than depending on alarms alone.
Check the cook systematically in the morning
Begin with the pit-temperature trend and any alarm history. Confirm that fuel and airflow remain adequate and that the thermometer probes are still correctly positioned.
Next, inspect the flat and point temperature readings, the bark and the integrity of any wrapping. If the flat is approaching the anticipated finishing range, perform a physical tenderness check.
Morning corrections can restore pit stability, adjust wrapping and improve scheduling. They cannot reverse moisture already lost through overcooking or guarantee that a brisket behind schedule will suddenly become tender.
Record actual results against the intended cooking timeline. The next overnight cook should use those observations to improve fuel planning, alarm settings and the predicted wrap window.
For the next 12-hour brisket, prepare a written start, wrap, tenderness-check and holding plan before lighting the smoker. Treat every temperature reading as information to guide a decision, and remove the flat from cooking heat when it is genuinely tender.
Can a 5 kg brisket always finish in exactly 12 hours?
No. A 5 kg brisket’s cooking time varies with shape, trimming, smoker temperature, airflow and the length of the stall. Twelve hours is a useful planning target, but the flat should be removed when it becomes probe-tender rather than at a fixed time.
Should the brisket be spritzed every hour to keep it moist?
Not necessarily. Spritzing adds surface moisture but does not guarantee moisture retention within the flat. Frequent lid opening and added evaporation can slow the cooking process. Use spritzing selectively, based on bark development and the cooker environment, rather than following an hourly rule.
What if the brisket reaches 203°F but the flat still feels tough?
Continue cooking and check tenderness again. Approximately 203°F (95°C) is a practical reference point, not a guaranteed endpoint. Verify probe placement and assess several locations in the flat before deciding that the brisket is ready.
Can a brisket be held for six hours in an ordinary cooler?
A six-hour hold in an unheated cooler cannot be assumed safe. The temperature drop depends on the meat’s size, initial temperature, insulation and surrounding conditions. An appropriate temperature-controlled holding appliance is more predictable for extended holds. Monitor the meat and follow the applicable food-safety guidance.
Does a thicker fat cap prevent the flat from drying out?
Not reliably. Exterior fat can influence how heat reaches the surface, but melting fat does not automatically replace moisture lost from muscle fibres. Excess fat may also prevent bark formation. A reasonably even trim, suitable heat positioning and accurate doneness checks are more dependable controls.