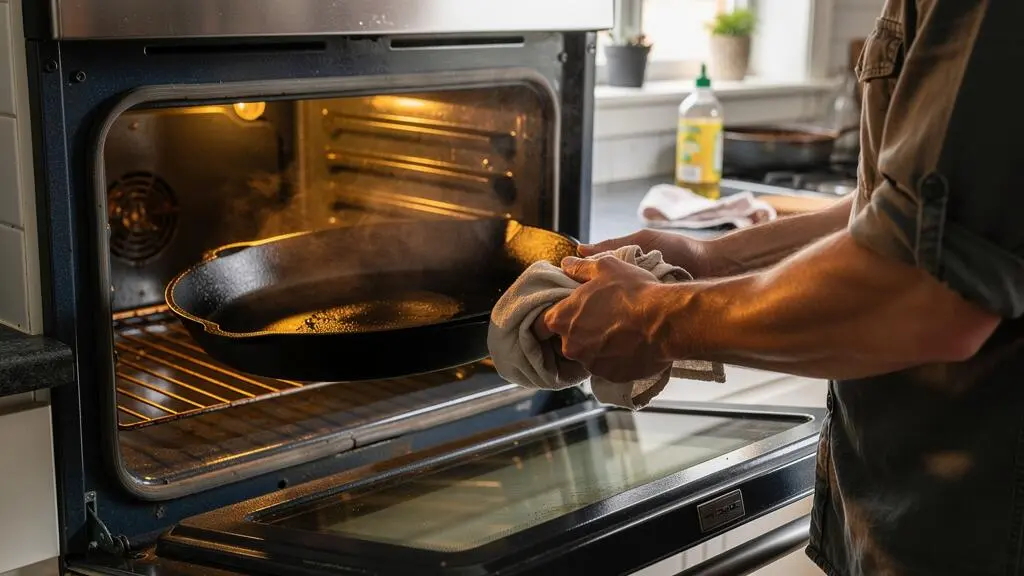
Cast iron can handle a hot barbecue, but its seasoning is only as reliable as the oil film used to create it. At 500°F (approximately 260°C), thick or poorly bonded deposits may become more obvious as sticky patches, dark flakes or exposed areas of metal. The solution is not to add more oil. It is to apply less, cure it properly and maintain the surface after cooking.
For bare, unenameled cast iron, start with a thoroughly cleaned and completely dry surface. Wipe on a minimal film of suitable cooking oil, remove any visible excess, then cure according to a suitable manufacturer-approved procedure. Three thin coats provide a practical starting routine, not a guarantee against flaking.
Grill grates need an additional check: many modern cast-iron grates are porcelain-enamelled and should not be treated like bare iron. Always establish which surface you own before attempting seasoning.
For UK barbecue owners, reliable results also depend on thorough drying and sensible storage between uses. Damp kitchens, sheds and coastal conditions make moisture control particularly important.
Cast-Iron Seasoning: The Essentials
- Apply exceptionally thin oil layers. Wipe off visible excess before curing to reduce tackiness and uneven deposits.
- Use a suitable curing procedure. A cast-iron manufacturer recommends 450–500°F for one hour, but that is not a universal durability guarantee.
- Dry thoroughly after cleaning, maintain exposed bare iron with a minimal oil film and keep it away from trapped moisture.
- Why Does Cast-Iron Seasoning Turn Sticky After the First High-Heat Cook?
- How to Season Cast Iron in 3 Thin Coats Without Smoking Out Your Kitchen
- Flaxseed or Rapeseed Oil: Which Makes a More Durable Seasoning Layer?
- The Over-Oiling Mistake That Makes Seasoning Flake Off Into Your Food
- When Should You Re-Oil Cast Iron After Grilling to Prevent Rust in Damp UK Air?
- How to Season Cast Iron in 3 Thin Coats Without Smoking Out Your Kitchen
- How to Preheat and Oil Cast-Iron Grates in 10 Minutes Without Creating Sticky Build-Up
- How to Use Cast-Iron Grates Without Sticking, Rust, or Patchy Heat
Why Does Cast-Iron Seasoning Turn Sticky After the First High-Heat Cook?
Cast-iron seasoning usually turns sticky because too much oil was left on the surface before heating or because the applied oil did not cure adequately. Proper seasoning is a hardened film formed through oil polymerisation, not a wet coating. A gummy surface indicates that the oil application or curing process needs correction.
During seasoning, heat drives chemical changes in the applied oil, including reactions that help form a bonded film. When the oil layer is excessively thick, different parts of that deposit may cure unevenly, leaving a soft or tacky residue.
According to Lodge Cast Iron‘s seasoning troubleshooting instructions, excess accumulated oil is a recognised cause of sticky seasoning. Its recommended corrective procedure is heating the cookware upside down at 450–500 °F (232–260°C) for 1 hour.
The location of stickiness can provide useful clues, although it cannot establish the cause with certainty:
- Sticky edges or handle junctions: inspect areas where oil could have collected before curing.
- Stickiness across the cooking surface: review the amount of oil applied, the actual curing temperature and the heating duration.
- Sticky patches with lifting deposits: check whether the underlying seasoning is still firmly attached.
A practical inspection can distinguish superficial tackiness from obvious physical damage. Once the pan is cool, gently wipe a suspect area with a clean cloth. If the residue can be removed and the film underneath remains sound, cleaning followed by a controlled curing cycle may be sufficient.
If the film is visibly lifting, flakes detach with light contact or bare metal appears underneath, clean away the loose material before rebuilding the affected seasoning. A gentle fingernail inspection can reveal loosened edges, but it is not a validated adhesion test and should not be used to scrape intact seasoning.
Do not assume every dark patch is a defect. Uneven coloration can occur on functional, seasoned cast iron, particularly during its early use.
Heat around 500°F makes careful preparation important, but there is no established rule that first-cook stickiness inevitably predicts future flaking. The defect is a reason to inspect and correct the surface, not proof that the whole pan must be stripped.
Once the surface is clean and stable, the next priority is rebuilding seasoning with controlled oil application rather than adding a thicker coat over the problem.
How to Season Cast Iron in 3 Thin Coats Without Smoking Out Your Kitchen
Season bare cast iron in three thin coats by cleaning and drying it, applying a tiny amount of cooking oil, wiping away the excess and curing each application separately. Use a temperature and duration appropriate to the cookware and its manufacturer’s instructions. Strong ventilation matters because high-temperature seasoning can produce smoke even when oil is applied carefully.
First, confirm that the cookware is unenameled and suitable for oven seasoning. Remove loose rust, food residue and any failing deposits, then wash and dry the metal thoroughly. Slightly warming the iron can make it easier to spread a small quantity of oil over the surface.
The governing rule is simple: apply the oil, then wipe as though it should not have been applied. A nearly dry-looking surface is preferable to visible pools or streaks.
A practical three-coat procedure is:
- Coat one: apply a tiny amount of neutral cooking oil to the warm, dry iron, including exposed edges. Wipe thoroughly with a clean cloth or paper towel. Cure using a suitable high-temperature procedure, then allow the cookware to cool safely.
- Coat two: inspect for sticky deposits or visible pools. Correct these before repeating the same extremely thin application and curing process.
- Coat three: repeat only when the previous film is stable. Finish with a clean, dry surface rather than adding a final wet coat.
Lodge Cast Iron’s oven-seasoning instructions recommend a very thin layer of oil, positioning the cookware upside down, heating at 450–500 °F for 1 hour and allowing it to cool inside the switched-off oven.
That procedure is a useful manufacturer reference. It does not establish that every oil must be cured just above its smoke point, nor that smoke-point temperature alone guarantees full polymerisation. Actual curing depends on the oil, film thickness, heating conditions and surface preparation.
Between coats, inspect both texture and adhesion. A sound seasoning layer should not feel gummy or leave oily residue on the fingers. It may appear matte, satin or somewhat glossy: appearance alone cannot reliably establish whether it has cured.
Three coats are a starting point, not a compulsory number. A stable, thinly seasoned surface is more useful than several thick layers added to reach a target count.
Ventilate the kitchen before heating and ensure the oven is suitable for the selected process. An outdoor barbecue can be a practical alternative when its temperature can be controlled safely. Never leave a smoke-producing curing process unattended, and do not use an oven’s self-cleaning cycle as a shortcut unless its manufacturer expressly supports that use.
Correct application limits the problems that curing temperature alone cannot fix. The next decision is which cooking oil offers the best balance of practicality, availability and resistance to maintenance mistakes.
Flaxseed or Rapeseed Oil: Which Makes a More Durable Seasoning Layer?
Rapeseed oil is a practical default for seasoning cast iron used on UK barbecues because it is widely available, inexpensive and straightforward to maintain. Flaxseed oil can form a comparatively hard polymerised film, but hardness does not automatically mean better durability. Neither oil has a demonstrated universal advantage under repeated 500°F grilling cycles.
Flaxseed oil is rich in polyunsaturated fatty acids and is commonly described as a drying oil. These properties help explain its capacity to form a hardened film during oxidation and polymerisation.
However, a hard film is not necessarily a flexible or strongly adhering one. Flaxseed seasoning is sometimes reported to chip or flake, especially when applied too thickly. Such practical reports warrant caution, but they are not a controlled demonstration that properly applied flaxseed seasoning always performs worse than rapeseed seasoning.
Rapeseed oil, also called canola oil in many English-speaking markets, is a more convenient routine choice. It is easy to buy in UK supermarkets and can be used for both seasoning and ordinary cooking.
The practical differences are best viewed as choices rather than guaranteed performance rankings.
| Decision factor | Flaxseed oil | Rapeseed oil |
|---|---|---|
| Film characteristics | Can form a hard polymerised film | Forms a functional seasoning film with appropriate application and curing |
| Flaking concern | Hard films can be vulnerable when poorly applied; relative durability is not established | Not immune to flaking from thick or poorly bonded deposits |
| UK availability | Typically a more specialised purchase | Widely available in supermarkets |
| Routine maintenance | Less convenient if purchased only for seasoning | Convenient for ongoing cooking and maintenance |
| Practical choice | For users willing to experiment with very thin applications | For straightforward, economical grill maintenance |
For either oil, follow a compatible curing procedure and avoid confusing the oil’s smoke point with a universal measure of seasoning quality. Smoke points vary with refining and composition, and they do not independently predict resistance to thermal cycling.
Frequent grill use also changes the evaluation. A surface that can be cleaned, dried and repaired easily may be preferable to one that looks exceptionally dark after initial seasoning but proves difficult to maintain.
Choose rapeseed for convenience, not an unproven guarantee of superior adhesion. Choose flaxseed only with a clear understanding that film hardness and real-world durability are different properties.
Whichever oil is selected, applying too much of it can undermine the result. Preventing excess deposits matters more than trying to engineer durability through oil choice alone.
The Over-Oiling Mistake That Makes Seasoning Flake Off Into Your Food
Over-oiling creates thick, uneven deposits that may remain soft, carbonise or detach during cooking. Instead of forming one reliable protective film, excessive oil can leave poorly adhered material on the iron. The correction is to wipe away almost all visible oil before every curing cycle and remove any loose residue before cooking again.
Seasoning works best as a thin film formed directly on a clean surface. Applying generous coats can create uneven deposits, particularly in corners and along the edges of cookware.
When those deposits are repeatedly heated, they may deteriorate or separate. Adhesion, oxidation, wear, contamination and thermal cycling can all contribute; attributing every flake solely to thermal expansion between stacked layers would oversimplify the problem.
The simplest preventive technique uses two wipes. Spread a minimal quantity of oil with one cloth, then use a fresh, dry cloth to remove the apparent excess. Inspect the result under side lighting. There should be no visible puddles, droplets or running oil.
An already over-oiled pan does not automatically require complete stripping. If the surface is merely tacky and the existing film is stable, cleaning and a further suitable curing cycle may resolve the problem. Do not simply apply more oil over a gummy layer.
Where loose flakes are present, remove the affected deposits by scrubbing and washing, dry thoroughly and reseason the exposed areas. Extensive damaged seasoning may call for more substantial restoration, but complete stripping is a last resort rather than the standard treatment for every imperfection.
Chemical stripping with lye-based products introduces significant handling hazards and requires appropriate safety precautions. Oven self-cleaning cycles can also subject cookware and the appliance to extreme temperatures and should not be treated as a routine restoration method.
Small black flakes may be carbonised seasoning, which Lodge identifies as not harmful in its troubleshooting guidance. That statement does not identify every possible black residue. If material is loose, contaminated or of uncertain origin, remove it before using the pan for food.
Exposed bare-metal patches are also more vulnerable to rust when moisture remains on the surface.
Five Checks Before the Next Seasoning Cycle
- Inspect the cooled surface: identify and record any gummy areas, loose flakes or exposed metal.
- Remove unstable material: clean and scrub affected spots until no loose residue remains.
- Dry completely: inspect corners and edges for remaining moisture before oiling.
- Apply and double-wipe: remove excess oil until no pooling or droplets are visible.
- Cure and reassess: follow the appropriate manufacturer procedure and confirm that the cooled surface is not tacky before cooking.
Once the seasoning is sound, the next threat is moisture. Consistent drying and storage habits are especially important where cast iron is kept in damp UK conditions.
When Should You Re-Oil Cast Iron After Grilling to Prevent Rust in Damp UK Air?
Re-oil bare cast iron after grilling only once it has been cleaned and dried completely. In damp UK conditions, moisture removal matters more than following a fixed re-oiling calendar. A barely visible layer of cooking oil can help protect exposed iron during storage, while trapped water can encourage rust despite previous seasoning.
After cooking, allow the cookware or grates to reach a safe handling temperature. Remove food residue using cleaning methods suitable for the particular surface. If washing is needed, rinse appropriately and dry the iron without delay.
A short, controlled warm-up on a suitable hob or cooling barbecue can help evaporate moisture. Keep the cookware stable, use a safe heat setting and never leave it unattended. Once the surface is dry and cool enough to handle safely, wipe on a minimal quantity of oil.
The key distinction is between a maintenance wipe and a full seasoning cycle. Applying a tiny protective oil film after cleaning does not necessarily create a new polymerised layer. Full seasoning requires an appropriate curing procedure.
Use the condition of the surface to select the level of maintenance:
- After ordinary cooking: clean, dry and apply a minimal protective wipe when appropriate for bare iron.
- When seasoning is worn or patchy: clean and evaluate the affected areas, then perform a thin curing cycle where necessary.
- When rust or loose deposits are present: remove the deterioration first and rebuild the affected protection rather than simply oiling over it.
Storage conditions matter as much as the final wipe. Avoid leaving damp cast iron enclosed under a tight lid or covered with wet barbecue equipment. A dry cupboard or well-ventilated storage space is preferable to an exposed, condensation-prone shed.
When stacking cookware, a clean, dry paper towel or suitable separator can reduce direct contact and allow some airflow. Replace any separator that becomes damp.
In coastal areas, salt deposits and humid air can increase corrosion risk. Washing away deposits and drying promptly are sensible precautions. Hard-water marks may affect appearance, but visible mineral residue should not automatically be mistaken for rust.
No reliable UK-wide interval guarantees rust-free storage. Frequency depends on use, the integrity of the seasoning and the actual storage environment.
Once routine rust prevention is under control, attention can shift to keeping the curing process manageable without filling an indoor kitchen with smoke.
How to Season Cast Iron in 3 Thin Coats Without Smoking Out Your Kitchen
To minimise smoke during a three-coat cast-iron seasoning process, control the amount of oil first, then choose a suitable curing location and ventilation arrangement. An outdoor barbecue may be preferable to an indoor oven when it can maintain the required temperature safely. Thin coats reduce unnecessary oil residue, but cannot guarantee a completely smoke-free cure.
The smoke problem starts before the oven is switched on. A thick oil film leaves more material available to heat, break down and smoke. Even a refined oil with a relatively high smoke point can produce visible fumes during an unsuitable curing procedure.
Smoke point is not a precise curing thermostat. It indicates when visible smoking begins under particular conditions, not when polymerisation necessarily starts or finishes. Heating every oil slightly above its nominal smoke point is therefore not a reliable universal recipe.
When smoke control is important, consider the available equipment:
- Outdoor gas barbecue: potentially useful if the cookware manufacturer allows the method and the barbecue provides appropriate temperature control.
- Charcoal barbecue: possible for suitable bare cast iron, but temperature management can be less predictable and requires active supervision.
- Domestic oven: workable when the cookware and appliance permit the procedure, with suitable extraction and ventilation operating throughout.
A kitchen extractor or oven fan may help manage heat or cooking fumes, but neither guarantees that smoke will be eliminated. Do not disable ventilation to imitate an outdoor curing environment.
Before starting each coat, run through a simple smoke-risk check:
- Confirm that the chosen oil is appropriate for the cookware and the curing method.
- Check that a second wipe has removed visible pools and droplets.
- Confirm the intended curing temperature and duration against suitable product instructions.
- Arrange ventilation before heating begins, not after smoke becomes visible.
- Keep the appliance supervised and allow safe cooling before the next application.
There is no dependable rule that the first 15–20 minutes above an oil’s smoke point will be the only smoke-producing period. Fume generation varies with the application and heating conditions. Schedule curing when supervision and ventilation can be maintained for the entire process.
A well-prepared surface may need fewer corrective cycles than one repeatedly coated to compensate for uneven colour. This is a further reason not to treat three coats as a compulsory minimum.
For an indoor environment with limited extraction, postponing seasoning until a suitable outdoor setup is available may be more practical than trying to eliminate smoke through oil selection alone.
After oven or barbecue curing, prepare cooking grates differently from skillets. Routine preheating and a light oil application are not substitutes for a complete initial seasoning procedure.
How to Preheat and Oil Cast-Iron Grates in 10 Minutes Without Creating Sticky Build-Up
A 10-minute preheat-and-oil routine can prepare some existing cast-iron grates for cooking, but it cannot be assumed to create a complete new seasoning layer. Preheat according to the barbecue manufacturer’s instructions, clean the grates and apply only a minimal amount of oil if the grate’s finish requires it. Avoid repeated heavy applications that leave gummy deposits.
First identify the grate construction. Bare cast iron and porcelain-enamelled cast iron require different treatment.
In Weber‘s explanation of porcelain-enamelled cast-iron grates, the manufacturer states that its newer porcelain-enamelled grates do not need seasoning. It recommends preheating them for approximately 10–15 minutes and brushing them clean.
That time describes preparation for cooking, not the creation of a new seasoning film. Bare cast-iron grates may need a separate initial seasoning procedure, depending on their condition and the applicable manufacturer instructions.
For suitable bare cast-iron grates that are already seasoned, the following is an illustrative short preparation sequence, not a universally validated ten-minute curing method:
- Minutes 0–3: start heating the barbecue with the grates installed, using the manufacturer’s recommended controls and settings.
- Minutes 3–7: continue preheating while the grates approach the required cooking temperature. Do not assume every barbecue heats at the same rate.
- Minutes 7–9: when safe and appropriate, remove loosened food residue with a grate-compatible cleaning tool. Apply a very light oil film only if suitable for the grate and cooking method.
- Minute 9 onward: allow the cooking surface to reach its appropriate operating condition before adding food. Extend preheating if necessary.
These timings are illustrative. Some barbecues will require longer, and manufacturer preheat recommendations take precedence. Do not use water droplets on very hot grates as a readiness test: splashing water on hot metal can create steam and burn hazards.
Sticky deposits can result from excessive oil, accumulated food residue and inadequate cleaning. Oiling cold grates is not established as the single principal cause, and a thin oil layer applied before heating is part of some manufacturer seasoning procedures.
If applying oil to hot grates, use a barbecue-safe method that keeps hands, cloth and tools away from flames. An oil-saturated cloth can ignite, so avoid dripping oil or placing combustible materials against dangerously hot surfaces. Do not use aerosol cooking spray directly over a hot or lit barbecue.
Some cooking sprays contain ingredients that may leave unwanted deposits, but build-up depends on their composition and use. A controlled application of plain cooking oil is often easier to manage when the grate manufacturer recommends oiling.
A separate, full seasoning process for bare grates can take considerably longer. Weber’s guidance for the bare cast-iron grates addressed in its FAQ describes heating for approximately 1–1.5 hours, rather than a complete ten-minute cure.
With the grates ready, evaluate sticking, uneven cooking and corrosion separately. These symptoms have different causes, and applying more seasoning is not always the appropriate response.
Key Takeaways Before Your Next Barbecue
- Verify whether the grates are bare cast iron or porcelain-enamelled before attempting any seasoning or rust-removal treatment.
- When food sticks, inspect preheating and food preparation before assuming the seasoning has failed.
- Repair genuinely exposed or corroded iron promptly, but avoid aggressive cleaning and unnecessary oil accumulation on sound surfaces.
How to Use Cast-Iron Grates Without Sticking, Rust, or Patchy Heat
To use cast-iron grates without persistent sticking, rust or uneven cooking, combine appropriate preheating, suitable food preparation, regular cleaning and thorough drying. Check the grate’s surface finish before adding oil or attempting repairs. Seasoning helps protect bare iron, but it cannot compensate for poor temperature control or moisture trapped during storage.
Food sticking should be diagnosed before the seasoning is changed. Three factors are especially useful to check: surface temperature, moisture on the food and the condition of the cooking surface.
For example, meat placed on inadequately preheated grates may stick even when the cast iron is well seasoned. Wet marinades, sugary coatings and excessive surface moisture can also affect release.
Use a simple troubleshooting sequence:
- Food sticks but the grate looks sound: review preheating, food moisture, cooking temperature and whether the food was moved too early.
- Food sticks where black deposits are raised: clean the accumulated residue and check for unstable seasoning.
- Food sticks around rusted or exposed areas: remove corrosion and restore the affected bare-iron protection before further cooking.
Patchy heat is a separate problem. Cast iron retains heat, but grate mass, burner position, charcoal distribution and airflow can create temperature differences across the barbecue.
Longer or more even preheating may help some equipment, while rotating food or using different cooking zones can improve results. Seasoning does not, by itself, make a poorly distributed heat source uniform.
Where a barbecue has multiple burners, inspect whether they are operating as intended. On charcoal models, evaluate the fuel arrangement and the position of the cooking surface.
For routine care, remove food residue with an appropriate brush or scraper and dry bare cast iron completely. Inspect the surface for exposed metal, raised deposits or reddish-brown corrosion. Apply a minimal protective oil film when needed.
Routine burn-off must follow the barbecue manufacturer’s guidance. In particular, aggressive high-temperature burn-off immediately after cooking can remove protective seasoning from some bare cast-iron grates. It is not universally preferable to cleaning before the next cook.
Rust treatment should match the damage:
- Minor surface rust: remove the rust with a suitable brush, abrasive pad or steel wool where permitted, clean the area, dry completely and restore the protective seasoning if necessary.
- More extensive corrosion: assess whether the iron remains structurally sound, remove affected deposits thoroughly and perform a suitable restoration procedure.
- Enamel damage: consult product-specific guidance rather than treating damaged enamel as ordinary exposed bare cast iron.
For the bare grates covered by Weber’s FAQ on cast-iron grate seasoning and maintenance, the manufacturer recommends removing visible rust with a steel brush, applying a very thin protective coating for extended storage and keeping the grates dry. Its advice also highlights the importance of using the correct procedure for the specific grate.
A monthly visual inspection can be a convenient personal routine during frequent barbecue use, but it is not a manufacturer-established universal interval. Inspect sooner whenever the grates show deterioration or have been exposed to prolonged damp conditions.
Before the next cook, confirm the grate finish, remove unstable residue, preheat correctly and keep the surface dry between uses. Those actions provide a more dependable maintenance strategy than repeatedly applying thick coats of oil in pursuit of a perfectly black finish.
Can cast-iron seasoning survive a 500°F barbecue?
Properly maintained seasoning can be used on cast iron exposed to high cooking temperatures, and Lodge specifies 450–500°F for an oven-seasoning procedure. However, that recommendation does not prove that every seasoning film will survive repeated 500°F grilling cycles without deterioration. Oil application, surface condition, flame exposure and subsequent cleaning all matter.
Should new porcelain-enamelled cast-iron grates be seasoned?
Not necessarily. Weber states that the newer porcelain-enamelled cast-iron grates described in its guidance do not require seasoning. Check the exact barbecue model and its care instructions before applying an oven-style seasoning procedure.
Does cast iron need to turn completely black before grilling?
No. Seasoning may initially appear brown, uneven or patchy without being defective. A stable surface without loose deposits or tackiness is more important than achieving uniform black coloration. Regular use can gradually change its appearance.
Can soap be used to clean seasoned cast iron?
Ordinary cleaning with a small amount of mild dish soap is generally compatible with sound, modern polymerised seasoning. Avoid unnecessarily aggressive cleaning and prolonged soaking. Rinse when appropriate, dry thoroughly and follow the cookware manufacturer’s maintenance guidance.
Should cast-iron grates be stored inside during a damp UK winter?
A dry indoor storage location is preferable when an outdoor barbecue or shed is prone to condensation. Clean and dry the bare-iron grates, apply the minimal protective coating recommended for their finish and ensure that no moisture becomes trapped around them. Storage conditions matter more than a fixed re-oiling schedule.