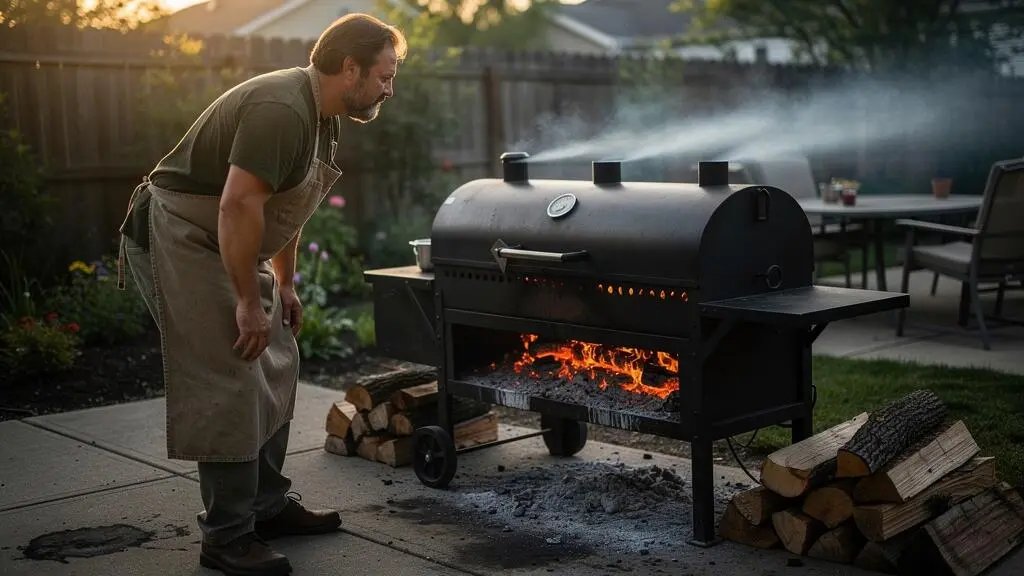
Great barbecue smoke should add depth, not leave chicken, ribs or pulled pork tasting like an ashtray. The difference often becomes apparent during the first 30 minutes, when the charcoal fire is settling, wood begins releasing gases and airflow determines whether those gases burn cleanly or linger around the food.
The target is thin, almost transparent smoke with a faint blue tint. It does not mean eliminating every trace of visible smoke. It means establishing a fire that burns wood gases efficiently, with enough oxygen and suitably dry fuel. Thick, persistent white smoke deserves attention, particularly when it develops into grey or black smoke, but colour alone cannot identify every combustion problem.
For UK kettle-smoker users, the practical approach is straightforward: establish the charcoal fire first, introduce a modest amount of smoking wood afterwards, and observe the exhaust before putting food into the strongest smoke. Wood species matter, but ignition, moisture, quantity and ventilation usually deserve attention first.
The essentials for cleaner barbecue smoke
- Build a stable, well-ventilated coal bed before adding smoking wood.
- Use properly seasoned wood and distinguish temporary white smoke from persistent, oxygen-starved smoke.
- Start with a small wood charge, then adjust according to the smoke leaving the vent rather than following a fixed quantity per hour.
- Why Does Smoke Turn Bitter Even When the Fire Looks Hot Enough?
- How to Light for Clean Smoke in the First 15 Minutes Without Smouldering Chunks?
- Wood Chunks or Chips: Which Gives More Control on a Kettle Smoker Setup?
- The Too-Much-Wood Mistake That Leaves an Ashtray Aftertaste for Hours
- When Should You Add Wood During a 6-Hour Cook for Noticeable Smoke Without Harshness?
- How to Blend Hickory With Fruit Wood Using a Simple 70/30 Mix Without Guessing?
- How to Pair Wood Choice With Umami Seasoning so Flavour Doesn’t Get Lost?
- Hickory or Apple Wood: Which One Tastes Better on Chicken Over a 2-Hour Cook?
Why Does Smoke Turn Bitter Even When the Fire Looks Hot Enough?
A fire can look hot and still produce bitter smoke because visible heat and clean combustion are not the same thing. Glowing charcoal and flames do not guarantee that wood gases are burning efficiently. When oxygen is restricted, fuel is damp or wood is smouldering, combustion can produce sooty particles associated with harsh flavours. The important question is not simply how hot the fire looks, but how it burns.
Wood releases combustible gases as it heats. With sufficient oxygen and suitable conditions, those gases burn more completely. When combustion is incomplete, larger particles and sooty compounds can travel towards the cooking chamber and settle on the food. This explains why a smoker can maintain a respectable cooking temperature while producing unpleasant exhaust.
Smoke colour provides a useful first diagnostic. Thin, faint blue smoke is generally desirable for barbecue, while persistent, dense white smoke suggests that the fire may still be passing through its initial wood-heating and gasification stages. Grey or black smoke can indicate insufficient oxygen and is particularly concerning because of its association with bitter, sooty flavours.
However, colour is not a laboratory measurement. Lighting conditions, particle size and the background behind the exhaust all influence what the eye sees. A brief white plume after adding wood is not automatically a failed cook. Look at its density, persistence and behaviour alongside the fire.
Wood moisture is another important variable. Wet wood consumes energy heating and evaporating water, which can interfere with efficient combustion and increase smoke production. The US Environmental Protection Agency recommends properly seasoned firewood with a moisture-meter reading of 20 % or less. This is general firewood guidance, not a barbecue-specific experimental threshold.
Without a moisture meter, use practical clues rather than pretending to obtain an accurate percentage. Dry wood is often lighter than an equivalent wet piece, can make a clearer sound when two pieces are tapped together, and may show cracks at the ends. Bark condition alone is not a reliable moisture test.
Finally, inspect the airflow. A tightly packed charcoal bed can restrict oxygen around the fuel even when flames are visible above it. The result can be localised smouldering and sooty exhaust. On a kettle, avoid blocking the intake and exhaust vents with ash, fuel or excessive food loading.
“Black and gray smoke happen when the fire is starving for oxygen”
For a more detailed explanation of particle size, combustion stages and smoke appearance, consult AmazingRibs‘ explanation of wood, smoke and combustion. Its guidance supports visual diagnosis, but does not establish that every white plume inevitably makes food bitter.
Once the difference between heat and combustion quality is clear, the next priority is controlling the ignition sequence so that the first wood charge meets an established fire.
How to Light for Clean Smoke in the First 15 Minutes Without Smouldering Chunks?
The most reliable way to shorten the dirty-smoke period is to light charcoal first and add smoking wood only after a stable coal bed has formed. Starting with wood sitting on cold, unlit charcoal encourages heating and smouldering before sufficient heat and oxygen are available for cleaner combustion. The sequence matters more than chasing an exact 15-minute timer.
On a kettle smoker, begin with a single controlled lighting zone. Use a chimney starter or another suitable charcoal-lighting method to establish a dependable supply of burning coals. Keep the vents sufficiently open during startup to support combustion, while following the manufacturer’s operating and safety instructions.
Allow the lit charcoal to develop before introducing wood. A developing coal bed should show established glowing areas, rather than isolated points of ignition surrounded by substantial unlit fuel. This provides a more dependable heat source for the wood gases that follow.
Now add a modest amount of dry smoking wood. One appropriately sized chunk is a sensible starting experiment, not a universal dosage rule. The correct amount depends on the kettle’s dimensions, airflow, fuel arrangement and the strength of smoke desired.
Observe the exhaust rather than assuming that wood is ready simply because it has caught fire. A temporary white plume may appear while the wood heats and releases gases. Give the fire time to settle, checking that the smoke becomes lighter and less dense. Persistent grey or black smoke, a struggling coal bed or a visibly restricted intake are reasons to investigate before cooking continues.
Do not try to solve a slow start by loading several chunks onto the fire at once. Excess wood can overwhelm the available combustion conditions and prolong the period of heavy smoke. Adding more fuel is not the same as improving the fire.
Use this practical sequence as a repeatable starting method:
Five checks before introducing food
- Light the charcoal in one controlled zone; verify that a dependable ignition source is established.
- Check the intake and exhaust; confirm that ash or fuel is not obstructing airflow.
- Allow the coal bed to develop; record whether several areas are glowing rather than relying on a timer alone.
- Add one modest dry wood charge; note the wood type and approximate piece size in a cooking log.
- Observe the exhaust; record its colour and density as it settles before placing the food on the grate.
There is no universally validated 15-minute procedure for every kettle, charcoal arrangement or weather condition. Wind, fuel condition and smoker design all affect the startup period. The useful target is a stable fire and improving smoke quality, not an arbitrary countdown.
With ignition under control, the next decision is which wood format offers the most predictable release: fast-burning chips or slower-burning chunks.
Wood Chunks or Chips: Which Gives More Control on a Kettle Smoker Setup?
Wood chunks generally provide more practical control during the first 30 minutes of a kettle cook because they release smoke over a longer period than small chips. Chips ignite more quickly and can create a concentrated burst, which may be useful for short smoking applications but is less forgiving when airflow or charcoal temperature is unstable. Neither format guarantees clean smoke without suitable combustion conditions.
The distinction is mainly about burn rate and timing. Weber describes chips as suitable for relatively short smoking applications of around 20 minutes, while chunks are more convenient for sessions lasting an hour or longer. Actual duration varies with the dimensions of the wood and the amount of air reaching the fire.
For a kettle, the choice should reflect the cooking setup rather than a universal rule. A short cook with a controlled fire may benefit from chips, whereas a longer indirect cook generally makes chunks easier to manage. A water pan changes the cooking environment and may affect temperature stability, but the available source material does not establish a universal water-pan-specific wood selection formula.
| Setup or objective | Chips | Chunks |
|---|---|---|
| Brief smoke application | Useful for short bursts | May be slower to establish |
| Longer cook | Require more frequent attention | Generally more convenient |
| Unstable airflow | Can produce rapid changes in smoke output | Still vulnerable to smouldering |
| Water pan fitted | No universal advantage established | Choose according to cook duration and fire behaviour |
| First 30 minutes | Useful when a brief, controlled charge is wanted | Often easier to manage progressively |
Wood placement also matters. A piece buried too deeply in a poorly ventilated coal bed may smoulder rather than burn efficiently. Wood placed directly on established hot coals has better access to the heat needed to release and ignite combustible gases, although the result still depends on airflow and fuel arrangement.
Soaking is another source of confusion. Weber recommends soaking chips for at least 30 minutes as a way to prolong their burning, while also warning that soaking can encourage smouldering rather than flaming. It advises that chunks do not need soaking. This is manufacturer guidance, not proof that soaking invariably creates bitter smoke.
For a kettle user seeking predictable early smoke, dry chunks are a sensible starting point. They avoid introducing extra water into the fuel and are easier to assess as a discrete charge. Dry chips can still be useful where a shorter smoke interval is specifically wanted.
Compare the two formats under similar cooking conditions. Keep the charcoal arrangement, vent settings and food consistent, then record how quickly smoke develops and how long it remains dense. Taste the result rather than assuming that a larger visible plume means stronger or better flavour.
Even the right wood format can overwhelm a kettle if too much fuel is introduced at once, making dosage the next important control.
[/HTML_CONTENT]
The Too-Much-Wood Mistake That Leaves an Ashtray Aftertaste for Hours
Adding too much smoking wood early in a cook can create a persistent, unpleasant flavour because the fire may not have enough oxygen and heat to burn the additional fuel cleanly. Dense smoke can deposit soot and other combustion products on the meat surface, producing an acrid taste that later cooking cannot reliably remove. More wood does not automatically mean more desirable smoke flavour.
The first phase deserves particular attention. Meat surfaces are generally cooler and may retain moisture, creating conditions in which smoke compounds can interact with the surface. However, the precise amount of smoke deposited depends on several variables, and there is no universal formula linking a particular number of chunks to a specific level of bitterness.
A better approach is to dose wood in stages. Start with a modest charge, observe how the exhaust behaves and assess the developing flavour before adding more. A small kettle with restricted airflow may struggle with a load that a larger, well-ventilated smoker handles comfortably.
Look for these warning signs during the first hour:
- Dense white smoke that continues well beyond the initial wood-heating stage.
- Grey or black exhaust suggesting oxygen-starved combustion.
- Acrid, tar-like smells rather than a clean woody aroma.
- Smoke that accumulates heavily inside the cooking chamber.
- Food developing an excessively dark, sooty surface before the desired bark has formed.
When these signs appear, stop adding wood and investigate the fire. If a remaining chunk is producing persistent heavy smoke, remove it carefully with suitable long-handled tools. Improve ventilation by checking that the intake and exhaust are unobstructed. If the food is directly exposed to a concentrated stream of dirty smoke, move it to a more indirect position where appropriate.
These corrections have limits. Removing the fuel can prevent further smoke production, and improved airflow may help the remaining charcoal and wood burn more efficiently. Neither action guarantees that existing soot deposits or bitter flavours will disappear from the food.
One useful distinction is between smoke intensity and smoke cleanliness. A strong woody aroma does not require a chamber full of opaque smoke. If the food already has the smoke character desired, continuing to feed wood simply because the fire can accept it risks making the result worse.
Think of the first hour as a controlled flavour-development period, not a competition to produce the largest smoke cloud. A modest wood charge and a stable coal bed offer more useful control than repeated additions made in response to impatience.
Once the initial smoke is clean, a longer cook requires a different strategy: maintaining noticeable flavour without disturbing the fire unnecessarily.
When Should You Add Wood During a 6-Hour Cook for Noticeable Smoke Without Harshness?
For a six-hour cook, most of the deliberate smoke development should happen earlier rather than through constant wood additions. Meat with a cool, moist surface can interact with smoke compounds during the earlier cooking stages, while the developing bark changes the surface conditions. As the cook progresses, the benefit of adding more wood may diminish relative to the risk of introducing harsh smoke.
This does not mean smoke absorption stops at a precise temperature or time. The idea that meat absorbs smoke most readily while its surface is cool and moist is a useful barbecue principle, but the available sources do not establish a universal cutoff point or prove that all smoke flavour development ends when bark forms.
For a kettle, use the condition of the fire and the food as your guide. Introduce an initial modest charge after the coal bed is established. Wait for that charge to settle into cleaner combustion before deciding whether another addition is necessary.
Do not add wood simply because an hour has passed. A chunk may still be producing smoke, the charcoal may need attention, or the food may already have enough smoke character. Adding fuel on a rigid schedule ignores differences in wood dimensions, airflow and smoker size.
Refuelling can also disturb temperature stability. Opening the lid, moving charcoal and introducing fresh wood can alter airflow and heat distribution. Keep additions modest, avoid unnecessarily rearranging the coal bed and restore the vent settings gradually. A stable fire is more valuable than chasing continuous visible smoke.
As bark develops, reassess the need for further smoke. If the desired flavour is already present, let the cook continue on charcoal alone. Late wood additions can produce more surface exposure without necessarily adding useful flavour, particularly when the bark is established and the surface has dried.
A practical decision framework is:
- Early phase: establish clean combustion and introduce the main smoke charge.
- Developing bark: assess the food and exhaust before considering another modest addition.
- Later phase: favour fire stability and charcoal heat if the smoke profile is already satisfactory.
- Persistent dirty exhaust: correct airflow and fuel conditions instead of adding more wood.
For consistency, keep a simple cook record with the time of each addition, wood format, approximate piece size, vent configuration and smoke observations. Over several cooks, this will reveal how a particular kettle behaves more reliably than a generic chunks-per-hour rule.
Remember that the six-hour duration is a cooking scenario, not a guarantee that every smoker needs a particular number of additions. Weather, fuel moisture, meat size and the charcoal arrangement all influence the result.
After controlling when wood enters the fire, the next opportunity is controlling its character by combining stronger and milder varieties.
How to Blend Hickory With Fruit Wood Using a Simple 70/30 Mix Without Guessing?
A 70/30 hickory-to-fruit-wood blend is a useful starting hypothesis for combining a pronounced smoke character with a gentler aromatic note. Hickory provides a richer, assertive profile, while apple and other fruit woods offer subtler sweetness. The ratio is not a scientifically validated universal formula, and its effect depends on the wood pieces, fire behaviour and total smoke output.
Hickory is suitable when the goal is a more recognisable barbecue character. Fruit woods can soften the overall impression and are useful when the meat or seasoning would be overwhelmed by a highly assertive smoke profile.
The key is to understand what the ratio describes. A 70/30 mixture by number of chunks is not necessarily 70/30 by weight, volume or smoke contribution. A large hickory chunk and a small apple chunk will not produce an equivalent result to two similarly sized pieces. Burning characteristics also vary with moisture, airflow and placement.
For a practical kettle experiment, choose one consistent measurement method. If using similarly sized chunks, a starting mixture of seven parts hickory to three parts apple by the chosen measure is easy to reproduce. Keep the total wood charge modest and record the actual pieces used.
There are two practical ways to implement the blend:
- Mixed load: combine the two varieties in the same wood charge. This gives a blended exposure, although the individual pieces may ignite and burn at different rates.
- Alternating additions: introduce hickory and apple separately. This allows greater control over the sequence and makes it easier to notice the contribution of each wood.
Neither method has been established as universally superior in controlled sensory testing. Mixed loading is convenient, while alternating additions provide a clearer opportunity to observe changes between smoke phases.
To refine the ratio, use a single-variable tasting method. Cook the same cut of meat with the same charcoal arrangement, seasoning, temperature approach and cooking duration. Change only the blend ratio between sessions. Record the aroma, smoke intensity, sweetness and any lingering bitterness.
Do not automatically increase the hickory proportion when the result tastes weak. First check whether the smoke is clean and whether enough wood is burning efficiently. A poorly ventilated fire can make a mild wood taste harsh, while excessive smoke can obscure the distinction between varieties.
The 70/30 approach is therefore best treated as a repeatable starting point, not a rule. The useful ratio is the one that produces the intended flavour under the conditions of the particular smoker.
Wood selection is only half the flavour equation. Seasoning can either complement a clean smoke profile or become overwhelmed when both elements are too intense.
How to Pair Wood Choice With Umami Seasoning so Flavour Doesn’t Get Lost?
Wood choice and umami seasoning should be balanced so that neither dominates the finished food. Stronger woods such as hickory can complement robust savoury profiles, while apple and other delicate fruit woods are often better suited to lighter seasoning. The best pairing depends on seasoning intensity, smoke exposure and the natural character of the meat.
Umami-rich ingredients such as soy sauce, mushroom, tomato and fish-based seasonings contribute savoury depth. They can add complexity to barbecue, but heavy smoke may obscure their more subtle characteristics. The result can taste muddy rather than layered when both the seasoning and smoke are unusually aggressive.
A useful starting framework is to match the intensity of the wood to the intensity of the seasoning:
| Wood profile | Seasoning direction | Flavour objective |
|---|---|---|
| Hickory | Pronounced soy, mushroom or tomato notes | Robust barbecue flavour with clear savoury depth |
| Apple | Light seasoning and delicate savoury notes | Gentle sweetness without excessive smoke intensity |
| Cherry | Moderate seasoning | Subtle fruity smoke character |
| Hickory and apple blend | Balanced savoury seasoning | More adjustable smoke intensity |
These are culinary pairing suggestions rather than experimentally proven chemical interactions. The available Weber guidance describes apple as subtly sweet and hickory as rich and subtly sweet, but it does not test either wood against specific umami-rich rubs.
Timing also matters. Seasoning applied before cooking contributes to the flavour of the surface as it develops. A seasoning adjustment after the smoke-heavy phase can help preserve delicate finishing notes without exposing them to additional heavy smoke. However, the ideal timing depends on the recipe and the ingredients involved.
Watch for double intensification. A heavy hickory charge combined with a deeply savoury, concentrated rub can produce a result that feels excessively powerful. If the seasoning is already assertive, consider a milder fruit wood or a smaller wood charge. If hickory is essential to the desired barbecue character, reduce the intensity of the seasoning instead.
Make one change at a time. Keep the meat and cooking conditions consistent, then compare a strong-wood/light-seasoning combination with a milder-wood/stronger-seasoning combination. This reveals whether the problem comes from the smoke profile, the seasoning or their combined intensity.
Above all, clean combustion remains essential. No wood pairing can reliably compensate for persistent sooty smoke. The smoke should enhance the savoury character rather than cover it.
These principles become especially important with chicken, where a relatively short cooking period and delicate surface make wood selection and early smoke quality particularly noticeable.
Key decisions before choosing chicken smoking wood
- Prioritise clean combustion over the strength of the wood variety.
- Choose apple for a gentler smoke profile and hickory for a more pronounced barbecue character.
- Keep the initial wood charge modest because excessive smoke can overwhelm delicate poultry flavours.
Hickory or Apple Wood: Which One Tastes Better on Chicken Over a 2-Hour Cook?
Apple wood is generally the gentler choice for chicken over a two-hour cook, while hickory is better suited to cooks seeking a stronger, more recognisable barbecue flavour. Both woods are suitable for poultry, but chicken’s relatively delicate flavour and thin skin make excessive smoke particularly noticeable. The quality and quantity of smoke matter more than the wood variety alone.
Weber describes apple wood as subtly sweet and recommends it for poultry. Hickory has a richer, subtly sweet character and is also listed as suitable for chicken. These descriptions provide useful culinary guidance, although they are not results from a controlled two-hour chicken taste experiment.
Apple is a sensible starting point when the aim is clean, restrained smoke. It can complement chicken without overwhelming its natural flavour, especially when the skin is beginning to render and the surface is drying.
Hickory is more appropriate when a pronounced barbecue character is wanted. Its stronger profile can work particularly well with robust rubs, but a large early wood charge can make the finished chicken taste harsh regardless of the wood’s reputation.
Use this decision framework:
| Consideration | Apple | Hickory |
|---|---|---|
| Flavour profile | Subtle and sweet | Rich and more assertive |
| Smoke intensity goal | Gentle | Pronounced |
| Seasoning pairing | Light or moderate rubs | Robust savoury rubs |
| Best starting approach | Small, controlled wood charge | Modest charge with careful monitoring |
A hickory-and-apple blend offers another option. The proposed 70/30 ratio can be tested as a starting point, but it should not be treated as a validated ideal for chicken. Adjust the mixture according to the actual wood dimensions and the result of previous cooks.
For a two-hour cook, establish clean smoke before introducing the chicken and avoid repeatedly adding wood simply to maintain a visible plume. Once the desired smoke character has developed, prioritise stable heat and proper cooking.
Food safety remains separate from smoke quality. Chicken must reach a safe internal temperature, checked with a suitable food thermometer at the appropriate thickest part. Smoke colour, skin appearance and cooking time cannot establish that poultry is safely cooked.
For the next cook, start with apple if a delicate smoke profile is preferred, or use a restrained hickory charge for stronger barbecue character. Record the wood, amount and smoke behaviour, then adjust the next session according to the flavour on the plate.
Is white smoke always bad when smoking meat?
No. White smoke can appear naturally while newly added wood heats, dries and releases gases. A temporary plume is not necessarily a problem. Persistent, dense white smoke deserves attention, particularly when accompanied by restricted airflow or an acrid smell. Grey and black smoke are stronger warning signs of oxygen-starved combustion. Judge smoke by its behaviour and the condition of the fire rather than colour alone.
Can smoking wood be too dry for a kettle smoker?
Properly seasoned wood is generally preferable to wet wood because excess moisture can interfere with efficient combustion. The EPA recommends a moisture-meter reading of 20% or less for seasoned firewood, although this is general firewood guidance rather than a barbecue-specific optimum. Dry wood still needs appropriate sizing, positioning and airflow to produce clean smoke.
Should smoking wood be soaked before putting it on charcoal?
Soaking is not necessary for wood chunks. Weber recommends that chunks are used without soaking and explains that soaked chips can burn more slowly and encourage smouldering rather than flaming. Dry wood is a practical starting point when seeking predictable combustion, although the best method depends on the smoker and the intended smoking interval.
How many wood chunks should be used in a kettle smoker?
There is no universal number. The appropriate amount depends on chunk dimensions, charcoal quantity, airflow, smoker size and the food being cooked. Start with a modest charge, observe the exhaust and assess the resulting flavour before adding more. A single well-managed charge can be more useful than several chunks producing persistent heavy smoke.
Can bitter smoke flavour be removed after the meat has cooked?
Not reliably. Once sooty deposits and harsh smoke flavours have accumulated on the surface, further cooking does not guarantee their removal. During the cook, remove remaining problematic wood where safe, restore appropriate airflow and reduce exposure to dirty smoke. Prevention through dry fuel, controlled wood quantities and a stable coal bed is much more dependable than trying to correct oversmoking afterwards.