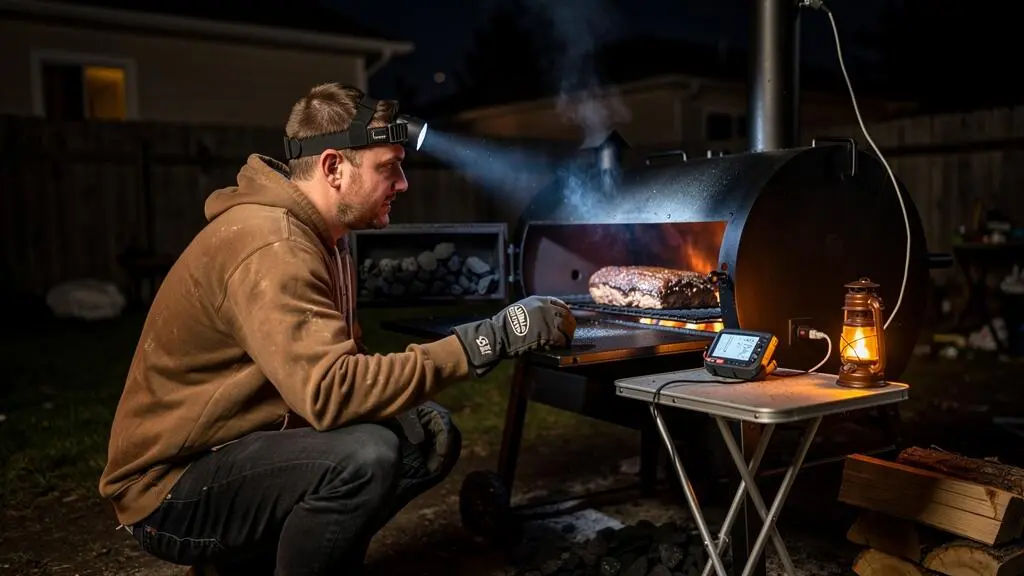
A long barbecue cook should fit around home life, not force you to spend the night staring at a thermometer. The difficulty is that maintaining cooking temperature, finishing meat on schedule and operating a live fire safely are three separate problems. Solving one does not automatically solve the others.
A reliable low-and-slow method starts with a smoker whose behaviour you understand, enough fuel for the planned cooking window, accurate temperature monitoring and a realistic finishing schedule. For UK home smokers, weather exposure, limited outdoor space and different cooker designs make those preparations particularly important.
There is also a crucial distinction between reducing unnecessary temperature checks and leaving a burning appliance unattended. A thermometer alarm can warn of a problem, but it cannot extinguish a fire or make an unattended smoker safe. Follow the manufacturer’s supervision requirements, remain on the property and arrange an awake adult to monitor the cooker whenever active supervision is required. If nobody can supervise the fire, adjust the schedule or use a permitted indoor cooking method instead.
Overnight low-and-slow: the essentials
- Prove temperature stability during a supervised test before attempting a long cook, and measure both grate temperature and meat temperature.
- Calculate fuel requirements from your own burn rate, account for weather and use alarms as a backup to appropriate fire supervision.
- Plan backwards from serving time, treat the stall as normal and leave sufficient time for a properly managed brisket rest.
- Why Does Low-and-Slow Fail Even When You “Did Everything Right”?
- How to Set Up an Overnight Smoke So Temperature Holds for Hours Unattended
- Night Start vs 5 am Start: Which Timing Actually Fits Your Schedule?
- The Stall-Panic Mistake That Turns Low-and-Slow Into Dry Slices
- How to Log One Cook So Your Next Low-and-Slow Run Is Twice as Predictable
- How to Set Your Vents for a Steady 225°F Without Constant Tweaks
- How to Stabilise Temperature Using One Vent Rule Without Constant Tweaking
- How to Smoke a Brisket for 12 Hours Without Drying the Flat
Why Does Low-and-Slow Fail Even When You “Did Everything Right”?
Low-and-slow smoking usually fails because the cooking setup was less predictable than it appeared, or because conditions changed after the cook began. A successful daytime brisket does not prove that the same smoker will behave identically overnight. Separating poor initial planning from equipment or operating problems is the fastest way to identify what actually went wrong.
Planning failures begin before lighting the fire. Examples include loading insufficient fuel, underestimating brisket thickness, positioning the meat in a hot spot or expecting a manual-feed offset smoker to operate like a thermostatically controlled pellet unit.
Operating failures develop after the initial setup: ash restricts airflow, rain interferes with exposed equipment, wind changes combustion or a lid seal begins leaking. Repeatedly opening the lid to investigate can make the temperature response harder to interpret.
The deceptive situation is a smoker that appears stable throughout a mild afternoon. A calmer daytime environment may hide how sensitive the fire is to wind or changes in ambient temperature. Once conditions change, the same vent positions may no longer maintain the same cooking temperature.
Before relying on any setup for a long session, perform a supervised three-hour stability trial under conditions representative of the intended cook. Record four operating variables:
- Grate-level temperature: the temperature experienced near the meat, rather than solely the lid thermometer reading.
- Fuel remaining: the approximate quantity left after the test.
- Weather: wind, rain exposure and ambient conditions.
- Smoker position: orientation and exposure to draughts.
This is a diagnostic test, not evidence that a smoker can safely operate without supervision overnight.
Loading cold meat adds another complication. A large refrigerated joint absorbs heat as it warms, which can temporarily change the cooking-chamber temperature. Avoid interpreting the first dip after loading as immediate proof that the fuel or vents need adjustment. Assess whether the chamber begins recovering with the lid closed.
For measurement, the USDA guidance on thermometers for smoking meat recommends monitoring the smoker and the food separately. Its recommended smoker-air range is 225–300 °F (approximately 107–149°C). These US recommendations provide useful technical context but do not replace applicable UK food-safety guidance or the appliance manufacturer’s instructions.
The important lesson is to investigate measurable causes before making another adjustment. Once the smoker’s behaviour is understood, the next challenge is designing a fuel and monitoring plan that can support a long cooking window.
How to Set Up an Overnight Smoke So Temperature Holds for Hours Unattended
To prepare a smoker for a long overnight cooking window, establish its measured fuel consumption, allow for suitable operating reserves, check airflow and temperature sensors, and plan who will supervise the active fire. A stable setup can reduce unnecessary adjustments for several hours, but no fuel calculation or thermometer alarm makes an unattended burning smoker safe.
The first distinction is between equipment that regulates heat automatically and equipment requiring regular manual intervention.
| Smoker | Heat-management characteristics | Planning priority |
|---|---|---|
| Pellet smoker | Controller regulates fuel feed and combustion, subject to equipment reliability. | Hopper capacity, power supply, cleaning and alarms. |
| Kamado | Insulated ceramic body can retain heat with relatively restricted airflow. | Known charcoal consumption, unobstructed vents and stable combustion. |
| Charcoal kettle | Fuel arrangement and natural airflow determine heat development. | Fuel layout, ash management and closer supervision. |
| Offset smoker | Traditional solid-fuel models commonly require fresh wood and active fire management. | Refuelling schedule and an available, awake operator. |
Fuel planning should be based on observed consumption rather than a generic claim about how many hours a bag of charcoal lasts. For a supervised test, record the starting fuel quantity, estimated quantity consumed and actual operating time.
For example, in a hypothetical test where a smoker consumes 2 kg of charcoal over four hours, the observed average consumption is 0.5 kg per hour. An eight-hour planning window would therefore imply 4 kg before accounting for weather, changes in operating conditions and a reserve appropriate to that specific appliance. This arithmetic is an estimate, not a guarantee of an eight-hour burn.
For pellet equipment, calculate the fuel reserve in the same way but check hopper capacity, electrical requirements and manufacturer’s operating restrictions. For offsets, an additional pile of logs does not substitute for the operator needed to feed the fire.
A pre-cook inspection should target specific failure modes rather than simply confirm that the smoker looks ready.
Five checks before a long smoking session
- Clear the airflow path. Inspect the firepot or ash area and intake openings as the manufacturer directs. Deliverable: a confirmed clear combustion-air route.
- Verify suitable dry fuel. Check the required charcoal, pellets or wood against the appliance instructions. Deliverable: a documented fuel type and loading quantity.
- Check both temperature probes. Verify the probes against a suitable reference and place the ambient sensor near the food without contact with the grate. Deliverable: two credible readings and tested alerts.
- Calculate the required fuel reserve. Use the measured consumption rate, anticipated cooking window and equipment-specific allowance. Deliverable: a written fuel estimate and confirmation it fits the appliance’s permitted capacity.
- Check conditions and supervision. Confirm safe outdoor placement, clearance, weather protection permitted by the manufacturer and who will monitor the cooker. Deliverable: an agreed supervision and response plan.
A scheduled mid-cook inspection can reduce unnecessary interventions when the equipment permits longer intervals between manual adjustments. Set its timing according to the observed fuel curve and the manufacturer’s supervision requirements. During a brief check, review the grate reading, meat reading, fuel condition, airflow and any alarm history.
However, a single planned waking point is not a universal operating rule. If the smoker requires continuous attendance or more frequent observation, arrange an awake operator or select a different cooking schedule. Automated alerts are useful for detecting departures from the plan, but they cannot replace required supervision.
Once these checks are routine, cooking start time becomes a scheduling choice rather than an attempt to compensate for unpredictable equipment.
Night Start vs 5 am Start: Which Timing Actually Fits Your Schedule?
The best start time depends on when the food must be served, how much attention the smoker needs and how much schedule uncertainty you can tolerate. An evening start offers more potential cooking and resting time before lunch, while a 5 am start avoids managing ignition when exhausted. Neither option removes the need for appropriate fire supervision.
The practical decision begins with three questions: What time is lunch? How reliably can the smoker maintain heat under supervision? And how much delay can the serving schedule absorb?
| Consideration | Evening or night start | 5 am start |
|---|---|---|
| Time before lunch | More potential cooking time | Less time for a large joint |
| Ignition and stabilisation | May occur when the cook is tired | Can occur after a night’s sleep |
| Supervision | Requires a suitable overnight plan | Easier for a cook who remains awake |
| Schedule flexibility | More opportunity to finish early | Greater risk of a late meal if the stall is prolonged |
Starting late at night has a hidden disadvantage: the most demanding work happens just when concentration is reduced. Lighting charcoal, arranging probes and stabilising the fire require more attention than maintaining an already stable system.
An intermediate approach is to start in the early evening while fully alert. Prepare the smoker, complete the initial stabilisation phase and establish the expected cooking trend before the night begins. This moves setup decisions into a period when they can be checked carefully.
That approach only works if active supervision continues as required. A stable temperature observed before bedtime is not permission to leave the fire operating without an awake responsible person.
When planning backwards from lunch, include a finishing and resting allowance rather than calculating only the expected cooking duration. Large briskets vary considerably in thickness and cooking behaviour. A nominal twelve-hour recipe is not a reliable promise that any particular brisket will finish in twelve hours.
Wrapping offers a useful timing adjustment. Foil restricts surface evaporation and can accelerate progress through the stall; butcher paper generally offers a different compromise between moisture retention and bark texture. Neither guarantees a precise finishing time.
If the cook runs late, wrapping may help regain some schedule flexibility, but it will not repair a fire that is failing or a brisket that has already been overcooked.
A schedule with enough finishing margin makes the next common problem—the stall—much easier to manage without rushed decisions.
The Stall-Panic Mistake That Turns Low-and-Slow Into Dry Slices
The barbecue stall is a period when a large cut’s internal temperature rises unusually slowly or temporarily stops increasing despite continued heat in the smoker. Surface moisture evaporates and removes thermal energy, slowing the meat’s temperature increase. The stall is normal; unnecessary lid opening and uncontrolled heat adjustments are often more damaging than allowing it to develop.
The explanation is physical rather than mysterious. Energy entering the meat supports both heating and evaporation. When evaporative cooling becomes substantial, the internal thermometer may appear stuck even though the fire is working normally.
In AmazingRibs’ investigation of the barbecue stall, the underlying mechanism is described as evaporative cooling rather than primarily collagen conversion or fat rendering.
A documented brisket stall experiment
In a brisket experiment reported by AmazingRibs using a thermostatically controlled smoker, the stall developed after approximately two to three hours of cooking, at an internal temperature around 150°F (66°C).
The reported plateau lasted approximately six hours. That observation demonstrates how prolonged a genuine stall can be, but does not establish a standard onset temperature or duration for other cuts, smokers or cooking conditions.
There are three reasonable responses, and each carries a trade-off.
| Response | Practical benefit | Trade-off |
|---|---|---|
| Wait without changing the setup | Leaves the exposed bark to develop | Less predictable finishing time |
| Wrap in foil or butcher paper | Limits evaporation and can accelerate cooking | Changes bark texture, particularly with foil |
| Moderately increase pit temperature | May improve progress when time is limited | Changes the cooking conditions and requires attention to doneness |
Choose the response before the cook, not while half asleep. For example, a personal plan might specify that wrapping becomes an option once the bark is suitably developed and the meat reaches a preselected internal-temperature range. That range should be treated as a decision aid rather than a universal rule; bark condition and schedule still matter.
Before concluding that a stall is genuine, verify the pit temperature and probe placement. An inaccurate ambient probe can hide a falling fire, while a meat probe touching bone, entering an unusual fat pocket or sitting too close to the surface can give misleading information.
Where appropriate, check the meat at a second location with a reliable instant-read thermometer. If the pit temperature is stable and the readings are credible, a plateau alone is not a reason to intervene.
A moderate increase in smoker temperature is not automatically destructive. The risk comes from aggressive adjustments, overshooting doneness and failing to account for the thinner parts of the cut.
Once a response is selected, recording the actual outcome provides more useful information for the next cook than relying on a remembered recipe time.
How to Log One Cook So Your Next Low-and-Slow Run Is Twice as Predictable
A useful barbecue log records the decisions and conditions that explain how the cook developed: when actions occurred, what the smoker and meat thermometers showed, how much fuel was used and what the weather was doing. Two comparable cooking records can reveal recurring patterns, although no log guarantees that the next cook will be twice as predictable.
The aim is not to create an elaborate spreadsheet. It is to gather enough information to stop guessing about your own equipment.
Use five practical categories:
- Time of each meaningful action, including lighting, loading, wrapping and removing the meat.
- Smoker temperature at recorded checkpoints.
- Internal meat temperature at the same checkpoints.
- Weather and exposure conditions during the cook.
- Initial and remaining fuel quantity, or measured fuel additions for manual-feed smokers.
These records show whether a late finish came from an extended stall, insufficient heat, slow initial warming or an interruption in the fuel supply.
Consider a hypothetical comparison. On the first supervised cook, a charcoal smoker consumes 3 kg in six hours. On the second, it consumes 4 kg over the same duration during windier conditions. The observed average rates are 0.5 kg and approximately 0.67 kg per hour respectively.
Those values show that the second session used more fuel. They do not prove wind was the only cause: fuel type, vent settings, loading and other differences must also be considered.
The practical calculation is straightforward: divide the fuel consumed by the observed cooking hours. Compare the result across sessions with similar target temperatures, similar equipment configurations and recorded weather conditions.
For manual-feed smokers, include all fuel additions rather than treating the initial charge as the total consumption. An approximate remaining quantity is useful for planning, but weighing fuel where practical produces better comparisons.
Change one operating variable per comparable test whenever possible. If you simultaneously change charcoal brand, airflow and meat position, the outcome will not clearly identify which adjustment helped.
Finish the log with a five-line post-cook review:
- What happened: the main cooking timeline and final result.
- What deviated: temperature, timing, fuel or food-quality differences.
- Likely cause: a working hypothesis supported by the observations.
- Next adjustment: one planned improvement.
- Verification: the measurement that will show whether that change helped.
Keep actual readings separate from estimates and personal impressions. A note such as “fuel likely ran low” should not become an established fact unless the fuel remaining was checked.
Once the smoker’s consumption pattern is documented, airflow becomes the next variable worth controlling systematically.
How to Set Your Vents for a Steady 225°F Without Constant Tweaks
To maintain approximately 225°F (107°C) in a charcoal smoker, begin with sufficient airflow to establish clean combustion, then make small adjustments as the pit approaches its target. Allow time for each change to affect the fire before adjusting again. The correct vent positions depend on smoker design, fuel, weather and unwanted air leaks, not on a universal opening ratio.
Charcoal combustion depends on fuel availability and oxygen. Increasing airflow generally increases the rate at which burning charcoal can release heat. Restricting airflow can reduce combustion intensity, although excessive restriction may cause dirty combustion or extinguish the fire.
The essential distinction is between intake and exhaust. On many charcoal cookers, intake airflow is the primary temperature-control mechanism, while the exhaust remains open enough to maintain the manufacturer’s intended smoke and combustion flow.
A fixed rule saying the intake must always be more open than the exhaust is not universally supported. Different designs have different vent areas and airflow characteristics. Follow the specific appliance’s instructions instead of comparing openings by appearance alone.
Weber’s charcoal barbecue temperature-control instructions explain the roles of fuel, vents, lid position and weather. Their guidance also supports making gradual adjustments rather than repeatedly reacting to small temperature movements.
A practical supervised calibration begins with the cooker set up as directed by its manufacturer. Establish the fire, monitor grate-level temperature and progressively reduce airflow as the temperature approaches the desired cooking range.
Use an initial observation window of roughly 20 minutes to assess the direction of change, but do not assume every smoker stabilises within that period. Heavy ceramic cookers, for example, can react differently from thin-walled kettles.
The smoke itself provides an additional observation. Thin, lightly coloured smoke is often consistent with cleaner combustion, while sustained thick white smoke can indicate a developing combustion problem, damp fuel or inadequate airflow. Smoke appearance alone is not a complete diagnosis.
Weather also matters. A setting that works in a sheltered garden on a mild afternoon may produce a different result when strong winds affect the intake or exposed metal loses heat more quickly.
Finally, inspect unwanted leakage. Smoke escaping around a damaged gasket, distorted lid or poorly seated component may indicate that the cooker is not following its intended airflow path. Some designs normally release smoke from particular joints, so compare the observation with the manufacturer’s guidance rather than assuming every visible leak is a fault.
After establishing a suitable baseline, the more important operating skill is resisting the urge to adjust it constantly.
How to Stabilise Temperature Using One Vent Rule Without Constant Tweaking
The most useful single-vent rule is to choose the manufacturer’s designated temperature-control vent and adjust only that control during routine fine-tuning. Make small changes, observe the temperature trend and avoid correcting every minor fluctuation. A threshold such as 25°F from target can serve as a personal monitoring trigger, but it is not a universal rule or a substitute for diagnosing fuel and airflow problems.
For many charcoal appliances, the designated control is the air intake. Using the exhaust as the sole temperature-control mechanism is inappropriate where the manufacturer requires it to remain open for clean combustion.
The reason repeated adjustments fail is delayed response. Changing airflow affects combustion first; the resulting heat must then change the air temperature detected by the thermometer.
Suppose the grate temperature begins drifting upward. Closing a vent slightly may not immediately lower the reading, because already-burning fuel continues producing heat. If the operator closes it again too soon, the fire can become excessively restricted. Opening it aggressively afterwards produces another delayed response.
The result is a self-inflicted cycle of temperature swings.
A practical operating rule is to consider an adjustment after a meaningful and sustained deviation rather than a brief spike. For example, a cook may adopt a personal 225°F target with a provisional ±25°F observation band, provided that band is consistent with the cooking plan and equipment requirements.
After a small adjustment, a 15–20-minute observation period may be useful on a slow-responding charcoal setup. That interval is a working procedure, not a manufacturer-validated requirement for every appliance. Respond sooner if fire safety, equipment behaviour or safe food preparation demands it.
Temperature trends help identify what to inspect:
- Temperature continues rising after an adjustment: the active fuel bed may still be releasing substantial heat; avoid making another blind correction.
- Temperature falls and stays low: inspect the fuel supply, ash accumulation, intake obstruction and probe condition rather than assuming the vent needs opening.
- Temperature changes abruptly in rain or wind: check exposure and equipment condition without blocking required ventilation or moving a lit smoker unsafely.
- Meat enters the stall while pit temperature remains steady: do not change vents merely because the meat thermometer stops climbing.
Refuelling is another exception. Opening a firebox or adding fuel changes the combustion environment, so the normal fine-tuning rule should not be treated as a complete refuelling procedure. Use the instructions applicable to that smoker.
Minor fluctuations are expected. The goal is stable, clean combustion and a credible cooking-temperature trend, not a perfectly flat digital display.
Stable pit temperature provides a foundation for the cook, but the final test is whether the thick and thin parts of the meat finish tender without sacrificing moisture.
Key takeaways before smoking a whole brisket
- Protect the thinner flat from the smoker’s strongest heat rather than assuming every part of a brisket cooks identically.
- Use internal temperature to guide checks, then judge the finishing point by tenderness across multiple areas.
- Reserve enough time for resting and safe hot holding; a finished brisket is easier to manage than an unfinished one at serving time.
How to Smoke a Brisket for 12 Hours Without Drying the Flat
To protect the flat during a long brisket smoke, manage the direction of heat, monitor temperature near the meat, avoid overcooking the thinner section and use tenderness rather than elapsed time as the final test. Twelve hours can be a planning estimate, but brisket thickness, pit conditions and the stall determine the actual finish.
A whole packer brisket contains two different muscles. The flat is generally thinner and leaner, while the point is thicker and contains more intramuscular fat. Their geometry and composition mean they can respond differently to the same cooking environment.
The main practical risk is allowing the flat to become overdone while the thicker point continues towards its preferred texture.
Positioning matters more than choosing a universal fat-side rule. Protect the thinner part from the strongest radiant heat or hottest region of the cooker. In an offset, this may mean keeping the flat away from the firebox-side hot spot. In a cooker receiving stronger radiant heat from below, placing the fat cap down may help shield exposed meat.
The appropriate orientation depends on where heat actually reaches the brisket. ThermoWorks’ thermal guide to smoking brisket describes this distinction and emphasises measuring cooking temperature near the food.
Place the ambient probe near the brisket without allowing it to touch the metal grate or the meat itself. A lid-mounted thermometer positioned far from the food may give a different picture of the actual cooking environment.
Several familiar moisture-management techniques deserve different levels of confidence:
- Heat positioning and finishing control: directly address uneven heat exposure and overcooking, making them sensible first priorities.
- Wrapping: reduces surface evaporation and changes the cooking environment; foil usually has a more pronounced softening effect on bark than leaving the meat unwrapped.
- Injection: introduces liquid into the meat, but its effect depends on the formulation and application. It does not guarantee a juicy flat.
- Additional fat or larding: may change richness and surface conditions but cannot reliably compensate for overcooked lean muscle.
- Water pan: can alter the humidity and thermal behaviour of some cookers, but the effect varies by design and should not be treated as proven protection against a dry flat in every smoker.
For a home cook with limited preparation time, controlling heat exposure, measuring accurately and avoiding an unnecessarily late finish are more useful priorities than adding several optional moisture techniques simultaneously.
Begin assessing tenderness as the brisket approaches its expected finishing region. Many low-and-slow brisket methods use internal readings around 90–96 °C (194–205°F) as a practical checking range, but that range is an approximate cooking convention, not a guarantee that every brisket is ready.
Insert a suitable probe into more than one part of the flat. Finished meat should offer little resistance, often described as a probe sliding into soft butter. Check the point as well and consider the texture of the entire cut before removing it.
Resting is the final scheduling tool. A brisket removed from the cooker can be allowed to settle before slicing, reducing the likelihood of an immediate rush from heat to carving board. A wrapped rest may also help manage surface cooling, although prolonged wrapping can soften the bark.
For extended holding, use a properly temperature-controlled food-safe arrangement and verify the meat remains at a safe holding temperature. An ordinary insulated cool box should not be assumed to maintain safe hot-holding conditions for an arbitrary number of hours. Follow applicable UK food-safety guidance, including appropriate hot-holding limits, rather than relying on touch or guesswork.
Resting can improve the final serving experience, but it cannot reverse substantial moisture loss caused by overcooking. Similarly, a soft flat cannot be restored to its previous texture simply by wrapping it and waiting.
For the next cook, choose a realistically sized brisket, establish a supervised and measured cooking setup, plan for the stall and allow time to finish without rushing. Record the results so the following session requires fewer guesses, fewer unnecessary interventions and a more reliable serving schedule.
Can you safely leave a charcoal smoker running while you sleep?
A stable temperature does not prove that a live-fire smoker is safe to leave unattended. Follow the manufacturer’s requirements for supervision, location and operation. Wireless alarms cannot detect or control every possible fire hazard. If the appliance requires an awake operator, arrange suitable supervision or choose a different cooking schedule.
Is a pellet smoker automatically safer for overnight cooking?
A pellet smoker can regulate fuel delivery and cooking temperature automatically, which reduces manual adjustments. However, it still uses heat and combustion and may experience faults, power interruptions or fuel-feed problems. Automatic temperature control does not establish that unattended overnight operation is permitted or safe.
What should you do if the smoker loses heat during a long cook?
Check the equipment and fire conditions safely, then inspect fuel, airflow and thermometer accuracy. Review how long the meat may have been outside the intended safe cooking conditions. If its temperature history is uncertain, do not assume reheating will resolve every food-safety concern. Use appropriate official food-safety advice when deciding whether the cook can continue.
Does a wireless thermometer remove the need to check the smoker?
No. Wireless thermometers can reduce unnecessary lid opening and provide useful temperature alerts, but they monitor only what their sensors measure. They cannot reliably identify every problem involving fire, electrical equipment, weather exposure or structural damage. Keep the probes correctly positioned and maintain the level of supervision required by the cooker.
Can you smoke brisket one day and serve it the next?
Yes, provided the brisket is cooked, cooled, refrigerated, reheated and served using appropriate food-safe procedures. This can be a practical alternative when continuous overnight fire supervision is not possible. The result may differ slightly in bark and texture from freshly finished brisket, but a planned cook-ahead schedule can be more manageable than forcing an unpredictable large cut to finish just before lunch.