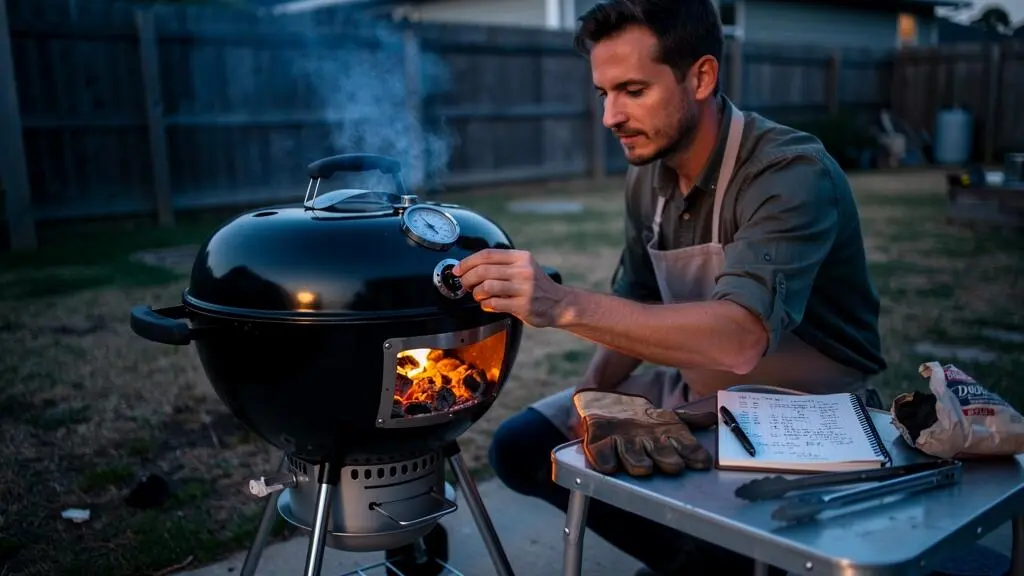
A charcoal barbecue that climbs from 225°F to 275°F and then drops towards 200°F is not necessarily faulty. It may simply be responding to a series of vent adjustments made before the previous ones have taken effect.
The solution is to treat the barbecue as a slow-responding system. Airflow governs how quickly charcoal burns, fuel arrangement determines how the fire develops, and the cooker body stores and releases heat. Once those three behaviours are understood, temperature control becomes considerably more predictable.
For a UK backyard cook using a basic kettle, kamado, bullet smoker or offset, the practical goal is not an absolutely flat thermometer reading. It is a controlled fire that stays within a useful cooking range without continual intervention.
That requires a repeatable lighting method, a vent strategy suited to the cooker, enough fuel for the session and the patience to let adjustments work. A notebook and an existing thermometer can reveal more about a barbecue’s behaviour than another accessory bought to compensate for inconsistent technique.
Barbecue temperature control in three principles
- Control airflow deliberately. Choose the appropriate vent for your cooker, make small adjustments and allow the fire to respond before touching it again.
- Build a predictable fuel bed. Consistent charcoal, lighting quantities and fuel arrangements reduce temperature variation throughout a long cook.
- Manage the trend, not every reading. Watch whether temperature is rising, settling or falling, and intervene only when the pattern warrants it.
- Why Do Tiny Vent Adjustments Cause 25°F Swings in Under 15 Minutes?
- How to Stabilise Temperature Using One Vent Rule Without Constant Tweaking?
- Briquettes or Lump Charcoal: Which Is Easier to Control for a 5-Hour Cook?
- The “Fix It Now” Mistake That Makes Temperature Control Impossible
- When Should You Start Stabilising the Pit So You Hit Target Temp by the First Hour?
- How to Stabilise Temperature Using One Vent Rule Without Constant Tweaking? (extended — applying the rule across different cookers)
- How to Set Your Vents for a Steady 225°F Without Constant Tweaks?
- How to Keep Smoking Temperature Stable for 6 Hours When the Weather Keeps Changing
Why Do Tiny Vent Adjustments Cause 25°F Swings in Under 15 Minutes?
A small vent adjustment can produce a substantial temperature change because it alters the oxygen reaching the charcoal, not merely the amount of air passing through the cooker. However, a 25°F swing within 15 minutes is a possible observation, not a universal response. The result depends on fuel, cooker design, existing fire conditions and weather.
Charcoal combustion responds to the oxygen available at the burning surface. Increasing the intake can accelerate combustion, releasing more heat and potentially igniting neighbouring pieces of fuel. The resulting change is therefore influenced by how much burning charcoal is present and how the coal bed is arranged.
A densely packed, well-sealed ceramic kamado may respond very differently from a kettle with air leaks. An offset smoker introduces another variable: airflow through the firebox and chimney affects both combustion and the movement of hot gases through the cooking chamber.
The basic relationship is explained in AmazingRibs‘ explanation of barbecue vent control, which also stresses the importance of air leaks, consistent fuel quantities and trial runs.
Thermal lag makes the response harder to interpret. The charcoal, metal or ceramic body, cooking grates and thermometer do not necessarily respond simultaneously. The displayed temperature may still be changing because of an adjustment made several minutes earlier.
This creates a trap: opening a vent because the dial reads low, then closing it because the temperature rises, without knowing whether the first adjustment has finished influencing the fire.
To discover your own cooker’s response, conduct a short calibration burn without food. Establish a reasonably steady fire, record the temperature and make one small vent adjustment. Note when the reading first responds, how quickly it changes and whether it eventually settles above or below the starting point.
Repeat on a separate occasion under comparable conditions. That provides a personal response curve rather than a guessed reaction time. The exercise is especially valuable because the same vent movement can have a different effect when the fuel load is nearly exhausted.
Once the delay and scale of that response are familiar, the next improvement is to establish a consistent operating rule instead of adjusting several controls at once.
How to Stabilise Temperature Using One Vent Rule Without Constant Tweaking?
For many charcoal barbecues, the simplest stabilisation method is to control combustion mainly through the lower intake vent while leaving the exhaust open. Start with a small, established fire, reduce the intake as the cooker approaches its target and wait for the temperature trend to settle. Follow manufacturer-specific instructions where they prescribe a different method.
The reason for favouring the intake on many cookers is straightforward: it regulates the oxygen supply close to the fuel. Keeping the exhaust open supports the movement of combustion gases and avoids making two airflow changes at once.
However, the one-vent rule is a control strategy, not a universal manufacturer setting. For some Weber charcoal grills, the manufacturer recommends the opposite arrangement: keeping the lower dampers open and regulating temperature with the lid damper.
That distinction appears in Weber‘s charcoal-grill temperature-control instructions. The published guidance gives model-specific temperature ranges and vent positions rather than a rule applicable to every charcoal cooker.
For a cooker intended to be controlled primarily at the intake, use this initial routine:
- Open the recommended airflow controls for lighting and establish a clean-burning charcoal fire.
- Watch the temperature rise with the lid in its normal cooking position.
- Begin restricting the intake before the cooker runs substantially above the desired temperature.
- Use a modest opening, such as roughly one-quarter, only as a provisional starting position where suitable for the model.
- Leave the vents alone long enough to observe the resulting trend, rather than reacting immediately to the first changed reading.
The waiting period is the no-touch window. Its duration should come from the response measured during calibration, not an arbitrary promise that every cooker settles after a fixed number of minutes.
During that window, observe more than the thermometer. A small, steady bed of glowing charcoal, clean-looking exhaust and a slowing rate of temperature rise can indicate a fire approaching balance. Thick, persistent smoke or a rapidly fading fire warrants closer inspection.
Never reduce airflow so aggressively that combustion becomes weak and smoky simply to preserve a displayed number. Stable cooking requires both suitable temperature and healthy combustion.
Once airflow control is consistent, the next variable to simplify is the fuel itself: an irregular charcoal bed can undermine even a carefully calibrated vent setting.
Briquettes or Lump Charcoal: Which Is Easier to Control for a 5-Hour Cook?
Briquettes are generally a practical starting choice for a five-hour barbecue session when repeatability matters more than rapid changes in heat output. Their relatively uniform pieces can simplify fuel arrangement and help produce a consistent burn. Lumpwood charcoal can also work well, but variations in piece size and composition make each load potentially less predictable.
Neither fuel guarantees an uninterrupted five-hour burn. The quantity used, airflow, cooker insulation, charcoal quality and desired temperature determine whether the fire will need replenishment.
Weber’s manufacturer documentation provides a useful product-specific comparison. Its described briquettes are specified for a three-hour burn, while its Premium Lumpwood Charcoal is specified for approximately 1.5 hours at 180°C. Those figures are not universal performance ratings and do not establish five-hour endurance.
The details are set out in Weber’s comparison of lump charcoal and briquettes.
| Control factor | Briquettes | Lumpwood charcoal |
|---|---|---|
| Fuel uniformity | More uniform manufactured pieces can simplify repeatable loading. | Natural pieces often vary considerably in size and shape. |
| Long cooking sessions | Often convenient for a gradual, consistent fuel arrangement. | Suitable when the quantity and burn behaviour have been tested. |
| Response to airflow | Depends on formulation, fuel bed and cooker. | Depends on wood source, piece size, fuel bed and cooker. |
| Repeatability | Easier to reproduce when using the same product and loading method. | May require closer attention to piece selection and arrangement. |
| Best practical use | Cooks prioritising steady, predictable heat. | Cooks familiar with their charcoal and comfortable managing variation. |
For lumpwood charcoal, sort out extremely small fragments that might obstruct airflow and arrange larger pieces so the fuel bed can burn progressively. Keeping the same brand and a similar mix of piece sizes between sessions also makes comparison more useful.
A hybrid approach is possible: use a small quantity of lump charcoal to establish the fire and briquettes for the main controlled burn. Treat this as an optional technique to test, not a proven performance advantage over using one fuel consistently.
For either fuel, a gradual ignition arrangement can be easier to manage than lighting the entire load at once. The appropriate arrangement depends on the cooker and must not obstruct its intended airflow.
Most importantly, keep a record of how much charcoal was loaded, how the vents were positioned and how long the cooking temperature remained useful. The next session can then begin with an evidence-based fuel quantity.
A predictable fuel supply reduces one major source of drift, but it cannot compensate for repeatedly overriding the fire before each adjustment has taken effect.
The “Fix It Now” Mistake That Makes Temperature Control Impossible
The most damaging temperature-control habit is correcting every small fluctuation immediately. Opening a vent to fight a falling reading, then closing it when the temperature rises, can create alternating overshoots and drops. Instead, judge the direction and persistence of the trend, allow previous adjustments to take effect, and intervene only when the fire genuinely needs correction.
Consider a hypothetical kettle smoker targeting 225°F. The thermometer slips to 215°F, prompting a large intake adjustment. The reading continues downward briefly because the cooker has not yet responded. A second adjustment follows. Eventually the added airflow increases combustion, sending the temperature above the target and prompting another large correction.
None of those readings proves that the cooker was inherently unstable. The operator has introduced additional changes faster than their effects could be evaluated.
Normal fluctuation and genuine fire failure are different problems. A small deviation with a slowing temperature trend may need no intervention. Sustained falling temperature, exhausted fuel, obstructed intake airflow or a deteriorating fire may justify action.
Use three questions before touching a vent:
- Has the previous adjustment had enough time to show its effect?
- Is the temperature moving away from the desired cooking range or already returning?
- Is there evidence of an underlying problem, such as ash blockage, spent fuel or an extinguishing coal bed?
No fixed temperature deviation can answer these questions for every barbecue. A brief change within the intended cooking range is generally less concerning than a sustained movement towards losing the fire.
When an intervention is justified, change one variable and record the result. If the fuel is genuinely depleted, opening a vent is not a substitute for replenishing it.
Build your first five-point temperature-control record
- Record the baseline. Write down cooker type, charcoal type, starting fuel quantity and target temperature.
- Mark the control position. Sketch or describe the intake and exhaust settings so they can be reproduced.
- Make one adjustment. Record its time, direction and approximate size, leaving every other control unchanged.
- Capture the response. Note the first visible temperature reaction, subsequent trend and eventual settled reading, if achieved.
- Write a reusable rule. Summarise the conditions and the adjustment that worked in a short settings card for the next cook.
That log turns a frustrating sequence of corrections into a simple experiment. After several sessions, it reveals whether instability originates mainly from lighting technique, fuel condition, airflow or external conditions.
Good control also begins earlier than the first unexpected fluctuation. The preparation and warm-up period determine how much correction will be needed once food is on the grate.
When Should You Start Stabilising the Pit So You Hit Target Temp by the First Hour?
Start stabilising the barbecue during lighting and warm-up, not after the thermometer reaches the target. Establish a manageable charcoal fire, approach the intended cooking range gradually and allow the cooker to settle before adding food. The required preparation time varies with cooker mass, fuel quantity and weather, so measure your own warm-up behaviour instead of relying on a universal timetable.
A thin steel kettle may change temperature relatively quickly. A heavy ceramic cooker has more thermal mass, meaning it can continue absorbing and releasing heat after the fire’s combustion rate changes. Both benefit from early airflow management, but their warm-up patterns differ.
A repeatable preparation sequence can be organised as follows:
- Lighting: ignite a consistent starting quantity of charcoal and provide sufficient airflow for an established fire.
- Coal-bed development: allow combustion to become reliable before restricting air substantially.
- Approaching target: begin reducing airflow before the cooker develops excessive momentum.
- Settling: observe whether the temperature is levelling off, still accelerating or beginning to fall.
- Loading food: proceed when combustion is clean and the cooking temperature has demonstrated reasonable stability.
Some cooks allow a modest overshoot and then reduce the intake to let the cooker settle towards target. This can be a useful controlled technique, but it is not automatically preferable. On high-thermal-mass cookers, a large overshoot can be particularly slow to reverse.
Approaching the target from below and restricting the fire early may therefore be more controllable than deliberately overheating the cooker.
Cold conditions, rain and wind can all alter the preparation period. For UK outdoor cooking, choose a safe, reasonably sheltered position before lighting rather than trying to move hot equipment when the weather changes.
Loading cold food changes the heat balance: the meat absorbs energy, and the cooker temperature may temporarily decline. That does not necessarily indicate that the fire needs more oxygen. Avoid interpreting the immediate post-loading temperature drop as proof that the initial vent setting was wrong.
To calibrate preparation time, note when charcoal was lit, when the target range was first reached and when the temperature became sufficiently steady for cooking. Repeat using a similar fuel load and method to establish a useful starting schedule.
That routine must still be adapted to the particular cooker. A vent opening that works on a kettle may be unsuitable on a tightly sealed kamado or an offset smoker.
How to Stabilise Temperature Using One Vent Rule Without Constant Tweaking? (extended — applying the rule across different cookers)
The most reliable way to apply one-vent control across different charcoal cookers is to choose one primary adjustment point for each model, rather than impose identical damper positions on every design. Sealed kamados commonly use fine intake adjustments, kettles require model-specific guidance, and offsets depend on a suitable balance of firebox air supply and unrestricted exhaust flow.
The same nominal opening has different effects because cooker volume, leakage, fuel location and draft characteristics vary. A quarter-open intake on a compact kettle does not admit the same effective airflow as a quarter-open opening on a larger smoker.
The following positions are calibration starting principles, not guaranteed temperature settings.
| Cooker type | Primary control approach | What to watch |
|---|---|---|
| Charcoal kettle | Follow the model’s damper instructions; many configurations respond well to intake control, while some Weber guidance prioritises the lid damper. | Air leakage, ash buildup and lid-versus-grate temperature. |
| Sealed kamado | Use small lower-intake movements with the upper exhaust set according to the manufacturer’s operating guidance. | Slow thermal recovery, overshoot and limited remaining airflow. |
| Vertical bullet smoker | Adjust the available lower air intakes consistently while maintaining the intended exhaust path. | Fuel progression, ash obstruction and changes between cooking levels. |
| Offset smoker | Maintain appropriate firebox airflow and a properly functioning exhaust; manage fire size and fuel as necessary. | Fire quality, chamber temperature differences and unwanted air leaks. |
An offset deserves particular care. Restricting the chimney to force down the temperature can impair draft and combustion. Although exhaust restriction may appear as a conditional troubleshooting tactic for some leaky cookers, it is not an appropriate universal throttle rule. Fire size, intake air and unwanted leaks should be assessed first.
For a leaky kettle, the issue may be different: even a nearly closed intake cannot fully control combustion if substantial air enters through unintended gaps.
Rather than continually compensating with another vent, identify obvious sealing or ash-management problems and refer to the equipment’s operating instructions.
A three-burn calibration is a useful way to establish a settings card without buying equipment. Use comparable fuel quantities and conditions, but vary the chosen control position between separate test burns. Observe the sustained temperature range, how the fire responds and how much charcoal remains.
Record the results as a small table: cooker, fuel, starting quantity, primary vent setting, observed temperature range and burn duration. Comparing those records is more meaningful than copying a vent position from a different barbecue.
Keep the tests controlled, avoid excessively restricting combustion and do not leave an unfamiliar fire unattended merely because it appears stable.
With that baseline established, a particularly useful challenge is maintaining low-and-slow smoking temperatures around 225°F, where overly aggressive airflow restriction can threaten the fire itself.
How to Set Your Vents for a Steady 225°F Without Constant Tweaks?
To hold approximately 225°F (107°C), establish a relatively small, controlled charcoal fire and restrict airflow progressively according to the cooker’s design. On suitable intake-controlled smokers, the lower vent may need only a narrow opening while the exhaust remains open. Other charcoal grills require different settings, so always use the model’s guidance and verify the actual cooking temperature.
The central challenge is controlling heat release without extinguishing combustion. A large, fully ignited charcoal load can deliver more heat than necessary, making low-temperature control difficult even with severely restricted airflow.
A smaller active fire supported by a gradually igniting fuel supply can be easier to manage, provided the arrangement suits the cooker.
For an intake-controlled smoker, begin with clean combustion and bring the cooking chamber towards the intended range. Reduce the intake in small increments while observing the temperature trend. Once the fire is responding predictably, resist the urge to make another change simply because the thermometer is not showing exactly 225°F.
Small adjustments are especially important at low temperatures. On a tightly sealed cooker, a movement of only a few millimetres may materially affect combustion. On another smoker, that same movement may be insignificant. Calibration determines the appropriate adjustment scale.
Signs that the fire may be struggling include a sustained temperature decline, weakening combustion and persistent dirty smoke. Thin or barely visible exhaust alone is not evidence of a dying fire; charcoal can burn cleanly with little visible smoke.
Likewise, a temporarily low reading immediately after opening the lid or adding food should not trigger an automatic vent adjustment.
Temperature measurement deserves attention. A thermometer built into the lid measures conditions at its mounting point, not necessarily the temperature beside the food. If an existing grate-level probe is available, use it to understand the difference. Without one, keep your measurement position consistent and avoid assuming the lid reading represents every part of the cooker.
For a Weber charcoal grill covered by the manufacturer’s published lid-damper instructions, its suggested 225–275 °F smoking range uses an upper damper opening between one-eighth and one-quarter with the lower dampers open. This example illustrates why a barely cracked bottom intake cannot be prescribed for every barbecue.
A useful target is a sustainable temperature range around the intended cooking point, rather than continuous intervention to achieve a mathematically exact reading.
Once the fire can hold its range in calm conditions, the remaining challenge is preserving that stability when a long cook encounters wind, rain or changing outdoor temperatures.
What to carry into a six-hour cook
- Start with the fuel plan. A known charcoal quantity and gradual burn arrangement are more dependable than emergency refuelling.
- Protect the cooking conditions safely. Choose a suitable outdoor position before lighting, without enclosing the barbecue or restricting required ventilation.
- Plan a few checks. Use trends, remaining fuel and the forecast to decide when intervention is necessary.
How to Keep Smoking Temperature Stable for 6 Hours When the Weather Keeps Changing
Keeping a smoker stable for six hours in changing weather requires preparation rather than constant adjustment. Position the cooker safely away from direct wind exposure where possible, begin with a fuel arrangement tested for the intended duration, keep unnecessary lid openings to a minimum and monitor temperature trends. Wind, cold and rain can alter heat loss and combustion, so adapt only when the change persists.
Weather affects a charcoal smoker in several ways. Wind can change the pressure around air openings and influence draft, sometimes increasing combustion or disturbing temperature stability. Cold conditions increase the difference between cooker and outdoor temperatures, encouraging heat loss. Rain can cool exposed surfaces and complicate fire management.
These influences are not uniform. A heavy ceramic smoker and a thin-walled kettle will not necessarily react in the same way, and the direction of wind relative to the vents matters.
For practical cold-weather preparation, Weber’s advice on barbecuing in cold and windy weather recommends limiting lid openings and notes that charcoal may need replenishing more frequently in windy conditions.
Do not assume that wind doubles airflow or that a particular outdoor temperature produces a fixed amount of heat loss. Those outcomes depend on the equipment and circumstances.
Safety comes before temperature stability. Use charcoal barbecues outdoors in properly ventilated locations, keep them well clear of combustible structures and never move them into a garage, shed, tent or enclosed shelter to escape the weather. Avoid cooking in high winds.
Where safe and practical, choose a location offering some protection from gusts without obstructing the intake or exhaust. Do not cover a burning smoker or place loose windbreak materials close to its hot surfaces.
Fuel management is the second part of a six-hour strategy. Instead of fully igniting a large load at the start, a compatible smoker may use a Minion-style arrangement or a charcoal ring in which a relatively small burning section progressively ignites adjacent unlit fuel.
These methods can extend the burn by spreading ignition over time, but their duration is not guaranteed. The cooker, charcoal product, air supply and fuel quantity all matter.
Use a previous calibration cook to estimate whether the starting load is sufficient. If replenishment is necessary, prepare the fuel beforehand and use the cooker’s intended access point or refuelling procedure to limit unnecessary heat loss.
Adding charcoal can temporarily change smoke production and eventually increase heat output as the new fuel ignites. Anticipate that response rather than immediately compensating with several vent changes.
A practical weather-management plan can be organised around three periods:
- Before lighting: check the forecast, choose a safe outdoor position, inspect the vents and ash area, and prepare the estimated fuel quantity.
- During the main burn: compare the current temperature trend with your calibration notes, check fuel condition when necessary and avoid repeatedly lifting the lid.
- When conditions change: establish whether the temperature change is sustained, then make one measured correction or replenish fuel if that is the actual cause.
Anticipation helps, but pre-emptively closing vents before a forecast gust or adding fuel before a predicted temperature drop should not become a reflex. Weather forecasts do not precisely predict the airflow experienced by one garden smoker. Use them to prepare, then rely on observed conditions before changing combustion.
If conditions become unsafe, stop cooking rather than trying to preserve the temperature at any cost. A steady fire is never more important than avoiding high winds, unstable equipment or carbon monoxide hazards.
For the next six-hour cook, prepare a simple settings card, load a fuel quantity informed by earlier burns, establish a clean stable fire and limit adjustments to those supported by an observable trend. The aim is not to watch the thermometer continuously, but to make each intervention purposeful and give the barbecue enough time to respond.
Should the top vent always remain fully open on a charcoal barbecue?
No. An open exhaust is a common starting principle for many intake-controlled charcoal smokers, but some manufacturers specify a different method. Weber’s published guidance for certain charcoal grills recommends keeping the lower dampers open and adjusting the lid damper. Follow the instructions for your particular cooker.
Is a lid thermometer accurate enough for low-and-slow smoking?
A lid thermometer can be useful for tracking general trends, but it measures temperature at the lid rather than directly beside the food. Differences between those locations can occur. If you already have a suitable grate-level probe, use it to assess that difference. Consistency in measurement location matters when comparing cooking sessions.
Can a charcoal smoker really hold temperature for six hours without refuelling?
It may be possible with an appropriate cooker, sufficient fuel and a well-managed gradual burn, but there is no universal six-hour guarantee. Some configurations need replenishment earlier. A test burn using the same charcoal and loading arrangement is the most practical way to estimate endurance.
Does opening the lid ruin barbecue temperature stability?
Opening the lid releases heat and can temporarily change airflow through the fire. The displayed temperature may drop before recovering, but that does not mean every brief opening ruins the cook. Keep openings purposeful, close the lid when finished and allow the cooker to recover before deciding whether a vent adjustment is needed.
Can ordinary charcoal and a basic kettle replace an automatic BBQ temperature controller?
Manual airflow control can deliver useful stability for many cooks when the fuel arrangement, vent settings and response time are understood. It does not offer the same automatic adjustment or monitoring capability as an electronic controller. The practical objective is predictable cooking with a manageable number of interventions, not unattended precision.