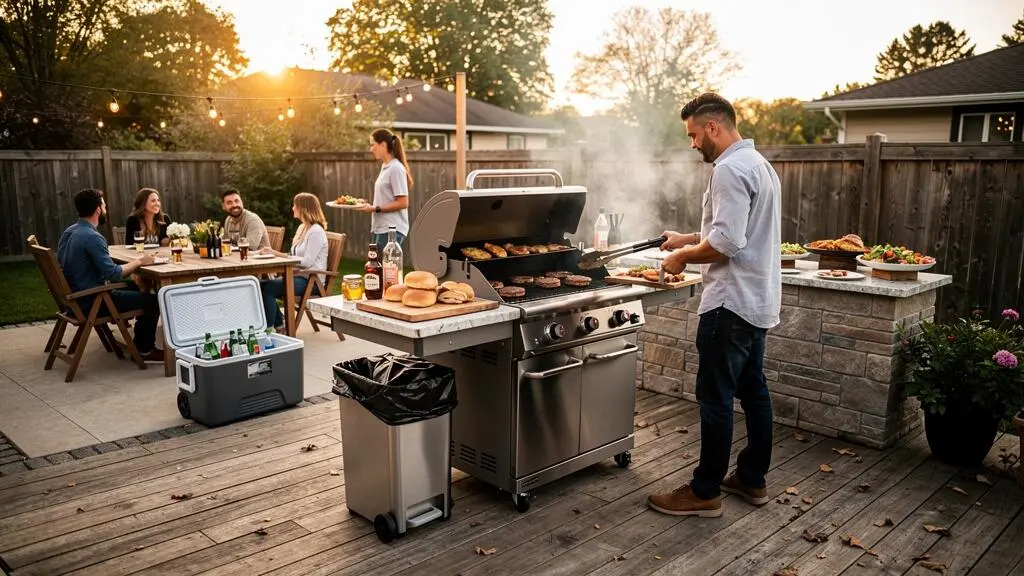
An outdoor kitchen should make cooking easier without making the barbecue feel separate from the gathering. On a UK patio, that means balancing three competing needs: a safe, practical workspace for the cook, a clear route for food and people, and a comfortable place for guests to sit, talk and eat. The best arrangement is not necessarily the largest or most expensive. It is the one that fits the available space and the way the household actually entertains.
Start by defining preparation, cooking, serving and social areas before buying equipment or fixing worktops in place. Keep raw ingredients and utensils separate from ready-to-eat food, avoid routes that cross directly in front of a hot grill, and give guests a reason to stay away from the cook’s immediate workspace without losing sight of the action.
A tape measure, a simple patio sketch and a realistic rehearsal of a typical barbecue are enough to identify many layout problems. Weather protection, lighting, storage and waste disposal also deserve attention from the beginning. Together, these decisions help create an outdoor kitchen that feels sociable rather than crowded and remains practical when several dishes, helpers and guests need space at the same time.
The essentials of a better outdoor kitchen layout
- Separate the cooking workspace from guest seating and circulation, while keeping the cook visible and part of the conversation.
- Measure the route from cold storage through preparation and grilling to serving, and check that people can move without collisions or unsafe backtracking.
- Design in food hygiene, storage, waste, lighting and weather protection before committing to a permanent installation.
- Why Do Guests Always Crowd the Grill Area and Make Cooking Harder?
- How to Plan Prep-to-Grill-to-Serve Zones Using Only a Tape Measure?
- Built-In or Modular Outdoor Kitchen: Which Makes More Sense in UK Weather?
- The Layout Mistake That Forces 30 Trips Inside During One BBQ
- When Should You Add Windbreaks and Lighting So Evening BBQs Stay Comfortable?
- How to Plan a Prep-to-Grill-to-Serve Flow That Matches Real Hosting Conditions?
- How to Build a Two-Board Prep Station on a Small Patio Table Without Clutter?
- How to Set Up a Prep Station That Prevents Cross-Contamination at a BBQ?
Why Do Guests Always Crowd the Grill Area and Make Cooking Harder?
Guests tend to gather around a barbecue because it is the most interesting part of the gathering: food is cooking, aromas are spreading and the host is doing something worth watching. When there is no obvious alternative place to socialise, the grill becomes the default meeting point. The resulting congestion is therefore often a layout problem, not simply a matter of guests ignoring the cook’s needs.
Three patterns commonly interfere with cooking. First, onlookers stand inside the cook’s working area, limiting access to tools and ingredients. Second, hungry guests form a queue directly in front of the grill, where the host needs room to turn food and handle hot trays. Third, people walking between the house, dining table and garden cut across the preparation route. Each problem requires a different response: a better-defined cooking boundary, a separate serving point and a circulation route that avoids the grill.
The solution is to make the social area more attractive than the immediate cooking space. Arrange seats so guests can see the cook without standing beside the hot surface. Put drinks, snacks and spare plates near the seating area, rather than beside the grill. For a buffet, place serving platters on a separate table that guests can approach from the side without blocking the cook.
Safety is another reason to keep these zones distinct. The Scottish Fire and Rescue Service advises using barbecues on stable ground, away from combustible surroundings, and keeping children and pets clear of the cooking area. Its barbecue safety guidance also stresses using a well-ventilated, open area. A layout that discourages crowding helps the host maintain those precautions, although it does not replace appliance-specific clearances or supervision.
Think of the cooking zone as a workspace that needs a clear boundary, not as the centre of a crowd. A practical layout lets guests remain involved in the occasion while leaving the cook enough room to concentrate, move hot food safely and keep the barbecue attended.
Once the zones are defined, the next task is to measure how food, equipment and people will move between them.
How to Plan Prep-to-Grill-to-Serve Zones Using Only a Tape Measure?
A tape measure helps you test an outdoor kitchen layout before spending money on furniture, worktops or built-in appliances. Measure the available patio, mark the proposed preparation, grill and serving positions, and trace the route food will take between them. The goal is to keep related tasks close enough to be convenient while leaving the cook room to turn, reach and move safely. There is no single work-triangle dimension that suits every patio or appliance.
Begin with a sketch showing fixed obstacles: doors, steps, walls, fences, drains, existing furniture and the route back into the house. Mark the cold-storage position, whether that is a refrigerator or a cooler, and the intended preparation surface. Place the grill next, taking account of its manufacturer’s installation and clearance requirements. Finish with the serving point, positioned so guests can collect food without crossing the cook’s main working lane.
Measure the gaps between these points, but also measure the space a person occupies while working. Stand at the proposed prep surface and simulate reaching for ingredients, turning towards the grill and carrying a tray to the serving area. Check door swings and access to cupboards, lids and drawers. A layout can look spacious on paper yet become awkward when an open lid or a person holding a hot tray occupies the same space as a passing guest.
Avoid relying on a fixed formula for every distance. A compact, single-cook setup has different requirements from an arrangement where two people prepare food together. Leave a usable route for the second person, and do not make the shortest possible distance your only objective: a direct route that passes between guests and the hot grill may be less practical than a slightly longer, safer one.
Before finalising the sketch, rehearse a complete cooking cycle. Imagine retrieving chilled ingredients, preparing them, cooking them, plating the finished food and disposing of packaging. Any point where you need to reverse direction, cross a busy route or put food down on an unsuitable surface signals a problem to solve before installation.
Five measurements to record before buying equipment
- Measure the usable patio and record fixed obstacles on a dimensioned sketch.
- Mark the proposed grill position and note the appliance’s required clearances from its installation instructions.
- Record the distance between cold storage and the preparation surface, with the intended route drawn on the plan.
- Mark the serving area and trace a route that avoids the cook’s main working lane.
- Simulate carrying a tray, opening storage and passing another person; annotate every collision or awkward turn on the revised sketch.
The tape-measure exercise is a planning method, not a building regulation or a guarantee that a layout is safe. Recheck the actual equipment dimensions and any applicable installation requirements before fixing utilities, building counters or ordering made-to-measure components.
Once the movement pattern works on paper, decide whether a fixed installation or movable modules best suit the patio and the way it is used.
Built-In or Modular Outdoor Kitchen: Which Makes More Sense in UK Weather?
A modular outdoor kitchen is often the more flexible starting point for a small, exposed or evolving patio, while a built-in arrangement can suit a permanent space with a settled layout and suitable protection from the weather. Neither option is automatically better in the UK. The right choice depends on the available footprint, how frequently the kitchen is used, the durability of the materials and whether the proposed installation can be maintained safely through wet and cold seasons.
Built-in kitchens can create a continuous worktop, integrated storage and a consistent appearance. They may also make it easier to keep preparation, cooking and serving areas in a deliberate sequence. However, fixed frames and worktops commit the homeowner to a particular arrangement. Drainage, foundations, service connections and access for future repairs need to be considered before construction. A permanent outdoor kitchen may also raise planning questions depending on the design and property.
Modular units can be repositioned as the hosting pattern becomes clearer. They may allow the owner to test a compact prep station, separate serving table or additional storage without rebuilding the whole kitchen. Some components may be easier to move under cover or store during winter, but this depends on their size, weight, materials and the manufacturer’s instructions. Modular does not automatically mean weatherproof, and permanent does not automatically mean unsuitable for British conditions.
Rain, frost and temperature changes make material selection and water management important for either design. Choose outdoor-rated components, follow care instructions and consider how water drains from worktops and surrounding paving. If a fixed installation includes electrical equipment, account for outdoor exposure from the outset; Electrical Safety First advises using suitable outdoor equipment and RCD protection. The exact requirements depend on the installation.
Planning permission is a separate question from the choice between modular and built-in. According to Planning Portal, in England a non-permanent outdoor kitchen will normally not require planning permission, while permanent structures may need to be considered under outbuilding rules. Listed properties, conservation areas and other constraints can change the position. Its guidance on outdoor kitchen permission is introductory rather than a substitute for checking with the relevant local planning authority. Rules elsewhere in the UK may differ.
| Consideration | Built-in kitchen | Modular kitchen |
|---|---|---|
| Layout flexibility | Best when the arrangement is unlikely to change | Useful when testing different positions and workflows |
| Patio conditions | Needs a suitable permanent location and weather-conscious construction | Can suit compact or exposed spaces if each component is rated for its conditions |
| Utilities and drainage | Requires careful advance planning for any fixed services | May avoid some permanent connections, depending on equipment |
| Winter care | Frames, worktops and drainage need appropriate protection and maintenance | Movable components may be easier to cover or store where practical |
| Best fit | A settled layout with frequent use and a permanent footprint | A small patio, a flexible arrangement or a layout still being refined |
Before making the commitment, consider the full installed arrangement rather than the price or appearance of a single unit. Access to the grill, the movement of people, maintenance, service connections and the ability to protect the equipment in winter all affect how useful the finished kitchen will be.
Regardless of the format, an efficient kitchen still needs the basic tools and facilities that stop the cook returning indoors for every missing item.
The Layout Mistake That Forces 30 Trips Inside During One BBQ
An outdoor kitchen can have an excellent grill and still be frustrating to use if everything around it has been treated as optional. Missing storage, no convenient water access, nowhere to put waste and no space for plates can turn a simple barbecue into a sequence of trips indoors. The “30 trips” figure is best used as a self-audit prompt, not as a verified statistic: the number of journeys depends on the household, menu and equipment.
The underlying mistake is designing for the moment food is on the grill rather than for the entire cooking session. The host needs ingredients before cooking, clean tools during preparation, somewhere to place hot food, plates for serving and a way to manage rubbish afterwards. If any of these functions has no dedicated place, the kitchen’s footprint may look tidy while its workflow remains inefficient.
Start by reviewing the previous barbecue. List each item fetched from inside and group the journeys into four categories:
- Storage: utensils, seasonings, spare plates and serving equipment.
- Washing: access to handwashing facilities and a suitable way to clean equipment.
- Waste: packaging, used paper towels and food scraps.
- Forgotten preparation: ingredients, sauces, garnishes and anything that should have been prepared beforehand.
The pattern matters more than the total. Several journeys for forgotten ingredients may indicate that the preparation area needs a better checklist, while repeated trips for plates suggest a serving-storage problem. A lack of water access is a different issue from a shortage of cupboard space and should be addressed accordingly.
A practical minimum setup includes dedicated tool storage, a covered bin, convenient handwashing access and a way to keep perishable food chilled until needed. Depending on the menu and space, a separate serving surface and a compact outdoor-rated cold-storage solution may be the next priorities. These additions should be chosen according to the audit, not simply because a fully equipped outdoor kitchen looks appealing.
Fewer interruptions can make hosting more relaxed, but the grill must still be supervised. The Scottish Fire and Rescue Service advises that a lit barbecue should never be left unattended; when the cook needs to step away, another responsible adult should take over supervision.
Hypothetical example: finding the missing zone
Imagine a household that repeatedly goes indoors for clean plates, spare tongs and bin bags. These journeys are not evidence that the patio needs a larger kitchen. They suggest three specific changes: move serving equipment into dedicated storage, keep a second set of suitable utensils at the station, and position a covered waste bin within convenient reach.
The improvement can be checked at the next barbecue by recording which indoor trips remain. This is a practical illustration, not a measured result or a claim that every household will eliminate a particular number of journeys.
Once the essential facilities are in place, consider how wind, darkness and outdoor electrical equipment affect the comfort and safety of the finished layout.
When Should You Add Windbreaks and Lighting So Evening BBQs Stay Comfortable?
Plan wind protection and lighting at the same time as the grill, preparation surface and seating area. These features influence where the barbecue can be positioned, how smoke disperses and whether guests can remain comfortably seated after sunset. Adding them only after the kitchen is built can leave cables, lights or screens in inconvenient positions and may create new obstructions in an already tight patio.
Wind protection needs particular care around a barbecue. A screen may reduce discomfort in a seating area, but placing a barrier close to the grill can interfere with airflow or allow smoke to collect where people are sitting. The Scottish Fire and Rescue Service advises using a barbecue in a well-ventilated, open area. Do not enclose a barbecue or assume that a windbreak makes an otherwise unsuitable location safe. Follow the appliance manufacturer’s instructions for clearances and installation.
Consider the prevailing wind and observe how it behaves in the actual garden before deciding where to position a screen. A practical approach is to protect the seating area where possible without compromising the open space around the grill. The suitable arrangement will depend on the garden’s exposure, nearby walls and fences, the appliance and the local conditions.
Lighting also works best when it supports separate tasks rather than trying to illuminate everything with a single fixture. Three useful layers are:
- Task lighting: light the preparation surface and cooking controls so the host can handle food and equipment accurately.
- Ambient lighting: make the seating and dining area comfortable enough that guests have no need to gather around the grill.
- Path lighting: make routes between the house, cooking station and dining area easier to navigate after dark.
Outdoor electrical equipment needs appropriate protection from moisture and damage. Electrical Safety First recommends RCD protection for outdoor electrical equipment and using cables, connectors and extension leads suitable for outdoor conditions. Its garden electrical safety advice provides general precautions, not a specific outdoor-kitchen lighting design. Fixed wiring or new circuits should be assessed and installed by a suitably qualified professional.
In the UK, planning these elements early can make the patio more usable during evenings when daylight fades earlier or the weather is less settled. Warmth, shelter and lighting should nevertheless be treated as separate design decisions: a comfortable seating area must not compromise barbecue ventilation or electrical safety.
A final layout review should check where light falls, where people walk and whether the cook can see the work surface without glare. Test the arrangement in the conditions in which it will actually be used, rather than judging it only in daylight.
With the physical zones and environmental conditions accounted for, the remaining challenge is to keep food moving through the kitchen without reversing direction or creating a bottleneck when several people help.
How to Plan a Prep-to-Grill-to-Serve Flow That Matches Real Hosting Conditions?
A useful outdoor kitchen layout must work when the barbecue is busy, not just when the patio is empty. Plan the sequence so ingredients move from chilled storage to preparation, then to cooking and finally to serving, without finished food returning to a surface used for raw ingredients. Allow a second person to help without entering the cook’s main working space, and choose the serving position to suit the way guests will eat.
The basic route can be represented as four connected zones:
- Cold storage: keep raw ingredients covered and chilled until needed.
- Preparation: portion and season ingredients on a suitable, clean surface, separating raw food from ready-to-eat items.
- Cooking: keep the grill accessible, with the tools and ingredients needed for the current cooking stage close by.
- Serving: move cooked food onto a clean surface and use clean plates and utensils for food that is ready to eat.
This one-way sequence is a practical layout principle. It makes separation easier to maintain, but it does not guarantee food safety on its own. The UK Food Standards Agency recommends keeping raw meat separate from ready-to-eat food and using separate utensils, plates and chopping boards for raw and cooked food. Its BBQ food safety guidance also advises keeping food covered and chilled until it is needed.
Test the layout under realistic conditions. Consider a menu with several dishes cooking at different times: the cook may need to retrieve another ingredient while a helper prepares vegetables, and a guest may approach to collect a plate. The design should leave the cook room to work while allowing the helper to reach the preparation or serving zone without cutting across a hot grill or handling lane.
A second person needs a defined role and a route. For example, one person can manage the grill while another prepares garnishes and arranges plates at the serving station. A side-access route can make this possible without forcing the helper behind the cook. If the patio is too narrow for two people to pass safely, plan for one person to control the cooking area while the other works at a separate time or position.
Serving style changes the final zone. For a seated meal, a side counter near the dining table may be enough for plating and carrying dishes to guests. For buffet-style hosting, the serving station needs enough accessible space for platters and a queue that does not block the preparation route. In either case, drinks and snacks can remain in the social zone so guests do not need to approach the grill to help themselves.
Before finalising the design, rehearse the busiest moment, not just the first few minutes. Open storage, move a tray, let a helper pass and imagine a guest collecting food. If any of those movements blocks the grill or mixes raw and cooked handling, adjust the zone order or circulation route.
Hypothetical example: seated dinner versus buffet
For a seated dinner, the cook can transfer finished food to a clean side counter and carry plates to the table in batches. For a buffet, guests need to approach the serving table independently, so the table should be accessible without crossing the cook’s workspace. Both arrangements use the same cooking sequence but require different guest circulation.
These are illustrative layouts, not tested performance comparisons. Choose the arrangement that matches the gathering most likely to take place on the patio.
On particularly small patios, the next priority is to preserve that sequence without allowing chopping boards, seasonings and utensils to overwhelm the preparation surface.
How to Build a Two-Board Prep Station on a Small Patio Table Without Clutter?
A two-board preparation station gives a small patio table a clear division of responsibility: one board is reserved for raw meat, while the other is used for ready-to-eat ingredients such as washed vegetables, buns and garnishes. The boards should be easy to distinguish and positioned so that raw meat, its packaging and its utensils do not spill into the clean-food area. This arrangement supports safe handling without requiring a large outdoor worktop.
Place the raw-meat board on the side closest to the cold-storage area, so ingredients can be transferred directly to preparation. Put the ready-to-eat board towards the serving side, away from the raw-meat handling area. If possible, use clearly different colours or labels. The distinction should be obvious at a glance, even when the cook is distracted by the grill or conversation.
Keep the table itself reserved for tasks that genuinely need a flat surface. Move seasoning jars, spare tools and clean plates to a side caddy, stable side table or suitable wall hooks. This prevents the two working boards from becoming crowded by items that can be stored elsewhere. Make sure anything hung on a wall is securely supported and does not obstruct a walkway or sit within the grill’s required clearance.
Using one board for everything creates an avoidable risk. Chopping vegetables and then handling raw chicken on the same surface can transfer harmful bacteria to food that will not receive further cooking. Simply wiping the board between tasks should not be treated as an adequate substitute for proper separation and cleaning.
The two-board approach is consistent with the Food Standards Agency’s guidance on keeping raw meat separate from ready-to-eat food and using separate chopping boards and utensils. The exact board positions described here are practical layout recommendations, not a prescribed arrangement from the agency.
During cooking, keep raw-meat packaging and used utensils on the raw side until they can be handled and cleaned appropriately. When the raw-food stage is finished, remove the used board from the active preparation area. Wash and dry it properly before reuse, following appropriate food hygiene practices. Do not let a dirty board occupy the space needed for ready-to-eat food.
Hypothetical example: a compact table
Imagine a small patio table that can hold two cutting boards but little else. The raw-food board sits near the cooler, the clean-food board sits towards the serving side, and seasonings and spare utensils are stored in a separate caddy. A small bin handles packaging, while the clean serving plates remain away from the raw-food area.
The aim is not to fit more objects onto the table. It is to preserve two distinct working surfaces and make the next safe action obvious throughout the cooking session.
A compact station succeeds when its boundaries remain clear after the first ingredients have been prepared. Keep the surface free of unnecessary objects, use the same side for the same task and plan where used equipment goes before the table becomes busy.
The boards are only one part of safe preparation. Handwashing, chilled storage, clean utensils and sensible serving arrangements complete the system.
Key takeaways
- Use a dedicated raw-meat board and a separate ready-to-eat board, with a clear distinction that prevents accidental swapping.
- Design the station around handwashing, chilled storage and separate clean utensils rather than relying on the boards alone.
- Make the safe workflow the easiest workflow by positioning raw ingredients, cooked food and waste in clearly separated areas.
How to Set Up a Prep Station That Prevents Cross-Contamination at a BBQ?
A safer barbecue preparation station separates raw ingredients from ready-to-eat food, provides access to proper handwashing and keeps perishable ingredients chilled until they are needed. Separate boards and utensils are essential parts of the arrangement, but so are clean serving plates, suitable waste disposal and enough space to keep raw-food handling away from cooked food. The aim is to make safe choices straightforward, even when the cook is busy.
Start by identifying the clean and raw sides of the station. Store raw meat separately from ready-to-eat ingredients, keep food covered and chilled until preparation is needed, and use separate chopping boards, utensils and plates for raw and cooked food. Arrange the worktop so that ingredients move towards the grill and finished food moves to a clean serving area without returning to the raw preparation surface.
Handwashing access needs to be planned rather than improvised at the last moment. A properly equipped washing facility is preferable. Where there is no outdoor sink, consider how the cook can reach an appropriate handwashing facility without handling doors, tools or serving equipment with contaminated hands. A jug of water and soap can be a practical supplementary arrangement in some settings, but it should not automatically be assumed to provide the same facilities or effectiveness as a suitable handwashing station.
Keep dedicated utensils for raw and cooked food. Tongs that have touched raw meat should not be used to handle cooked food unless they have been properly cleaned. Do not reuse a plate that held raw burgers for the cooked burgers, and do not pour marinade that has contacted raw meat over cooked food unless it has been handled safely according to appropriate food safety guidance. Raw chicken and other raw meat should not be washed, because splashing can spread harmful bacteria.
Temperature and timing matter outdoors. Keep perishable food chilled and covered until needed, and avoid leaving it exposed on a sunny table while guests arrive. The station should include a suitable cooler or refrigerator where needed, with clean serving dishes protected from contamination. Position waste collection close enough to be convenient, but not where it crowds the clean preparation surface.
Guest behaviour also affects the arrangement. Children may touch serving utensils after playing, and guests moving between pets, garden activities and the buffet may introduce contamination. Make the serving area easy to understand and avoid inviting guests to reach over the raw-food preparation space. If a helper is involved, assign separate responsibilities and make clean utensils readily available.
Use a short pre-barbecue check to verify that the station is ready before guests arrive. Confirm that raw and ready-to-eat food have separate surfaces, clean utensils and serving plates are available, chilled items can remain cold, and handwashing and waste arrangements are in place. The Food Standards Agency’s barbecue guidance provides the underlying food hygiene recommendations; the station checklist is a practical way to organise them, not a separate official standard.
Before the next barbecue, walk through the station as though cooking has already begun: check that you can wash your hands, handle raw ingredients, reach the grill and serve cooked food without crossing contaminated surfaces. Adjust the layout where the safe route is inconvenient, and keep the final arrangement simple enough to follow throughout the gathering.
How much space do you need for an outdoor kitchen on a small UK patio?
There is no single minimum footprint suitable for every outdoor kitchen. Start with the patio’s usable dimensions, the grill manufacturer’s clearance requirements, the space needed to open equipment and the route people use to move around. A compact arrangement with a grill, separate preparation surface and nearby serving area can be more practical than a larger installation that blocks circulation.
Should the outdoor kitchen be next to the house or at the far end of the garden?
Position the kitchen where it offers a workable balance of access, ventilation, safety and guest circulation. A location closer to the house may reduce journeys for supplies, but doors and through-traffic must not obstruct the cooking area. A more distant position can work if cold storage, preparation, water access and waste facilities are planned accordingly. Always follow the grill manufacturer’s installation and clearance instructions.
Is a modular outdoor kitchen better than a built-in kitchen in the UK?
Modular units offer flexibility when space is limited or the layout may change. Built-in kitchens suit a settled arrangement where permanent worktops and storage justify the commitment. Both require weather-appropriate materials, drainage and maintenance. Consider how the equipment will be protected in winter and check applicable planning and installation requirements before construction.
How can you stop guests gathering directly around the barbecue?
Create a dedicated social area with seating, drinks and a clear view of the cook. Put the serving station somewhere guests can approach without blocking the grill, and keep the route between the house and dining area outside the main cooking workspace. Children and pets should be kept away from the barbecue, which must remain supervised whenever it is lit.
What is the safest way to prepare raw meat outdoors?
Keep raw meat separate from ready-to-eat food, use separate chopping boards, utensils and plates, and wash hands thoroughly with soap and warm water after handling raw meat. Keep perishable food covered and chilled until needed, and never wash raw chicken because splashing can spread harmful bacteria. Consult the UK Food Standards Agency’s barbecue food safety guidance for further preparation, cooking and serving recommendations.