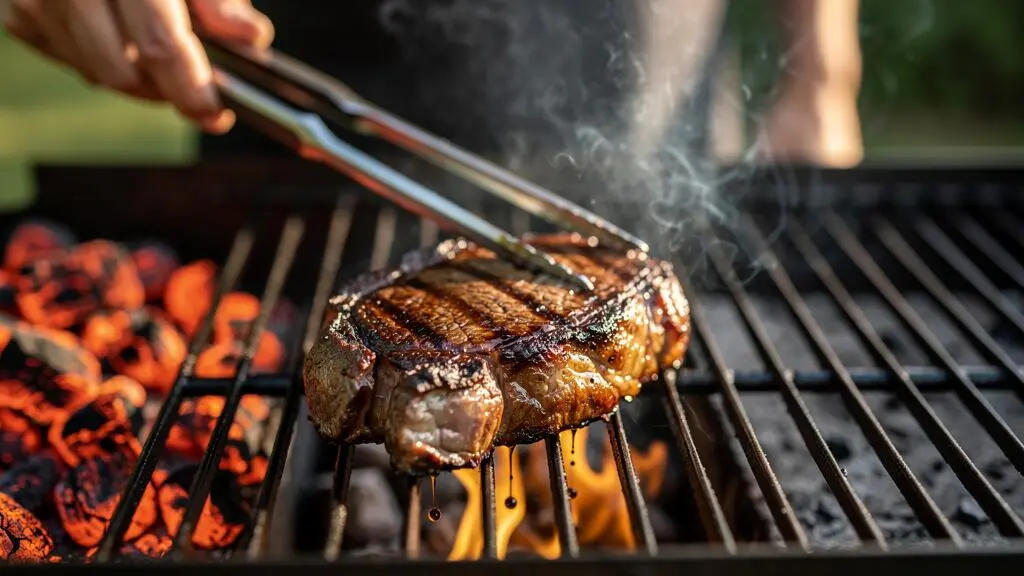
A grill that runs hot can produce an impressive crust, but it can also turn a beautifully browned steak, chicken thigh or vegetable into a bitter, blackened mess before the centre is cooked. The solution is not automatically to lower the heat or leave food on the grate for longer. It is to control the condition of the surface, the intensity of direct contact and the moment you move food away from the hottest part of the grill.
Deep browning develops when surface moisture has evaporated sufficiently for the temperature to rise and browning reactions to accelerate. Once that process begins, the margin between a rich brown crust and burnt patches can be surprisingly narrow. Added sugars, excess oil, flare-ups and dirty grates make the problem harder to control.
The most reliable approach combines a thoroughly preheated, clean cooking surface with dry food, a thin film of suitable oil and a two-zone fire. Let the crust develop until the food releases naturally, then finish over indirect heat if the centre needs more time. Sweet glazes belong near the end, not throughout the entire cook.
The essentials for a better grilled crust
- Pat food dry, preheat the grill thoroughly and start with clean grates so the surface can brown efficiently.
- Apply a thin film of high-heat cooking oil to the food, avoiding excess oil that drips onto the flames.
- Move food to indirect heat as soon as the crust is dark enough, and check internal doneness with a thermometer.
- Why Does Food Burn Before It Develops a Deep Brown Crust?
- How to Prep the Surface So Browning Starts in 60 Seconds Instead of 3 Minutes?
- Oil the Food or Oil the Grates: Which Gives Better Browning With Less Sticking?
- The Sugary-Marinade Mistake That Turns “Caramelised” Into Burnt in 2 Minutes
- When Should You Move Food Off Direct Heat to Finish Without Losing the Crust?
- How to Preheat and Oil Cast-Iron Grates in 10 Minutes Without Creating Sticky Build-Up?
- How to Time Your First Flip to Get Sear Marks Without Overcooking the Centre?
- How to Get Dark Sear Marks in 90 Seconds Without Tearing the Meat
Why Does Food Burn Before It Develops a Deep Brown Crust?
Food can burn before developing a deep brown crust because the surface is still releasing moisture while intense heat continues to arrive. The water initially limits the surface temperature, delaying efficient browning. Once enough moisture evaporates, the surface can brown rapidly, but the same high heat can quickly push exposed areas into charring. A hot grill therefore demands better surface preparation and closer attention, not simply more heat.
The key distinction is between the **Maillard reaction**, which produces many of the savoury aromas and brown compounds associated with grilled meat, and the thermal breakdown of sugars and other food components that contributes to caramelisation and eventually charring. These processes are related to heat but are not interchangeable. Meat browning is not simply sugar caramelising, and blackened food is not necessarily more flavourful than deeply browned food.
A wet steak illustrates the problem. Heat first evaporates the moisture on its surface. During this period, the steak may release steam and cook without developing the crust you want. When the surface finally dries, browning accelerates. On a grill with intense radiant heat and very hot metal, the exposed edges can progress from brown to burnt before the centre has received enough heat.
That window is affected by several variables:
- Surface moisture: wet food takes longer to develop a dry, browning surface.
- Heat intensity: hotter grates and strong radiant heat accelerate surface changes.
- Added sugars: honey, sweet marinades and barbecue sauces can darken much faster than an unsweetened surface.
- Fat and drippings: flare-ups can char one area almost instantly without evenly browning the rest.
Use visual and sensory cues rather than relying only on elapsed time. A rich brown surface, a firm crust and thin wisps of smoke are generally preferable to spreading black patches and thick, acrid smoke. Flames licking the food signal a different problem from simple contact browning: move it away from the flare-up rather than allowing the flames to continue.
The practical objective is to control how quickly the surface passes through the browning stage. A thoroughly heated, clean grate and a cooler finishing zone give you more control over that transition.
Once the cause is clear, the next step is to prepare the food so the surface begins browning sooner, reducing the time it spends exposed to intense heat without a crust.
How to Prep the Surface So Browning Starts in 60 Seconds Instead of 3 Minutes?
The fastest way to encourage browning is to remove excess surface moisture before the food reaches the grill. Pat meat and vegetables dry with paper towels, avoid placing wet food directly onto the hottest grates, and allow sufficient time for the cooking surface to preheat. A dry surface can brown sooner than a wet one, although no preparation method guarantees a crust within exactly 60 seconds; thickness, temperature, grill design and food composition all affect the result.
Start by blotting the food thoroughly, including creases and the underside. Do not leave wet marinade pooled on the surface. For steaks and other suitable cuts, uncovered refrigeration can help dry the exterior, provided the food is stored safely and protected from cross-contamination. Vegetables benefit from being drained and dried after washing, especially if they are cut into pieces with many exposed surfaces.
Salting requires a little planning. When you have enough lead time, salt meat in advance and allow the moisture drawn to the surface to be reabsorbed or evaporate under appropriate refrigeration. The exact timing depends on the cut and its thickness. If cooking immediately, pat away visible moisture before grilling rather than leaving wet salt brine on the surface.
The choice is therefore straightforward:
- Preparing ahead: salt suitable cuts in advance, refrigerate safely and dry the exterior before grilling.
- Cooking immediately: pat the food dry, season and transfer it promptly to the preheated grill.
- Using a wet marinade: remove excess liquid and assess whether its ingredients include sugar that could burn.
- Cooking thin or delicate food: balance rapid browning with the need to avoid drying or overcooking the interior.
Sugar changes the objective. A honey-based marinade or sweet barbecue sauce can brown rapidly, so drying alone will not solve the problem. Remove excess coating where appropriate and reserve additional sweet glaze for the final stage of cooking. The goal is to control the timing of browning, not to force every ingredient to brown at the same rate.
Also distinguish a dry surface from an entirely fat-free surface. A thin coating of oil can promote contact and help reduce sticking, whereas visible water delays browning. The ideal starting point is dry to the touch, evenly seasoned and lightly oiled when the recipe calls for it.
With moisture under control, the next decision is how to apply oil: directly to the food, to the grate, or to both in small amounts for different purposes.
Oil the Food or Oil the Grates: Which Gives Better Browning With Less Sticking?
Oiling the food is generally the more direct way to apply a thin, even coating to the surface that needs to brown. Oiling the grates can help reduce sticking, but it does not distribute oil across the food as reliably. For a hot grill, lightly oiling the food is a practical starting point, while a properly cleaned and preheated grate helps with release. Neither method requires a thick layer of oil, and combining them should be done sparingly.
Oil helps make contact between the food and hot metal more effective, including across small surface irregularities. It can also improve the evenness of browning and reduce the chance that a forming crust will adhere to the grate. However, oil does not eliminate the need for a dry surface, sufficient preheating or a properly timed flip.
Choose an oil suitable for the temperatures involved. Neutral oils with a relatively high smoke point are useful for high-heat grilling, but smoke point alone does not guarantee that an oil will remain flavour-neutral indefinitely. At extreme temperatures, oil can degrade, smoke and contribute bitter flavours.
Apply it in a controlled layer:
- Blot away visible moisture from the food.
- Apply a small amount of suitable cooking oil to the food’s surface.
- Spread it into a thin, even film, using a brush or another appropriate method.
- Check that the grate is clean and properly preheated before adding the food.
- Avoid pouring oil directly onto the grill or allowing excess oil to run onto the heat source.
The distinction between a thin coating and a pool matters. Excess oil can run off the food, drip onto coals or burners, and trigger flare-ups. Those flames can char the underside before the rest of the surface develops an even crust. If flames rise repeatedly, move the food to a safer zone, reduce excess dripping and check whether the fire needs to be adjusted.
For additional practical guidance on preheating, cleaning and oiling, consult Weber’s Canadian grilling basics. Its recommendations are manufacturer guidance rather than a controlled comparison proving that one oiling method is always superior.
Oil controls contact and sticking, but it cannot compensate for sugar exposed to intense heat too early. Sweet marinades and glazes need their own timing strategy.
The Sugary-Marinade Mistake That Turns “Caramelised” Into Burnt in 2 Minutes
Sweet marinades and glazes can burn before the interior of the food is cooked because added sugars darken and eventually char under intense heat. Honey, brown sugar and many barbecue sauces can produce attractive colour quickly, but their presence makes the surface less forgiving. On a grill that runs hot, apply sweet glaze in thin layers near the end of cooking rather than exposing a heavily coated surface to direct heat for the entire grilling period.
The key is to distinguish flavour development from the cooking of the food itself. A savoury marinade without substantial added sugar can be used earlier if the recipe and food-safety requirements allow it. A sweet coating behaves differently: the sugars can darken rapidly, particularly on a very hot grate or near an active flame.
A practical sequence is:
- Marinate the food in advance if desired, using a marinade appropriate to the recipe.
- Before grilling, remove excess liquid and check for sticky, sugary residue on the surface.
- Cook over direct heat only while the exterior can tolerate it without charring.
- Brush on a thin layer of sweet glaze near the end, then monitor the surface closely.
- If the glaze darkens too quickly, move the food to indirect heat rather than trying to rescue it by continuing over the flames.
There is no universal safe glazing interval for every food or grill. The operating manual for Weber’s Q140 and Q240 electric grills recommends applying high-sugar marinades, sauces and glazes during the final 10 to 15 minutes of grilling. That interval is specific to the equipment covered by the manual, not a fixed rule for every charcoal grill, gas barbecue or thin cut of meat. On a much hotter grill, the appropriate finishing window may be shorter.
If the outside is already blackening while the centre remains undercooked, transfer the food to indirect heat immediately. Avoid scraping away the entire crust: remove only heavily blackened patches when necessary, preserving the properly browned surface.
Sugary drips also create a maintenance problem. They can carbonise on the grates, leaving residue that contributes to sticking and unpleasant smoke during later cooks. Cleaning after grilling is therefore part of preventing the next burnt crust.
Once the exterior reaches the desired colour, the next decision is how to finish the centre without exposing that crust to another prolonged burst of direct heat.
When Should You Move Food Off Direct Heat to Finish Without Losing the Crust?
Move food off direct heat when the crust has reached the desired colour but the centre still needs cooking. This is the point at which continued exposure to the hottest grate becomes a liability: the exterior can char while the interior catches up. A two-zone grill lets you preserve the browned surface by finishing the food over indirect heat, where it receives gentler heat without the same intensity of direct flame or radiant exposure.
Set up the grill with a hot zone for searing and a cooler zone for finishing. On a gas grill, this usually means concentrating the active burners on one side and leaving another area without direct burner heat, subject to the manufacturer’s instructions. On a charcoal grill, arrange the coals to create a hot area and a separate area with little or no charcoal directly underneath.
Use the zones according to what the food is telling you:
- Deep brown crust, centre not ready: move to indirect heat and continue cooking.
- Blackening patches or persistent flare-ups: move immediately, then assess the surface and fire.
- Thin food already cooked through: remove it rather than leaving it on the grill unnecessarily.
- Sweet glaze darkening rapidly: finish away from the hottest direct contact and monitor closely.
Do not wrap freshly seared food tightly in foil simply to finish the cooking. Trapped steam can soften the crust you have just created. Resting on a suitable warm rack or holding the food in a controlled indirect zone is often more effective when preserving a dry exterior is the priority.
For operational guidance on a gas barbecue, see Weber’s guidance on direct and indirect gas grilling. It describes searing before moving food to a moderate or indirect zone and recommends checking internal temperature rather than relying exclusively on a timer. Its instructions should be interpreted in the context of the grill configuration described.
A thermometer is essential because crust colour cannot establish that meat is safely cooked. Insert a fast-read thermometer through the side of a steak or into the thickest part of the food, avoiding contact with bone where relevant. USDA guidance specifies 145°F (62.8°C) followed by at least a three-minute rest for whole cuts of beef, pork, lamb and veal; 160°F (71.1°C) for ground meats; and 165°F (73.9°C) for poultry. Follow the appropriate food-category guidance for the food being cooked.
Your five-step crust-control checklist
- Dry the food and prepare the surface. Deliverable: food that is visibly free of excess moisture before oiling.
- Preheat and clean the cooking surface. Deliverable: hot, clean grates ready for the first piece of food.
- Apply oil sparingly and inspect the fire. Deliverable: a thin, even film with no pooled oil or unnecessary drips.
- Establish a two-zone setup and identify the finishing area. Deliverable: a clear route away from direct heat before the crust begins to char.
- Check the centre with a thermometer before serving. Deliverable: a recorded internal temperature appropriate to the food category.
That two-zone approach becomes especially useful when the cooking surface is cast iron, which can retain substantial heat and reward careful preheating and maintenance.
Key takeaways
- Heat management starts before the food touches the grate: clean, thoroughly preheated cast iron gives you a more predictable contact surface.
- Avoid heavy oiling and remove sugary residue so sticking, sticky deposits and flare-ups do not undermine the crust.
- Use release, colour and internal temperature together to decide when to flip, move or remove the food.
How to Preheat and Oil Cast-Iron Grates in 10 Minutes Without Creating Sticky Build-Up?
To prepare cast-iron grates, preheat them thoroughly, clean away old residue and apply only a very thin layer of suitable cooking oil when needed. Oiling cold or dirty grates can leave a sticky film rather than a clean, seasoned surface. Ten minutes may be sufficient for some setups, but it is not a universal preheating guarantee: grill design, fuel, weather and starting temperature all affect how quickly the metal becomes ready for cooking.
Start by checking the grate manufacturer’s instructions and the grill’s normal preheating procedure. The Weber Canadian guidance recommends preheating for at least 15 minutes and cleaning the hot grate before cooking. That is a general recommendation from the manufacturer, so a shorter interval should not be assumed sufficient simply because the clock reaches ten minutes.
Once the grates are hot enough for the intended cook, brush off loose residue with an appropriate grill-cleaning tool. If the grates need oiling, use a folded paper towel held securely with long tongs to wipe on a minimal film. Never use your hand to oil hot grates, and avoid allowing the towel or excess oil to contact flames or hot burners.
Sticky build-up usually develops when layers of oil and food residue accumulate over time. Repeatedly adding more oil to partially cleaned grates does not solve the underlying problem. Instead, remove residue, apply oil sparingly and carry out deeper cleaning when the condition of the grate requires it.
Cast iron is useful for high-heat searing because it retains heat well. However, it does not eliminate temperature fluctuations or guarantee uniform browning. A cold steak can still reduce local surface temperature, and the food’s moisture, thickness and contact area continue to influence crust development.
Routine cleaning and re-seasoning are different tasks. Routine cleaning removes cooking residue after use; seasoning maintains a protective surface layer when needed. Not every clean requires a fresh seasoning treatment, and applying excessive oil during maintenance can create gummy deposits.
With the grates ready, the remaining challenge is timing the first flip. The aim is to let the crust set without leaving the food over direct heat longer than necessary.
How to Time Your First Flip to Get Sear Marks Without Overcooking the Centre?
Flip food when the first side has developed enough browning to release from the grate with little resistance. On a hot grill, repeatedly turning a piece of food before the surface has set can interrupt contact and tear the forming crust. However, a single flip is not a universal rule: thin cuts, small vegetables and foods that cook very quickly may need a different approach. Use colour, release and internal progress together rather than following a fixed timer.
Place the food deliberately on the hottest suitable part of the grate. Avoid moving it repeatedly during the initial contact period, and watch the edges for signs of deepening colour. When the surface has browned and the food lifts cleanly, turn it with tongs or a spatula rather than scraping it across the metal.
The release test is especially useful for steaks and other pieces that form a distinct crust. If the food sticks firmly, the surface may not have set yet. Give it a little more time if the colour and heat conditions remain safe, but do not force the release when the underside is already turning black. If burning is imminent, move the food away from direct heat rather than waiting for a perfect release.
The first flip is also an opportunity to reassess the balance between surface colour and internal doneness. If the underside is deeply browned but the centre remains far from ready, turn the food and then finish over indirect heat as needed. Continuing to sear both sides aggressively can produce a dark exterior before the interior is cooked.
Thin cuts behave differently. Smash burgers, thin steaks and small vegetable slices can brown so quickly that seconds matter more than the normal release sequence. Their limited thickness leaves little room for prolonged direct heat, so prepare the surface in advance and watch continuously.
Avoid treating timing estimates as promises. Grate temperature, thickness, surface moisture, oil and the type of food all change how quickly browning develops. A timer is a useful reminder, but it cannot replace observation.
Once the food releases reliably, the same principles can be used to create more defined, darker sear marks through deliberate placement and controlled contact with the hottest parts of the grate.
How to Get Dark Sear Marks in 90 Seconds Without Tearing the Meat
Dark, defined sear marks form where food makes direct contact with sufficiently hot metal. To create them, position the food deliberately on clean, preheated grates, keep the surface dry and lightly oiled, and leave it undisturbed until the crust has developed. Ninety seconds is a possible target for some foods and grills, not a universal cooking time. If the surface is charring before it releases, move the food or reduce its exposure to the hottest zone.
Start with a clean grate and identify the hottest usable area. Place the steak at a deliberate angle to the bars if you want diagonal marks. Make sure the food lies flat enough for consistent contact; a piece that rocks or rests only on a small edge may develop uneven stripes.
Gentle, brief pressure can help improve contact on an uneven surface, but pressing hard is not a substitute for preparation. Excessive pressure can squeeze juices from some foods, while repeated repositioning disrupts the contact needed to develop distinct marks. Once the food is in place, allow the surface to brown until it releases naturally.
To create a cross-hatch pattern, rotate the food approximately 90 degrees during the first-side cooking period, provided the surface is browning evenly and is not close to burning. This introduces a second contact orientation. The rotation should be deliberate rather than repeated, and it should never take priority over controlling excessive heat.
When the crust is ready, lift the food straight up with suitable tongs or a spatula. Avoid dragging it along the grate, which can tear the browned surface and spoil the marks. If it does not release easily, reassess the colour, heat and risk of charring before deciding whether to wait or move it.
The best result is not the darkest possible stripe but a well-browned, intact crust that complements a properly cooked centre. Let the food’s appearance guide the sear, then use indirect heat and a thermometer to finish the cook with confidence.
Should the grill be as hot as possible for the best crust?
No. The goal is sufficient heat for rapid browning without allowing the surface to char before the centre cooks. A hot, clean grate is useful, but an excessively intense flame, flare-up or sugary coating can burn the exterior. A two-zone setup provides a hot searing area and a cooler finishing area.
Why does my steak stick even when the grill is hot?
Sticking can result from a grate that is not clean, inadequate preheating, excess surface moisture or an attempt to flip before the crust has set. Pat the steak dry, apply a thin film of suitable oil and allow the surface to brown. Lift gently when it releases rather than pulling it away from the metal.
Can I get a good crust without using oil?
Yes, depending on the food and the condition of the grill. Some foods contain enough natural fat to brown well, and a clean, properly heated grate can support good contact. A thin film of oil can improve surface coverage and help reduce sticking, but excessive oil is unnecessary and may contribute to flare-ups.
How can I stop barbecue sauce from burning before the meat is ready?
Cook the meat before adding the sweet sauce, then brush on a thin layer near the end. If the sauce begins blackening while the centre remains undercooked, move the food to indirect heat and check the internal temperature. Avoid leaving thick, sugary coatings over intense direct heat throughout the cook.
Are dark sear marks proof that meat is safely cooked?
No. Sear marks describe the exterior, not the temperature at the centre. Use a food thermometer and follow the appropriate food-safety recommendations for the specific meat and preparation. Poultry, ground meat and whole cuts have different recommended internal temperatures, so appearance alone is not a reliable safety check.