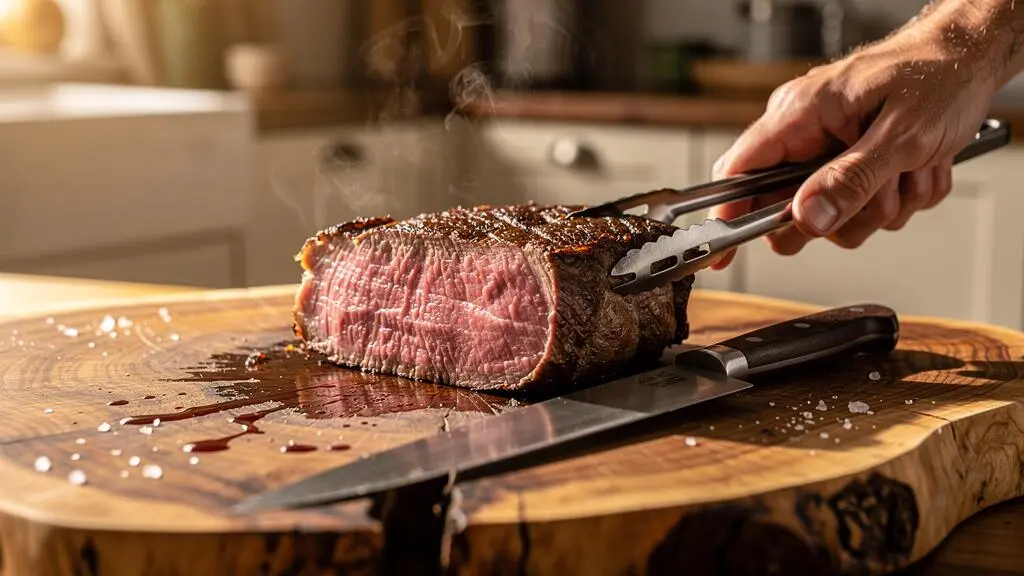
A thick steak presents two competing demands: the centre needs enough time to reach the desired doneness, while the outside needs intense heat to develop a deeply browned crust. Apply high heat for too long at the beginning, and the meat surrounding the centre can become grey, dry and overcooked before the middle is ready. Sear too briefly or on an insufficiently hot surface, and the steak may reach the correct internal temperature without developing the crust that makes the finished result satisfying.
**Reverse searing solves this problem by changing the order of cooking.** Instead of searing first and finishing over gentler heat, cook the steak slowly in a low-temperature oven or over indirect grill heat, then finish it over very high heat. A thermometer controls the first stage, while a dry surface and a properly preheated cooking surface make the final sear efficient.
For UK home cooks working with ribeye, sirloin or another thick cut, the method is particularly useful when the steak is around 4–5 cm thick or more. It is not a guarantee of a perfectly uniform interior, but it offers a practical way to reduce overcooked outer layers without sacrificing crust quality. The result depends on steak thickness, starting temperature, oven accuracy, surface moisture and the intensity of the final sear.
The reverse-sear method at a glance
- Cook thick steaks gently over indirect heat until the centre is a few degrees below the intended final temperature.
- Use a wire rack, advance salting and thorough surface drying to encourage rapid browning.
- Finish on a very hot pan or grill, turning as needed and checking internal temperature rather than relying on a universal cooking time.
- Why Does Reverse Searing Reduce Grey Bands on Steaks Over 4 cm Thick?
- How to Reverse-Sear Using an Oven First Without Missing Your Searing Window?
- Reverse Sear or Sous Vide: Which Gives a Better Crust on a 5 cm Ribeye?
- The Not-Hot-Enough Sear Mistake That Dries Out Steak in Minutes
- When Should You Rest Before the Sear to Get Better Browning in Under 90 Seconds?
- How to Prep the Surface So Browning Starts in 60 Seconds Instead of 3 Minutes?
- How to Time Your First Flip to Get Sear Marks Without Overcooking the Centre?
- How to Get Dark Sear Marks in 90 Seconds Without Tearing the Meat
Why Does Reverse Searing Reduce Grey Bands on Steaks Over 4 cm Thick?
Reverse searing reduces grey bands because the steak’s centre heats gradually before the exterior is exposed to intense direct heat. This limits the temperature difference between the outside and the middle, leaving less meat overcooked by the time the crust develops. The benefit becomes more noticeable with thick cuts, although no method can guarantee the complete elimination of grey bands.
The reason lies in how heat moves through meat. During conventional pan-searing, the surface receives intense heat while the centre remains relatively cool. To bring the middle to the target temperature, the outside must endure that heat for longer. The result is a gradient: a deeply browned crust, a grey-brown layer of more thoroughly cooked meat and, potentially, a pink centre.
Reverse searing changes that gradient before the crust forms. Gentle, sustained heating gives the centre time to warm while avoiding the extreme surface temperatures associated with direct searing. When the steak finally reaches the pan or grill, it needs only a short finishing stage to develop colour and flavour.
ThermoWorks illustrates this principle in its reverse-sear thermal principles and ribeye instructions, which describe how gentle early cooking helps keep exterior-to-interior temperature gradients relatively mild. Its guidance supports thermometer-led cooking, rather than a fixed schedule intended to work for every steak.
**Thickness is the practical deciding factor.** A steak around 4 cm thick or more gives heat a longer path to travel from the surface to the centre. Reverse searing becomes increasingly useful as that distance grows. For thinner steaks, the centre heats quickly enough that the additional low-temperature stage may offer little practical advantage.
Measure the steak at its thickest point before cooking. A 5 cm ribeye is a strong candidate; a much thinner steak may be better served by a conventional hot-pan method. Thickness is a useful guide, not a scientifically established universal cutoff.
The term *edge-to-edge doneness* also needs qualification. Reverse searing can narrow the overcooked band, but the final result still depends on the oven temperature, the accuracy of the thermometer, the duration of the sear and how dry the steak is when it reaches the heat. A prolonged or uneven final sear can recreate the very problem the first stage was intended to prevent.
The practical objective is therefore **a narrow overcooked perimeter, not a promise of zero grey meat**. A thin band can remain, particularly around areas exposed to concentrated heat. What matters is controlling the full cooking process rather than judging success by colour alone.
Once thickness makes reverse searing worthwhile, the next challenge is timing: the steak must leave the low-temperature stage at the right moment, with the finishing equipment already prepared.
How to Reverse-Sear Using an Oven First Without Missing Your Searing Window?
To reverse-sear a thick steak in an oven, cook it on a wire rack until its centre is a few degrees below the intended finishing temperature, then transfer it to a thoroughly preheated pan or grill for a short, intense sear. Prepare the finishing surface before the oven stage ends. A thermometer, not a generic cooking-time chart, should determine when the steak is ready to come out.
The central operational mistake is treating the oven and searing stages as separate tasks. If the steak is ready but the pan is still cold, the delay adds uncertainty. The surface may become moist, the centre may cool, and the cook may compensate with a longer sear that raises the internal temperature too far.
A better sequence is to prepare the entire finishing stage while the steak cooks gently.
First, preheat the oven to a low temperature. An oven setting around 100–110 °C is a practical starting point for reverse searing, although individual ovens vary. Place the steak on a wire rack over a rimmed baking tray so hot air can circulate around the meat. Insert an oven-safe probe into the thickest part of the steak, avoiding large pockets of fat or contact with bone.
ThermoWorks describes an approximately 104°C cooking environment for its reverse-seared ribeye technique and recommends monitoring the centre with a probe. Its suggested temperature differences are useful practical guidance, not universal thresholds that override the conditions of a particular steak.
For a medium-rare finish, an illustrative approach is to remove the steak from the low-temperature stage several degrees below the desired final internal temperature. The exact removal point depends on how aggressively the finishing surface heats the meat. A longer or hotter sear may add more heat than a brief finishing pass.
Do not assume that the oven’s displayed temperature is exact. Domestic thermostats cycle, and the temperature inside the oven can fluctuate. A wired probe with an alarm makes it possible to follow the centre without repeatedly opening the door. The alarm is a prompt to check, not a substitute for verifying the actual temperature.
The most useful timing principle is to **preheat the searing surface before the steak reaches its target oven temperature**. During the final part of the oven stage, prepare the oil, tongs and thermometer. For a grill, establish a hot direct zone and a cooler indirect zone before moving the steak.
There is no universal five- or ten-minute window in which every steak must be seared. ThermoWorks describes resting between the two stages for as long as an hour, demonstrating that an immediate sear is not an absolute requirement. What matters is the steak’s actual temperature, the condition of its surface and whether the finishing equipment is ready.
Five checks before the steak reaches the pan
- Measure the steak’s thickness and record the cut. This establishes the starting point for the cooking method.
- Insert a probe into the thickest part of the meat. Confirm that the tip is positioned in the centre rather than against bone or fat.
- Set the oven to a low temperature and place the steak on a wire rack over a tray. The rack and tray should be ready before cooking starts.
- Prepare the finishing surface, oil, tongs and instant-read thermometer before the oven stage ends. The pan or grill should be hot when the steak is ready.
- Record the centre temperature at removal and again after searing. These readings show whether the finishing stage is adding more heat than intended.
Once the oven and finishing surface are coordinated, the remaining choice is whether oven-based reverse searing offers the best balance of crust, precision and convenience compared with sous vide.
Reverse Sear or Sous Vide: Which Gives a Better Crust on a 5 cm Ribeye?
For a 5 cm ribeye, reverse searing and sous vide can both deliver a relatively even centre, but neither automatically produces the better crust. Reverse searing is convenient when an oven and a hot pan or grill are available. Sous vide offers controlled water-bath cooking but requires thorough drying before finishing. The better choice depends on equipment, preparation time and how much precision matters.
Reverse searing uses gentle dry heat to warm the steak before a high-temperature finish. As the meat sits on a rack, its surface can lose moisture during the cooking stage. That helps the final sear, although the surface should still be checked and dried if necessary.
Sous vide takes a different route. The steak is sealed in a bag and cooked in a temperature-controlled water bath. The water bath allows the cook to set the cooking temperature directly, which is particularly useful when consistency across the centre is the priority.
The trade-off appears when the steak leaves the bag. Its surface is typically wet, and water interferes with browning because energy must first evaporate that moisture. Anova Culinary‘s sous-vide steak cooking and finishing instructions recommend drying both sides thoroughly before transferring the meat to a very hot pan or grill. Its example finishing times depend on equipment and conditions; they are not a universal guarantee of a dark crust within 90 seconds.
The following comparison focuses on practical differences rather than declaring a universal winner.
| Criterion | Reverse sear | Sous vide |
|---|---|---|
| Cooking equipment | Oven or indirect grill, plus a hot finishing surface | Temperature-controlled water bath, plus a hot finishing surface |
| Centre temperature | Controlled with a probe and careful removal timing | Controlled by the water-bath setting and appropriate cooking duration |
| Surface before searing | Often relatively dry after cooking on a rack; check before finishing | Must be dried thoroughly after removal from the bag |
| Timing flexibility | Depends on the oven stage and desired finishing temperature | Offers flexibility in scheduling, within appropriate time and food-safety limits |
| Final crust | Depends on surface dryness and the intensity of the sear | Depends on thorough drying and the intensity of the sear |
| Fat and flare-ups | Manage dripping fat with direct and indirect grill zones | Manage dripping fat in the same way when finishing on a grill |
A 5 cm ribeye adds another consideration: marbling. Intramuscular fat contributes to the eating experience, but fat rendered during a high-heat finish can drip onto the flames of a gas grill. A sudden flare-up can scorch the crust before the desired browning develops. Keep a cooler zone available and move the steak away from excessive flames.
For a home cook with an oven, a probe thermometer and a heavy skillet, reverse searing is a practical starting choice. For someone who already owns a circulator and prioritises controlled centre temperature, sous vide may be more convenient. Both still require careful finishing.
The finishing stage matters whichever cooking method comes first. If the pan or grill is not hot enough, the cook can undo much of the benefit of the gentle initial phase.
The Not-Hot-Enough Sear Mistake That Dries Out Steak in Minutes
A pan or grill that is not hot enough can produce a dry steak even when the centre reaches the intended temperature. The surface browns too slowly, so the cook leaves the meat in contact with the heat for longer. During that extended sear, heat continues travelling towards the centre and enlarges the overcooked band. The solution is a sufficiently hot, well-prepared surface rather than a longer finishing time.
Browning is not instantaneous. The surface must become hot enough for the reactions responsible for the characteristic brown colour and roasted flavour to proceed efficiently. If moisture remains on the meat, energy is also consumed evaporating water. A cool cooking surface and a wet steak therefore compound each other’s disadvantages.
The practical result is familiar: the steak is cooked through, but the exterior remains pale, patchy or grey rather than developing a distinct brown crust. The cook leaves it in the pan, hoping that another minute will solve the problem. The centre continues to heat while the surface still struggles to brown evenly.
Before adding the steak, preheat the pan thoroughly. A heavy cast-iron skillet is useful because it can maintain substantial heat during contact with the meat. Use a small amount of an appropriate high-smoke-point oil, and avoid pouring water onto a hot cooking surface as a temperature test.
Oil provides a practical visual cue. Depending on the oil, a faint shimmer or the first wisps of smoke can indicate that it is hot. Smoke alone is not a precise temperature measurement, and the absence of smoke does not establish that a surface is too cool. Never leave smoking oil unattended.
For a gas grill, preheat the grates and create distinct direct and indirect cooking zones. The direct zone develops the crust; the indirect zone gives the cook somewhere to move the steak if the flames become excessive. This is particularly important with heavily marbled ribeye.
The opposite mistake is to chase maximum heat without controlling the flames. Excessive direct flame can blacken fat and surface proteins before a balanced brown crust forms. Dark brown is not the same as carbonised black. If the steak is charring in isolated patches, move it away from the flame or reduce the direct exposure instead of continuing to burn the same area.
The useful diagnostic is to assess the entire chain: Is the steak dry? Is the pan or grill properly preheated? Is the contact surface clean? Is the crust actually forming? If the surface remains pale, adding more cooking time without addressing these conditions is unlikely to improve the result.
Once the heat is right, the next opportunity to improve the result comes between the gentle cooking stage and the final sear, when the surface can dry while the pan or grill heats.
When Should You Rest Before the Sear to Get Better Browning in Under 90 Seconds?
After the low-temperature cooking stage, place the steak on a wire rack and use the interval before searing to let surface moisture dissipate while the pan or grill reaches full heat. A short pause can help, but there is no universal resting time that guarantees a brown crust in under 90 seconds. The outcome depends on surface dryness, steak thickness and the power of the finishing heat.
The purpose of this pause differs from the familiar rest after cooking. Here, the aim is not simply to let a finished steak settle before serving. It is to prepare the surface for the final high-heat stage without unnecessarily extending the cooking time.
A wire rack is preferable to a flat plate during this interval because it allows air to circulate around the steak and prevents moisture from pooling underneath. A tray can catch drips, but the meat should sit above them rather than in contact with liquid.
This pause also creates a useful opportunity to prepare the finishing surface. Instead of allowing the steak to wait while a cold pan heats, start preheating the pan or grill during the low-temperature phase. When the steak is ready, the surface can be checked, dried with kitchen paper if needed and transferred promptly.
The length of the pause should be guided by the actual condition of the meat. If the surface is visibly wet, pat it dry before searing. If it is already dry and the cooking surface is hot, there is no need to wait simply to satisfy a timer.
There is also no requirement that the steak be seared immediately after leaving the oven. ThermoWorks’ technique permits a rest between stages, but the practical implications depend on the desired centre temperature and the surrounding conditions. A long delay may allow the steak to cool, changing the amount of heat required during the final sear. If the steak is held for an extended period, food-safety considerations must also be taken into account.
The often-quoted 90-second target should therefore be treated as a possible outcome, not a fixed rule. A very hot pan and a dry surface can produce rapid browning, while a damp steak on a less powerful grill may need longer. The cook should judge the actual crust and internal temperature rather than sacrifice one to meet a stopwatch target.
That preparation begins even earlier, with salting and refrigeration. Done properly, these steps can reduce the amount of moisture that interferes with browning at the pan or grill.
How to Prep the Surface So Browning Starts in 60 Seconds Instead of 3 Minutes?
To encourage fast browning, salt the steak in advance when possible, refrigerate it uncovered on a wire rack, and pat the surface dry before cooking. A dry exterior lets the surface temperature rise more efficiently because less energy is spent evaporating water. A very hot pan or grill then helps the crust develop quickly. Sixty seconds is a conditional target, not a guaranteed result for every steak or appliance.
Dry-brining means salting the steak ahead of cooking and allowing time for the salt to interact with the meat. As moisture is drawn to the surface and the salt dissolves, the resulting liquid can be reabsorbed over time. Refrigerating the steak uncovered on a rack also exposes the surface to circulating refrigerator air, helping it dry.
Serious Eats recommends dry-brining on a wire rack in the refrigerator for at least 45 minutes when time allows. That is a practical recommendation rather than a universal optimum for every thickness and refrigerator. If there is insufficient time for advance salting, salt immediately before cooking and pay particular attention to surface drying.
For the most predictable result, use the following sequence.
- Salt in advance. Season the steak and place it on a wire rack over a tray in the refrigerator. Keep it uncovered when conditions allow.
- Allow the surface to dry. The exposed surface should feel relatively dry rather than wet or slick with visible moisture.
- Inspect before cooking. Pat away remaining surface moisture with kitchen paper. Avoid leaving paper fibres on the meat.
- Prepare the cooking surface. Start with clean pan or grill grates, free from accumulated burnt residue that can interfere with contact and add bitter flavours.
- Use suitable oil. Apply a small amount of an oil suitable for high-temperature cooking, either to the meat or to the cooking surface, depending on the method.
The condition of the cooking surface matters as well as the condition of the steak. A pan covered in burnt residue may produce bitter patches, while unevenly heated grill grates can create isolated dark marks without uniform browning. Cleaning the surface and allowing it to preheat helps make the finishing stage more predictable.
The difference between a fast brown crust and a slow, pale finish is not determined by one trick. Advance salting, uncovered refrigeration, a clean cooking surface, suitable oil and high heat work together. If the steak still takes several minutes to brown, identify the limiting factor rather than automatically extending the sear.
A useful visual test is to inspect the first contact area. It should begin developing a brown crust rather than releasing a pool of liquid. If the surface is steaming instead of browning, reassess the moisture level and the heat before continuing.
With the steak prepared and the cooking surface ready, attention turns to the first flip. The right moment depends on crust formation and contact, not on a universal number of seconds.
Key points before the first flip
- Prioritise a uniformly dry surface and sufficient heat over a fixed searing time.
- Use the first contact to develop a crust, then turn and continue cooking in short, controlled passes.
- Watch for sticking, uneven browning and excessive flames rather than pursuing dark grill marks at any cost.
How to Time Your First Flip to Get Sear Marks Without Overcooking the Centre?
Flip a steak when the first side has developed enough crust to release cleanly from the pan or grill, rather than turning it according to a fixed timer. A crust that releases naturally is a useful practical cue, although the timing varies with the cooking surface, heat intensity and moisture level. Short, controlled passes help develop colour without unnecessarily extending the final sear.
The first flip does more than create an attractive pattern. It changes how heat is distributed between the two faces and allows the cook to monitor browning before the centre receives too much additional heat. On a very thick steak, this control matters because the gentle cooking stage has already brought the centre close to the intended final temperature.
Start by positioning the steak on the hot surface and leaving it undisturbed long enough for the crust to form. Resist the temptation to slide it back and forth. Moving it repeatedly can interfere with consistent contact and make it harder to judge whether the surface has browned.
When you test the edge with tongs, use a gentle lifting motion rather than pulling. If the steak sticks firmly, the crust may not be ready or the surface may be insufficiently hot. Forcing it away can tear the browned layer and leave pieces of meat attached to the grate.
Once the steak releases cleanly, turn it and allow the second side to brown. Depending on the shape of the cut and the cooking surface, additional short turns may help keep the heat distribution even. Serious Eats discusses frequent flipping as a way to improve evenness during steak cooking, but it does not establish one universal first-flip time for all pans and grills.
The centre temperature remains the decisive measurement. Use an instant-read thermometer during the finishing stage, especially when the steak is already close to the target. The time needed for a crust varies, and the steak can continue to gain heat while you chase a darker surface.
A common distraction is the pursuit of pronounced grill marks. Dark stripes can look appealing, but they cover only part of the steak’s surface. If the rest of the meat remains pale, extending the cooking time solely to deepen the stripes may overcook the centre without delivering a more complete crust.
Aim for a balanced result. Turn the steak when the first side has browned sufficiently, rotate it if the grill pattern or heat distribution calls for it, and move it to a cooler zone if flames become excessive. A pan offers a broader area of contact, while a grill introduces hot spots and the risk of flare-ups from dripping fat.
Once the first side releases cleanly, the final objective is to develop a dark, even crust across the steak without tearing the meat or allowing grill flames to burn the surface.
How to Get Dark Sear Marks in 90 Seconds Without Tearing the Meat
To develop dark sear marks quickly, begin with a dry steak, preheat the pan or grill thoroughly, and leave the meat undisturbed until the crust releases naturally. Turn it with tongs rather than forcing it off the surface. A short sear can work on a well-prepared steak, but 90 seconds is not a guaranteed finishing time: equipment, surface moisture, steak shape and the intensity of the heat all affect the result.
Sticking usually indicates that the steak is not ready to release, the surface has not browned sufficiently, or the contact conditions are poor. Pulling harder is rarely the best solution. It can tear away the crust and leave the cook with an uneven surface that needs further cooking.
On a grill, the challenge is that grate temperature and flame exposure are not uniform. A steak can develop strong marks where it contacts the hottest bars while remaining relatively pale elsewhere. This is why the goal should be a well-developed crust, not just dark lines.
For a gas grill, prepare both direct and indirect zones before the steak reaches the finishing stage. Use the direct zone for browning, then move the steak to the cooler zone if flames become excessive or if one area is darkening too quickly. Ribeye deserves particular attention because rendered fat can drip onto the flames and cause sudden flare-ups.
On a pan, ensure that the cooking surface is clean and hot, then add an appropriate high-temperature oil. Place the steak down carefully and avoid unnecessary movement. Once the crust has formed and the meat releases, turn it and repeat the process on the other side. Check the edges too, especially if the steak is thick enough for the sides to remain relatively pale.
The difference between a dark crust and a burnt one is important. A good crust develops a deep brown colour and roasted flavour. Blackened patches, bitter smells and aggressive flames suggest that the surface is charring rather than browning evenly. Reduce the direct exposure or use the cooler zone when necessary.
Do not treat the 90-second target as a test of cooking skill. A steak may brown quickly under ideal conditions, while a damp surface or less powerful grill can require more time. If browning is slow, check surface dryness, heat and contact before extending the sear. If the crust is already dark and the centre is approaching its target, stop chasing additional colour.
For a repeatable result, judge the steak on three separate outcomes: the colour and texture of the crust, the internal temperature and the condition of the overcooked band. These observations help identify whether the next attempt needs better drying, more effective preheating or a shorter finishing stage.
For the next thick steak, record its thickness, the temperature at the end of the gentle cooking stage, the final internal temperature and the approximate searing time. Those observations provide a practical baseline for refining the technique with your own oven, pan or grill.
Is reverse searing worth it for a steak under 4 cm thick?
It can work, but its advantage is generally more noticeable on thicker cuts. A thinner steak reaches its target internal temperature more quickly, leaving less opportunity to benefit from a separate low-temperature stage. A conventional hot-pan sear may be simpler for thinner steaks.
Should you salt a steak before reverse searing?
Yes, advance salting is useful when time allows. Place the salted steak on a wire rack in the refrigerator, uncovered, so its surface can dry. If there is insufficient time, salt immediately before cooking and pat the surface dry before searing.
Can you reverse-sear a steak entirely on a gas grill?
Yes. Use indirect heat for the initial cooking stage, then move the steak to the hot direct zone for finishing. Keep a cooler zone available in case rendered fat causes flare-ups. A probe thermometer helps control the centre temperature throughout the process.
Why is my reverse-seared steak cooked correctly but still has a pale crust?
The surface may be too wet, the pan or grill may not be sufficiently hot, or the cooking surface may not be making consistent contact with the meat. Dry the steak thoroughly, preheat the finishing surface and use a suitable high-temperature oil. Avoid prolonging the sear without first addressing these conditions.
Does reverse searing guarantee a perfectly pink centre with no grey band?
No. Reverse searing can reduce the width of the overcooked outer layer, but the result still depends on thickness, heat intensity, thermometer accuracy and finishing time. A thin grey band may remain, even when the method is executed carefully.