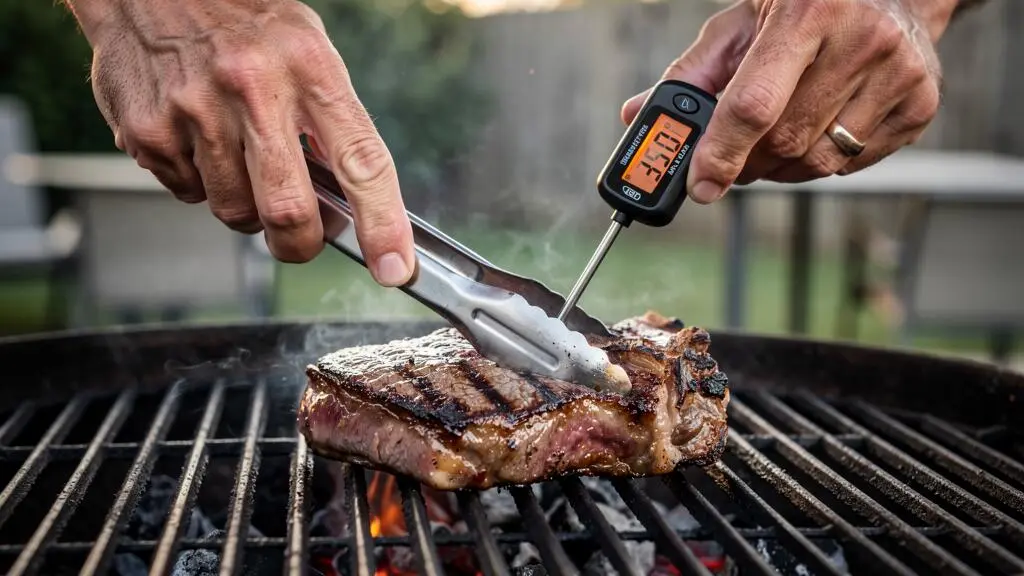
A meat thermometer can tell you what is happening inside a steak, roast or brisket, but it cannot make the cooking decision for you. The number on the display is only part of the picture: probe placement, temperature rise, cut thickness, resting conditions and food-safety requirements all affect what that reading means.
The most reliable approach is to treat internal temperature as a control signal rather than a magic number. Check that the thermometer is accurate, measure the thickest muscle correctly, estimate how much the temperature may rise after removing the meat from the heat, and verify the result after resting. That process helps explain why meat can look underdone on the outside while its centre is already approaching the intended doneness.
For UK grillers, one distinction matters throughout: culinary preferences such as medium-rare and medium are not the same as food-safety recommendations. Official guidance can differ by country, food category and preparation method. In particular, minced meat and poultry require a different safety assessment from an intact steak. Never lower a safe cooking target simply to compensate for carryover cooking.
The practical rules
- Trust a temperature only after checking the thermometer and placing the probe correctly.
- Estimate carryover cooking from the cut, cooking intensity and resting method rather than applying a universal offset.
- Use temperature to guide the decision, but keep the applicable food-safety minimum as a separate requirement.
- Why Does Internal Temperature Stall for Hours During a Long Cook?
- How to Place a Probe So Your Reading Isn’t Wrong Near Bone or Fat?
- Medium-Rare or Medium: Which Target Temperature Makes More Sense for Thick Steaks?
- The Carryover Mistake That Overcooks Meat Even When You Pull It ‘On Time’
- When Should You Calibrate Your Thermometer — and How to Catch a ‘Perfect Temp’ That’s Lying?
- Why Does a Wireless Thermometer Reading Lag Behind What Your Meat Is Actually Doing?
- How to Translate ‘I Like It Medium’ Into a Pull Temperature and Rest Time?
- How to Hit Your Desired Doneness Every Time, Even When Cut Thickness Changes
Why Does Internal Temperature Stall for Hours During a Long Cook?
Internal temperature can remain nearly unchanged for hours during a low-and-slow barbecue because moisture evaporating from the meat’s surface removes heat as quickly as the cooker supplies it. This phenomenon, known as the barbecue stall, is especially familiar when smoking large cuts such as brisket and pork shoulder. It does not automatically mean the cooker has stopped working or the meat has stopped cooking.
As the surface warms, moisture migrates outward and evaporates. That evaporation absorbs energy, slowing the temperature increase at the centre even while the meat remains exposed to heat. AmazingRibs.com describes a brisket experiment in which a plateau began around 150°F (66°C) after roughly two to three hours and lasted about six hours. Those timings illustrate what can happen; they are not a schedule that every brisket will follow.
The right response depends on what matters most. Wrapping the meat in foil—the Texas crutch—traps moisture and suppresses evaporation, helping the cook move through the stall faster. The trade-off is a softer exterior bark. Leaving the meat unwrapped preserves a firmer crust but can extend the cook. Raising the cooker temperature slightly is another option, provided the cooking conditions remain controlled.
Before intervening, check that the probe is still embedded in the intended part of the meat and that the cooker temperature and fuel supply are stable. A displaced probe or falling pit temperature can resemble a genuine stall. Temperature is useful here precisely because it reveals a change in the cooking process, not because it dictates a single mandatory action.
About six hours
A prolonged plateau recorded in one brisket experiment described by AmazingRibs.com. It is an observed example, not a forecast for every long cook.
Collagen conversion and other changes in texture can continue during a temperature plateau. The stall describes the balance between incoming heat and evaporative cooling; it does not mean every transformation inside the meat has stopped. The duration varies with the cut, airflow, moisture and cooker conditions.
Once the reading is understood in context, the next step is ensuring that the probe is actually measuring the part of the meat that matters.
How to Place a Probe So Your Reading Isn’t Wrong Near Bone or Fat?
A thermometer reading can misrepresent doneness when the probe tip touches bone, sits in a fat pocket or misses the thickest muscle. Bone and fat behave differently from muscle during heating, so the displayed temperature may not describe the portion you will eat. The size of the error varies with the cut and the probe’s position; a 15°F difference is possible in some circumstances, not a universal correction to apply.
For an intact steak or roast, target the thickest area of muscle and avoid bone. In a thin steak or chop, insert the probe horizontally from the side so the sensing tip can reach the centre without passing through the meat. For a thick roast, approach the centre along a path that leaves the tip fully surrounded by muscle.
With an instant-read thermometer, move the probe slowly through the thickest area while watching the display. A changing reading can reveal a temperature gradient: the outside may be considerably hotter than the centre. Look for the lowest stable reading in the central muscle, then reposition the probe if the number changes unexpectedly or the tip may have contacted bone or a large fat seam. This is a practical verification method, not a guarantee that the lowest number is always correct in every irregular cut.
University of Minnesota Extension recommends placing a thermometer in the thickest part of whole-muscle meat without touching bone. Its guidance also recommends sideways insertion for thin foods. See the University of Minnesota Extension food thermometer guidance for its placement and accuracy-check instructions.
On a thick or irregular cut, take readings at more than one position. A warmer reading near the exterior and a cooler one in the centre may simply reflect normal cooking from the outside inward. A large or unexpected difference should prompt a placement check rather than an automatic adjustment to the cooking target.
Accurate placement establishes a trustworthy starting point. The next decision is what the reading should mean for the steak’s preferred final doneness.
Medium-Rare or Medium: Which Target Temperature Makes More Sense for Thick Steaks?
For a thick steak, medium-rare and medium are different texture goals, and neither should be selected from thickness alone. Medium-rare generally favours a cooler, pinker centre, while medium gives the centre more heat exposure and can narrow the contrast between the exterior and interior. The best target depends on the cut, thickness, preferred texture and expected temperature rise during resting.
A thick ribeye behaves differently from a thin steak because heat has farther to travel from the seared surface to the centre. Its outer layers can become much more cooked while the middle remains relatively cool. A pull temperature that works for a thin steak therefore may not deliver the same overall result in a steak twice as thick. Probe readings help reveal this gradient, but one central measurement cannot describe every layer of the meat.
Medium-rare can preserve a cooler centre and a juicy texture, but a thick steak may have a pronounced difference between the outer band and the middle. Medium can reduce that contrast, depending on cooking technique, and may offer a wider margin against small carryover-estimation errors. For a heavily marbled ribeye, some cooks prefer a somewhat higher final doneness to soften the fat; a lean tenderloin may be preferred at a lower doneness. These are culinary trade-offs, not universal rules about fat rendering.
Food safety must remain a separate consideration. FoodSafety.gov recommends that whole-muscle beef steaks reach at least 145°F (63°C), followed by a three-minute rest. Its guidance lists 160°F (71°C) for ground meat and 165°F (74°C) for poultry. These are US recommendations and should not be presented as identical to official guidance in every English-speaking country. They are also not a chart defining culinary medium-rare or medium.
Use this distinction when choosing a target:
| Consideration | Medium-rare preference | Medium preference |
|---|---|---|
| Centre texture | Cooler and pinker | Warmer and more cooked |
| Thick-cut gradient | Can produce a stronger contrast between centre and exterior | May reduce the contrast, depending on technique |
| Carryover sensitivity | Requires careful prediction if a cooler centre is important | Still requires carryover monitoring; it is not error-proof |
| Food safety | Preference alone does not establish that the meat meets the applicable safety guidance | Preference alone does not establish that the meat meets the applicable safety guidance |
Do not treat a steak’s appearance or a culinary label as proof of safety. Ground meat has a different risk profile from an intact muscle because grinding can distribute surface contamination throughout the product. Follow the applicable local guidance for the specific food being cooked.
Even a well-chosen target can be missed if the meat continues warming substantially after it leaves the grill.
The Carryover Mistake That Overcooks Meat Even When You Pull It ‘On Time’
Meat can overshoot its intended doneness after it leaves the heat because hotter outer layers continue transferring energy towards the cooler centre. This is carryover cooking. Removing a steak when its centre reaches the desired final temperature may therefore be too late, especially for a thick cut cooked over intense heat. The solution is to estimate the likely rise and monitor the temperature during the rest.
The size of the rise varies with cooking temperature, mass, geometry and the temperature gradient between the exterior and centre. In an experiment published by ThermoWorks, a 150 g pork chop removed at 140°F (60°C) rose by 4.9°F (about 2.7°C) after cooking in a 300°F (149°C) oven, while a similarly sized chop cooked at 425°F (218°C) rose by 11.5°F (about 6.4°C). These are measurements from particular trials, not offsets to apply to every steak or roast.
Large roasts can carry over differently from thin steaks, and two pieces cooked at the same grill setting can behave differently if their thicknesses or shapes differ. A hot cooking environment can create a steeper gradient, leaving more heat in the outer layers to migrate inward. The resting method also matters: resting uncovered, loosely tented with foil or in a warm environment changes heat loss and the subsequent temperature curve.
That is why a pull-temperature chart should be a starting reference rather than a promise. If the chart ignores your cut, grill intensity and resting setup, its number may not transfer to your cook. Begin conservatively, watch the rate of rise, and record the final temperature after resting so the next cook can be adjusted using your own observations.
4.9°F versus 11.5°F
In ThermoWorks’ reported pork-chop trials, the measured carryover rise differed between the 300°F and 425°F oven conditions. The results demonstrate variability; they do not establish a universal pull-temperature offset.
Do not let an estimated carryover rise replace a required food-safety temperature or rest. In particular, a predicted temperature increase is not proof that the centre has reached a safe minimum. Where a public-health recommendation specifies both a temperature and a rest, follow the complete recommendation for that food category.
To make those adjustments meaningful, the thermometer itself must be accurate enough to trust.
When Should You Calibrate Your Thermometer — and How to Catch a ‘Perfect Temp’ That’s Lying?
A thermometer that consistently reads too high or too low can produce repeatable cooking mistakes while appearing perfectly reliable. Checking its accuracy helps establish whether a displayed temperature is trustworthy before using it to judge doneness. Check after a drop or suspected damage, before an important cook and periodically according to the manufacturer’s instructions. Not every thermometer can be manually recalibrated.
An ice-water check is a practical starting point. University of Minnesota Extension describes an accuracy check for dial thermometers using a glass filled with crushed ice and water. Stir the mixture and let it stand for three minutes; for the described dial-thermometer procedure, insert the stem at least two inches into the mixture. After approximately 30 seconds, the thermometer should indicate 32°F (0°C). Follow the instructions for your own model, because digital and leave-in probes may require different checking methods.
If an adjustable dial thermometer is inaccurate, the university’s procedure allows the calibration nut to be turned until the instrument indicates 32°F. Digital models vary: some offer a trim adjustment, while others do not. Do not assume that every digital probe can be corrected by changing a setting, or that a known error is harmless during a fast cook.
A boiling-water check can also be useful when the manufacturer supports it, but the boiling point changes with altitude and local atmospheric pressure. The source guidance used here does not provide a validated altitude-adjustment procedure, so consult the instrument instructions or a reliable local reference rather than guessing the expected reading.
There is no universal acceptable drift threshold established by the cited guidance for every thermometer. If the device repeatedly fails its accuracy check and cannot be adjusted according to its instructions, replacing it is more dependable than building every cooking decision around an uncertain offset.
A verified thermometer and correctly positioned probe still need to be interpreted carefully when the reading arrives through a wireless app.
Why Does a Wireless Thermometer Reading Lag Behind What Your Meat Is Actually Doing?
A wireless thermometer can display a temperature that trails the meat’s current state because the sensor needs time to respond and the app may update at intervals. The probe measures the temperature at its own tip, not the entire cut, and wireless transmission adds another layer between measurement and display. During rapid temperature changes, relying on the latest number without considering its trend can lead to a late pull.
Several factors contribute to the apparent lag: the sensor’s response time, the location of the probe, changes in the surrounding cooking environment and the app’s update frequency. Some systems also smooth readings to make the display easier to follow. The exact delay depends on the device and circumstances; the available sources do not establish a universal number of seconds or degrees for wireless lag.
Watch the rate of change as well as the absolute reading. If the displayed temperature is climbing quickly, the meat may be approaching your pull point sooner than a slowly updating display suggests. A rise of 1–2°F per minute can be a useful warning that the temperature is moving quickly, but it is not a validated correction formula and should not be used to calculate an exact unseen temperature.
Be particularly alert when grill heat changes rapidly, such as after a lid is opened, a hot spot develops or the fuel supply changes. If the reading seems inconsistent with the cook, check the probe position and cooker conditions. Where practical, cross-check with a reliable instant-read thermometer at the meat before removing it.
A wireless probe and an instant-read thermometer serve different purposes. A leave-in probe helps track a long cook and its direction of travel; an instant-read probe helps verify the temperature at a specific location before serving. Neither automatically corrects a poorly positioned tip, and a fresh instant-read measurement is not infallible if it misses the thickest muscle.
Once the instrument’s behaviour is understood, a preferred doneness such as medium can be translated into a practical target and resting strategy.
How to Translate ‘I Like It Medium’ Into a Pull Temperature and Rest Time?
To translate a preference such as medium into a cooking decision, first define the intended final result for the specific meat, then estimate how much the temperature may rise after removal from the heat. The pull temperature is a planning point below the desired final temperature when carryover is expected, but it must never be used to bypass an applicable food-safety requirement. Resting time and temperature should be planned together.
The basic calculation is straightforward: desired final temperature minus estimated carryover rise equals a provisional pull temperature. The challenge is estimating that rise. A thin steak cooked over moderate heat may behave differently from a thick ribeye seared intensely, and a large roast may retain more heat in its exterior. Resting uncovered, tented with foil or in a warm environment also changes how quickly the meat loses heat.
Consider a purely hypothetical example: a cook wants a particular final temperature and estimates, from previous comparable cooks, that the meat usually rises by a few degrees while resting. The cook can use that observed rise to choose a provisional pull point, then measure the actual result. The estimate is a working hypothesis, not a guarantee that the next piece will behave identically.
Rest time is part of the same decision. Heat continues to move inward after cooking, while the meat also loses heat to its surroundings. A longer rest does not guarantee an ever-increasing temperature: the rise may peak and then reverse as the meat cools. Avoid assuming that every additional minute creates a predictable temperature increase.
There is also an important difference between culinary language and food safety. One person may call a steak medium at a different internal temperature from another person. For ground beef, however, the safety question is not simply whether the centre looks medium. FoodSafety.gov recommends 160°F (71°C) for ground meat, compared with 145°F (63°C) and a three-minute rest for whole-muscle beef steaks under its US guidance. Apply the official guidance relevant to your location and the specific food.
After resting, check the final temperature and compare the result with the intended doneness. Record the cut, thickness, pull reading, resting conditions and final reading. A few comparable cooks can reveal a useful personal pattern without turning it into an assumed rule for every piece of meat.
The final step is to use that feedback loop consistently, even when several different cuts share the same grill.
Key takeaways
- Verify the thermometer and the probe location before treating a reading as reliable.
- Estimate carryover from comparable cooks and check the actual final temperature after resting.
- Adapt the cooking sequence to each cut’s thickness and safety requirements rather than forcing every piece to finish at the same moment.
How to Hit Your Desired Doneness Every Time, Even When Cut Thickness Changes
Consistent doneness comes from following a repeatable process rather than chasing one temperature on a chart. Check the instrument, position the probe correctly, choose a target appropriate to the meat and desired result, account for expected carryover, monitor the trend, rest the meat and verify the final temperature. Each step reduces a different source of error; none eliminates every uncertainty.
Thickness changes how heat travels through the meat. A thick steak can have a large temperature gradient between its surface and centre, while a thin steak has less distance for heat to travel. The same central reading can therefore correspond to different degrees of cooking across the rest of the cut. Carryover can also differ with geometry and cooking intensity, so do not apply an automatic rule that every thick cut must always be pulled at a particular lower temperature.
When grilling thin and thick cuts together, stagger their start times where possible and use separate heat zones. The thinner pieces may finish first, while the thicker cuts need more time for heat to reach the centre. Take readings independently and remove each piece when it reaches its planned decision point, provided the applicable safety requirements are met. The grill should adapt to the meat, not the other way around.
Use the following checklist to make the process observable and repeatable.
Your five-step doneness check
- Check the thermometer using the method specified by its manufacturer; record the result and any adjustment made.
- Insert the probe into the thickest muscle without touching bone; note the measured location and initial reading.
- Choose a final target consistent with the desired doneness and applicable food-safety guidance; record the target and the estimated carryover.
- Monitor the temperature trend and cross-check an unexpected or rapidly changing wireless reading with an instant-read thermometer when practical; record the pull reading and resting conditions.
- Measure after resting and compare the final reading with the intended result; record the outcome so the next comparable cook can be adjusted.
Keep a simple cooking log. A few notes about cut, thickness, cooking conditions, pull temperature, resting method and final temperature are more useful than a universal correction factor copied from an unrelated recipe. Repeated results help identify how your own grill and thermometer behave, while changes in cut geometry or cooking conditions still warrant a fresh check.
Food safety remains a constraint throughout this process. A successful texture result is not proof that meat has reached the safe temperature recommended for its category. In the United States, for example, FoodSafety.gov recommends 145°F (63°C) followed by a three-minute rest for whole-muscle beef steaks, 160°F (71°C) for ground meat and 165°F (74°C) for poultry. These are US recommendations, not a claim that every English-speaking country’s official advice is identical.
The practical goal is not to eliminate every variation in cooking. It is to recognise the sources of uncertainty, respond to the meat in front of you and keep food safety separate from personal preference. With a verified thermometer and a short record of each cook, the next steak becomes a better-informed decision rather than another guess.
Should meat be removed from the grill as soon as it reaches the target temperature?
Not necessarily. If the target is the desired final temperature, carryover cooking may take the meat above it after removal. Plan the pull point around the expected rise, but never use a predicted rise to replace an applicable safe minimum temperature or required rest.
Why does my steak look pink even when the thermometer shows a high temperature?
Colour is not a dependable stand-alone measure of internal temperature or food safety. Pigments, preparation and cooking conditions can affect appearance. Check the thermometer’s accuracy and placement, and use the applicable temperature guidance rather than relying on colour alone.
Can a wireless thermometer replace an instant-read thermometer?
A wireless leave-in probe is useful for monitoring temperature trends during a long cook. An instant-read thermometer is useful for checking a particular location before removal or serving. Cross-checking is especially helpful when a wireless reading seems stale, unexpected or inconsistent with the cooking conditions.
Does a longer resting period always make meat hotter inside?
No. Heat may continue moving towards the centre for a time, but the meat is also losing heat to its surroundings. The internal temperature can peak and then fall. The outcome depends on the cut, cooking intensity, temperature gradient and resting environment.
Can medium-rare ground beef be treated like a medium-rare steak?
No. Ground meat requires a different food-safety assessment because grinding can distribute contamination throughout the product. FoodSafety.gov recommends 160°F (71°C) for ground meat under its US guidance. Follow the official recommendations applicable to your location rather than applying whole-muscle steak preferences to burgers.