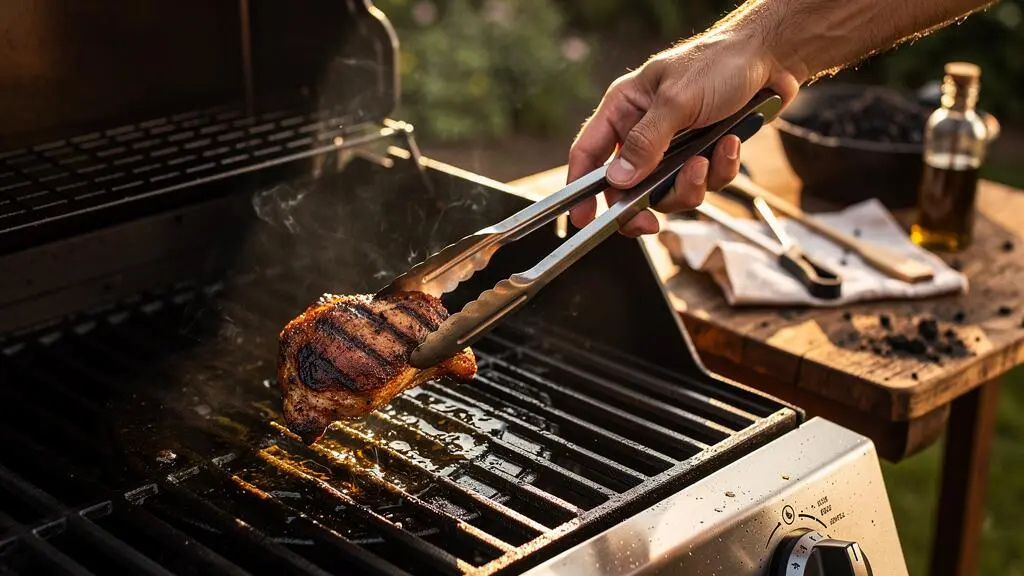
Fish skin tearing against the bars, chicken leaving browned patches behind and courgette slices refusing to lift are familiar frustrations at the barbecue. Reaching for a cooking spray might seem convenient, but a naturally easy-release grilling surface depends more on heat management, surface condition and patience than on applying extra oil.
The practical approach is straightforward: preheat the cooking grates thoroughly, use a very thin film of suitable oil and leave food undisturbed until it releases. Clean grates matter just as much. Old residue, rust and excessive oil can undermine good technique, especially on seasoned cast iron.
Different grills need slightly different handling. A gas barbecue can heat unevenly across its burners, charcoal develops changing hot and cooler zones, and pellet grills follow model-specific heating cycles. The aim is not to achieve an identical preheating time on every appliance. It is to prepare the actual surface touching the food, then cook without damaging either the food or the grate.
Natural nonstick grilling: the essentials
- Preheat clean grates properly; a hot lid thermometer does not necessarily mean the cooking surface is ready.
- Lightly oil the food, particularly fish, and maintain seasoned cast iron without leaving thick layers of oil behind.
- Allow a seared crust to develop before turning, then clean and dry the grates appropriately after cooking.
- Why Does Food Stick More When You Start Cooking Too Early?
- How to Stop Sticking Using the 3-Step Preheat, Oil, and Release Routine?
- Oil the Food or the Grill: Which Prevents Fish From Sticking Better?
- The Cooking-Spray Mistake That Leaves a Gummy Layer on Hot Grates
- When Should You Deep-Clean Grates Without Stripping the Nonstick Layer?
- How to Stop Sticking Using the 3-Step Preheat, Oil, and Release Routine?
- How to Preheat and Oil Cast-Iron Grates in 10 Minutes Without Creating Sticky Build-Up?
- How to Use Cast-Iron Grates Without Sticking, Rust, or Patchy Heat
Why Does Food Stick More When You Start Cooking Too Early?
Food sticks more readily when cooking begins before the grates are properly preheated because the surface may not deliver enough consistent heat to form a firm seared exterior. Moist proteins can adhere to the metal before a crust develops. A fully heated, clean cooking surface makes food release more predictable, although oil, moisture and grate condition still matter.
When raw chicken or fish touches a grate, surface proteins can interact with the metal. Heating changes those proteins and gradually creates a browned exterior. Until that process progresses sufficiently, lifting the food may pull away its surface rather than separating it cleanly.
Metal expands as it heats, but the popular explanation that expanding metal pores close around food is too simplistic to establish as the main cause of sticking. Surface contamination, temperature, moisture, protein behaviour and the developing crust offer a more useful basis for troubleshooting.
Grate temperature is not the same as lid temperature. A thermometer mounted in the barbecue lid measures conditions around its sensor, not the precise temperature of every cooking bar. Heavy grates can lag behind the air inside the grill, especially during initial heating.
A few drops of water can sometimes give a rough indication of surface heating on suitable solid metal, but the skittering-water demonstration is not a validated universal readiness test for open barbecue grates. Droplets may fall between the bars, and hot oil or flare-ups introduce additional risks. A surface thermometer appropriate to the grate material, together with the manufacturer’s preheating guidance, provides a more dependable check.
Gas, charcoal and pellet grills reach cooking conditions differently. Gas burners offer relatively direct adjustments, while charcoal requires attention to fuel distribution and changing heat zones. Pellet grills follow their controller and airflow design, so their preheating requirements should not be borrowed from a gas model.
For example, Weber‘s Searwood DirectFlame cooking instructions specify a 15–20-minute preheat for that particular operating mode. The recommendation supports thorough preheating but should not be treated as a universal barbecue rule.
Starting too early also encourages another damaging habit: prising food away with force. Torn protein and burnt fragments remain on the bars, adding residue that can interfere with subsequent cooking. Forceful scraping may also damage a vulnerable or poorly maintained coating.
Once the surface is genuinely ready, the next challenge is applying the right amount of oil and recognising when food can be moved without tearing.
How to Stop Sticking Using the 3-Step Preheat, Oil, and Release Routine?
The three-step routine is to preheat clean grates thoroughly, apply a thin film of suitable oil and wait until the food releases naturally before turning. For delicate foods, oiling the food directly is often preferable to wiping the grill. The sequence works because stable heat promotes searing, moderate oil reduces unwanted contact and patience allows a crust to form.
Step 1 — Preheat. Remove old food debris using a cleaning method approved for the grate material, then heat the barbecue according to its instructions. Allow the actual cooking surface to reach a stable operating condition rather than relying solely on the lid reading.
On a charcoal barbecue, check that the cooking zone has settled into the heat needed for the recipe. On a gas grill, allow enough time for the grate bars to heat after the burners reach their settings. Follow the model-specific procedure on pellet equipment.
Step 2 — Oil lightly. Pat excessively wet food dry, then apply a small, even amount of cooking oil. Vegetable or sunflower oil can be practical choices for high-heat grilling, provided the oil suits the intended cooking temperature.
On suitable uncoated or seasoned grates, a restrained wipe with an oil-dampened folded paper towel held in long tongs may help condition the surface. Follow the barbecue manufacturer’s instructions, keep hands clear of the heat and never pour oil directly onto hot grates or flames.
Oil should not collect in droplets or pools. Excessive oil can smoke, leave residue and increase flare-up risk. Applying oil well before cooking may also expose it to unnecessary prolonged heating.
Step 3 — Wait for release. Place the food on the grill and avoid repeatedly lifting it. As the surface sears, a crust develops and the food may loosen naturally. Look for browned edges, a more stable exterior and reduced resistance when lifting carefully with an appropriate utensil.
Delicate fish or thin vegetables sometimes benefit from a carefully planned early adjustment if positioning is clearly wrong. However, immediate sliding or repeated repositioning is not a universal anti-sticking technique. If the food resists, unnecessary movement is more likely to tear it.
Five checks for your next barbecue
- Inspect the cold grates and remove loose debris; confirm that the bars are free of visible food fragments.
- Preheat using the manufacturer’s guidance; confirm that the intended cooking zone has reached a stable condition.
- Dry the food surface and apply a light, even oil coating; check that no oil is pooling or dripping.
- Place the food once and observe its edges; identify visible searing before testing for release.
- Lift gently when the food loosens, then record which preparation and turning cues worked on your grill.
The routine applies broadly to chicken, vegetables and fish, but fragile fillets deserve additional care because their surfaces can break apart before they are ready to turn.
Oil the Food or the Grill: Which Prevents Fish From Sticking Better?
Oiling the fish is generally the better first step for preventing delicate fillets from sticking. A thin coating follows the fish across its contact surfaces and can be applied without handling hot grates. Oiling suitable grates can support surface maintenance, particularly for seasoned cast iron, but it does not replace proper preheating, clean metal or patient turning.
Fish presents a particular challenge because its flesh separates easily into flakes. Moisture on the surface can delay browning, while premature turning can pull the exterior apart. Oiling the fish directly gives better control over how much oil is used and where it goes.
For a skin-on fillet, a practical method is to pat the fish dry, apply a little suitable oil and place it skin-side down on a clean, properly heated grate. The skin provides a useful contact surface while the flesh cooks. Depending on the recipe, searing the flesh side first may also be appropriate.
Weber’s fish-grilling techniques recommend preheating, cleaning the grates, oiling the fish and allowing natural release before turning. The guidance also cautions against repeatedly flipping skinless fish because it may break apart.
Both oiling methods have distinct roles:
| Consideration | Oiling the fish | Oiling the grates |
|---|---|---|
| Main purpose | Coats the food’s contact surface | Conditions suitable metal surfaces |
| Oil control | Easy to apply evenly before cooking | Requires careful handling near heat |
| Best application | Delicate fillets and everyday grilling | Maintaining compatible seasoned grates |
| Limitation | Cannot overcome dirty or badly damaged grates | Cannot prevent tearing caused by early turning |
Neither approach repairs damaged grate material. Worn seasoning, rust, thick residue or a failing manufactured coating must be addressed according to the grate’s construction. Oiling food may temporarily improve release, but persistent sticking is a reason to inspect the cooking surface.
When turning fish, use a suitable thin spatula or fish turner and test a small edge gently. If the fillet resists, allow further searing where appropriate rather than pulling it free. Food safety and the risk of overcooking still take priority over waiting indefinitely for perfect release.
When a well-preheated grill still catches properly oiled fish, the next suspect may be a residue layer rather than the fish itself.
The Cooking-Spray Mistake That Leaves a Gummy Layer on Hot Grates
Cooking sprays can contribute to sticky residue when too much oil accumulates on hot grates or remains insufficiently converted into a stable seasoned layer. Some sprays contain additional ingredients, but it is not established that every aerosol formulation creates the same residue. A controlled, thin application of ordinary cooking oil is a practical alternative, particularly when maintaining seasoned cast iron.
A naturally seasoned cast-iron surface contains oil that has undergone heat-driven chemical changes to form a bonded coating. That process is useful when the layer is thin and properly developed. Too much oil, uneven heating or repeated application can instead leave a tacky deposit.
The problem is not adequately explained by blaming spray propellants alone. Formulations differ, and gummy accumulation can occur with ordinary bottled cooking oil as well. The better distinction is between a controlled thin film and excessive, incompletely developed oil residue.
Signs worth investigating include a surface that feels tacky when cold, raised or flaking deposits, persistent burnt-food fragments and patchy cooking results. Early smoke may indicate excess oil or residue, although smoke by itself does not identify the cause.
For suitable seasoned cast iron, the first response should be targeted cleaning rather than automatically stripping everything to bare metal. Allow the grill to cool to a safe cleaning temperature, remove loose deposits with a suitable brush or scraper and assess whether the remaining surface is still tacky.
A manufacturer-approved heat-cleaning cycle may help loosen or carbonise some food residue, but repeated maximum-heat burn-offs are not automatically safe for every grate or protective finish. Excessive heat can damage components or accelerate deterioration. Follow the appliance’s cleaning instructions instead of improvising prolonged burn cycles.
Abrasive paste-and-heat remedies are similarly unsuitable as universal fixes. They may leave residues or damage coatings, depending on the materials involved. When substantial buildup persists, use the grate manufacturer’s restoration method, which may involve controlled scrubbing and reseasoning for compatible bare cast iron.
Once the surface is restored, change the application habit rather than simply choosing another aerosol brand. Lightly oiling food usually reduces the need to coat the entire cooking surface. For grates that require seasoning, use only the amount of oil specified for that material.
Preventing residue is easier than repeatedly removing it, which makes the distinction between routine cleaning and deeper restoration especially important.
When Should You Deep-Clean Grates Without Stripping the Nonstick Layer?
Deep-clean grill grates when ordinary maintenance no longer removes stubborn deposits, when a seasoned surface remains tacky or when corrosion requires treatment. There is no universal deep-cleaning interval that suits every grate material. The safest approach is to remove contamination with the least aggressive method that works while following the manufacturer’s instructions for preserving or restoring the cooking surface.
Routine cleaning addresses fresh food fragments, grease and loose residue. After cooking, allow the grill to reach the temperature recommended for cleaning, then use an appropriate brush or scraper. Check tools for damaged bristles or fragments that could remain on the cooking surface.
Deep cleaning serves a different purpose. It deals with persistent deposits that normal brushing cannot remove, or with deterioration that needs surface restoration. Treating every cook as a full stripping session creates unnecessary work, particularly on seasoned cast iron.
The cleaning method depends on the grate:
- Seasoned bare cast iron: Remove stubborn deposits using suitable cleaning tools, dry promptly and restore a thin oil layer when required.
- Porcelain-enamelled grates: Use tools compatible with the enamel. Avoid assuming that abrasive metal scouring or reseasoning is appropriate.
- Stainless-steel grates: Remove residue using compatible cleaners and tools, following the manufacturer’s instructions.
For rust on cast iron, assess the extent before considering replacement. Minor surface rust can often be cleaned away, followed by thorough drying and oiling. More extensive rust may require additional scrubbing and reseasoning if the component remains structurally sound.
Lodge‘s cast-iron grilling maintenance FAQ distinguishes minor rust treatment from more extensive restoration and warns against prolonged soaking. Its oven-based seasoning instructions apply only to compatible equipment, not automatically to fixed barbecue grates or coated components.
Appearance alone cannot reliably diagnose every problem. Dark patches may be normal seasoning, accumulated carbon or another coating. Grey areas might expose metal or reflect the material’s original finish. Examine the texture and the grate’s specifications rather than treating colour as definitive proof.
When storing the grill, remove trapped moisture and protect appropriate bare cast-iron surfaces with a very light oil film. A cover helps shield equipment from weather, but it should not trap persistent condensation against the metal.
Once cleaning is under control, the quickest way to improve consistency is to identify which part of the cooking routine is failing on your particular barbecue.
How to Stop Sticking Using the 3-Step Preheat, Oil, and Release Routine?
When the three-step routine still produces sticking, troubleshoot each stage separately: insufficient grate heat, poorly timed or excessive oil, and turning before the crust has formed. These problems can overlap, so changing several variables at once makes the cause harder to identify. A simple observation exercise helps establish a repeatable method for your grill, food and cooking conditions.
Begin with preheating. If the lid thermometer shows the expected temperature but food repeatedly clings to the bars, the grate may be cooler than assumed, or a cooking zone may be receiving uneven heat. Confirm preheating against the appliance guidance and use a suitable grate-temperature measurement where practical.
Next, consider oil application. Oil added too early may spend unnecessary time exposed to high heat. Oil applied heavily can drip or accumulate, while very wet food may steam before it develops a useful crust.
Finally, observe the turn. If chicken skin or fish tears despite clean grates and appropriate heat, the immediate problem may be impatience. Wait for a sufficiently developed exterior and check release gently, while ensuring the food cooks safely.
A practical calibration exercise is to choose one familiar food and keep the preparation consistent for a cooking session. Note the preheating conditions, the moment the food is placed on the grates, any noticeable smoking and the visual signs present when it releases successfully.
Record observations rather than relying on a supposed universal number of minutes. For example, write down whether the grate was clean, whether the food had been patted dry and whether its first attempted turn met resistance. Use the notes to make one considered change next time.
| Stage | Common warning sign | Useful correction |
|---|---|---|
| Preheat | Food catches before substantial browning | Check grate readiness and heat distribution |
| Oil | Pooling, dripping or persistent tackiness | Reduce oil and apply it closer to cooking |
| Release | Surface tears during turning | Allow more crust development and test gently |
The stages work together. A perfectly controlled oil coating cannot compensate for dirty or insufficiently heated grates, and thorough preheating cannot prevent damage from forceful turning. Equally, no amount of waiting will repair a corroded or structurally deteriorated cooking surface.
Cast-iron grates make this calibration particularly valuable because their substantial mass, seasoning and storage conditions all influence how the surface behaves.
How to Preheat and Oil Cast-Iron Grates in 10 Minutes Without Creating Sticky Build-Up?
Ten minutes may be enough to preheat some clean, maintained cast-iron grates on a suitable gas barbecue, but it is not a guaranteed target. Heavy grates, cold weather and charcoal setups may need longer. To avoid sticky buildup, heat the surface gradually as appropriate, apply one very thin oil film near the end of preparation and avoid repeated heavy coatings.
Cast iron retains heat well, making it useful for searing once properly heated. Its mass also means the metal may take longer to reach an even cooking temperature than the surrounding air. This is why an apparently hot barbecue can still have cooler areas across its grates.
Seasoning is a bonded layer produced when oil undergoes heat-driven changes on suitable cast-iron surfaces. It is not simply liquid oil left on the bars, nor does it make cast iron completely immune to sticking.
The practical sequence starts with clean, dry grates. Preheat according to the grill manufacturer’s requirements, paying attention to how the cooking zones warm. As the surface approaches readiness, apply a minimal, even film of appropriate oil if the grate’s care instructions call for it.
Use tongs and a folded, lightly oil-dampened towel only where this application method is suitable and can be performed safely. Keep the towel away from exposed flames, prevent drips and avoid using a heavily saturated cloth. Oiling the food directly remains a useful alternative.
A brief wisp of smoke can indicate that oil is heating, but it does not prove seasoning has fully developed. Continuous or heavy smoke is a reason to check the oil quantity and temperature rather than adding more oil.
Multiple applications during the same preheat are unnecessary for routine cooking and can encourage residue. A stable seasoned layer develops through proper care and controlled heating, not through repeatedly flooding the surface with oil.
At the beginning of barbecue season, inspect grates that have been stored for months. Remove dust and loose residue, check for rust and make sure the iron is dry. Dull or exposed areas may need targeted reseasoning under the manufacturer’s instructions before demanding high-heat cooking.
Ten minutes is therefore a planning reference rather than a performance promise. The useful result is a clean, evenly heated surface with no excess oil, even if preparing that surface takes longer.
Once the cooking surface is prepared, its long-term reliability depends on protecting the seasoning, controlling moisture and preventing uneven residue accumulation.
Key takeaways for lasting cast-iron performance
- Diagnose surface problems before adding oil: tackiness, corrosion and uneven heating require different responses.
- Protect clean, dry cast iron after cooking and during storage, when moisture exposure can undo good maintenance.
- Treat every barbecue as part of an ongoing care routine rather than relying on a single intensive seasoning session.
How to Use Cast-Iron Grates Without Sticking, Rust, or Patchy Heat
Cast-iron grill grates perform best when their seasoning remains sound, the metal is kept dry and heat is distributed appropriately before cooking. Sticking, rust and patchy searing can have different immediate causes, but all three are influenced by maintenance. Clean carefully, apply oil sparingly, prevent prolonged moisture exposure and investigate uneven heat rather than repeatedly adding seasoning.
Start by identifying the actual surface problem. Food that sticks to an otherwise clean grate may indicate insufficient preheating, moisture or premature turning. A grate that feels sticky when cold may have excess oil buildup. Visible orange-brown corrosion calls for cleaning and possible reseasoning, not another ordinary cooking wipe.
Heat distribution is a separate issue. Uneven preheating, burner performance, charcoal placement and deposits on the grate can all affect browning. Thick residue may interfere with effective contact, but dark glossy areas are not automatic proof of an insulating carbon layer.
Likewise, exposed grey metal can sometimes suggest that seasoning has worn away, but its significance depends on the grate’s construction and original finish. Verify whether the surface is bare, seasoned or enamelled before selecting a treatment.
After a barbecue, remove food residue using a suitable tool and cleaning temperature. Allow the equipment to cool sufficiently for safe handling, then dry washed cast-iron components promptly. Apply a very light protective oil film when recommended for that grate.
Moisture management matters particularly between cooking sessions. Rainwater, condensation and prolonged damp storage can encourage rust on exposed cast iron. Store removable grates in suitable dry conditions where practical, and check that a barbecue cover does not trap moisture.
For cast iron showing surface rust, carefully remove corrosion and restore protection according to its manufacturer’s instructions. Severely deteriorated, cracked or structurally damaged grates should be assessed for replacement rather than assumed safe after superficial cleaning.
Consistency is more valuable than an occasional aggressive restoration. Proper preheating, limited oil, gentle turning and appropriate cleaning all help maintain a reliable cooking surface. Conversely, heavy oil applications, forcing stuck food away and leaving washed iron wet create avoidable problems.
This approach also has a practical limitation: seasoning is an easy-release aid, not a guarantee. Delicate fish may still need careful handling, sugary marinades can leave burnt deposits, and cooking temperature must suit the food rather than the condition of the grate alone.
Inspect the grates while cold, clean them appropriately and prepare one food with a measured amount of oil. Observe when it releases, then clean and protect the surface after cooking. Repeating that manageable process is the most practical route towards naturally easier-release grilling without relying on sprays.
Can stainless-steel grill grates become naturally nonstick?
Stainless steel can provide good food release when it is clean, properly preheated and used with a suitable amount of oil. It does not need the same seasoning maintenance as bare cast iron. Some food may adhere initially during searing, so allowing a crust to form before turning remains important.
Should you oil porcelain-enamelled grill grates?
Follow the grate manufacturer’s instructions. Porcelain enamel is a manufactured coating rather than exposed seasoned iron, so cast-iron reseasoning procedures should not automatically be applied. Lightly oiling the food is often a straightforward way to improve release without unnecessarily treating the coating.
Which cooking oil is suitable for high-temperature grilling?
Vegetable oil and sunflower oil are among the options identified in Weber’s Searwood grilling guidance. Choose a cooking oil suitable for the heat required by your recipe, apply it sparingly and avoid excessive quantities that can drip onto burners or hot fuel. Suitability also depends on the oil’s formulation and the grill’s operating conditions.
Can you use washing-up liquid on cast-iron grill grates?
Appropriate mild washing-up liquid can be used during cleaning of compatible seasoned cast-iron equipment, including the rust-removal procedures described by Lodge. Avoid prolonged soaking, rinse as appropriate, dry the iron promptly and restore protective oil or seasoning when required. Always check instructions for your specific grates.
Why does chicken stick even when the grates have been oiled?
Possible causes include insufficient grate preheating, excess surface moisture, burnt residue, damaged grate finishes and turning before the chicken has developed a firm crust. Check each factor separately rather than adding more oil. Chicken must also reach a safe internal cooking temperature, verified using a suitable food thermometer, regardless of when its surface releases.