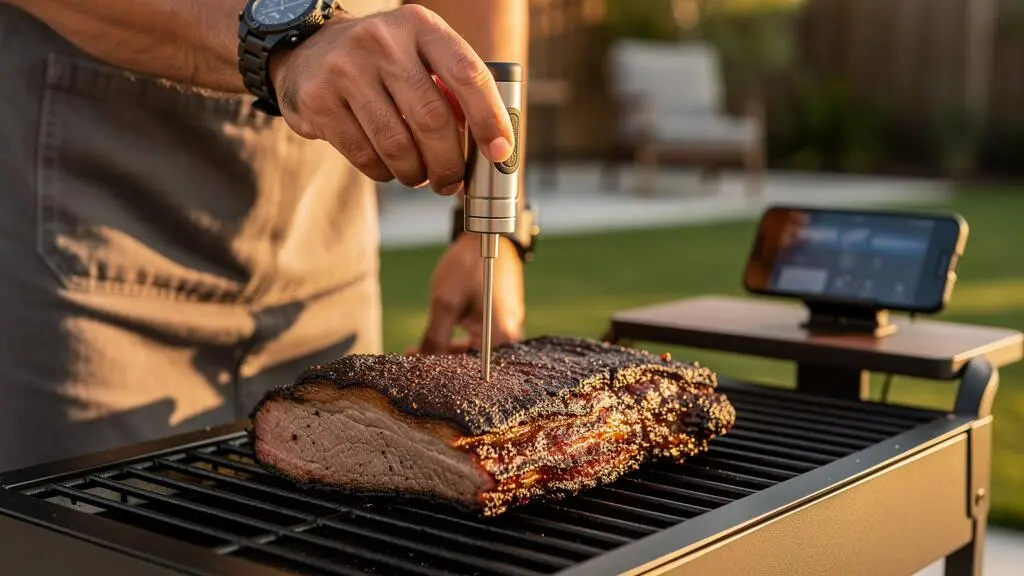
Cooking alerts should give you permission to enjoy your backyard gathering, not another reason to keep checking your phone. Yet a thermometer that buzzes every few minutes can become almost as distracting as standing beside the grill. The solution is not simply to turn up the volume or enable every notification your cooking app offers.
A reliable grill alert system assigns a purpose to each notification. An early temperature warning tells you when to prepare for a decision. A final temperature alert tells you when to check the food. A timer reminds you about an upcoming flip, wrap, or rest. Connection and battery warnings help you troubleshoot the equipment without confusing technical issues with cooking emergencies.
The right combination depends on what you are cooking, how quickly its temperature changes, and how far you will be from the grill. With accurate probe placement, sensible thresholds, and a short pre-cook check, you can spend more time with guests while keeping important cooking decisions under control.
Smarter Cooking Alerts at a Glance
- Give each alert a job: reserve attention-grabbing notifications for decisions that require action, rather than every change in the cooking process.
- Use an adjustable early-warning buffer: start by testing an alert 10°F below your intended pull temperature, then refine it according to cooking speed and carryover heat.
- Match the alert to the food: use timers and instant-read checks for thin, fast-cooking items, and continuous temperature monitoring for thicker cuts and long cooks.
- Why Do Cooking Alerts Become Background Noise After 20 Minutes?
- How to Set Alerts 10°F Early So You Can Fix Problems Without Rushing?
- Temperature Alerts or Timers: Which Works Better for Burgers vs Large Roasts?
- The Too-Many-Alerts Mistake That Makes You Miss the Only One That Matters
- When Should You Schedule Alerts So You Don’t Miss the Wrap or the Rest Window?
- How to Set Up Wireless Probes So Your Alerts Match Reality on the Grill?
- How to Use a Wireless Meat Thermometer Without Overcooking While You Wait for Alerts?
- How to Set Alerts 10°F Early So You Can Fix Problems Without Rushing (Setup Walkthrough)?
Why Do Cooking Alerts Become Background Noise After 20 Minutes?
Cooking alerts become background noise when too many notifications arrive without requiring a useful decision. Repeated warnings gradually lose their urgency, especially when routine connection messages sound like critical temperature alerts. Twenty minutes is not a scientifically established threshold for grill users; the practical problem is the frequency and relevance of notifications, not a fixed amount of time.
Imagine preparing a roast while talking to guests on the patio. Your phone sounds when the probe connects, when the grill temperature briefly fluctuates, when the app reconnects, and when the meat approaches its target. If every notification uses the same sound, identifying the one that requires action becomes unnecessarily difficult.
This resembles alarm fatigue, a phenomenon studied in environments where users encounter large numbers of monitoring alerts. A scientific review of alarm fatigue in healthcare, published in 2025, examined 32 publications and identified frequent or non-actionable alarms as factors associated with reduced responsiveness among healthcare professionals.
That research does not establish identical behavior among barbecue cooks. However, it provides a useful framework for designing alerts that are easier to interpret.
32 publications
Included in a 2025 scoping review examining alarm fatigue in healthcare. The research concerns clinical monitoring, not outdoor cooking, and does not establish a 20-minute threshold for notification desensitization.
Michels and colleagues, BMC Nursing, 2025.
Outdoor hosting introduces additional complications. Wind, conversations, background music, and the distance between your phone and the grill can make a default notification difficult to hear. Increasing every alert’s volume might make the system more intrusive without making important messages easier to identify.
Instead, review your last cook. Count the notifications you received and identify how many required you to inspect, adjust, move, or remove food. If most notifications demanded no response, reconsider which ones deserve an audible warning.
Where supported, give critical temperature alerts a distinctive sound. Keep routine status updates silent or visible only in the application. A connection-loss warning should remain available, particularly when remote monitoring depends on that connection, but it need not sound identical to an urgent food-temperature alert.
Once unnecessary alerts are removed, an early temperature warning can become genuinely useful rather than another notification you instinctively dismiss.
How to Set Alerts 10°F Early So You Can Fix Problems Without Rushing?
To create an early cooking warning, begin by setting a temperature notification 10°F below your intended pull temperature, not below the temperature you expect the food to reach after resting. Treat that 10°F difference as an adjustable starting point. The time it provides depends on how quickly the food heats, probe accuracy, and carryover cooking.
The important distinction is between temperature difference and reaction time. A fast-cooking burger may move through a 10°F interval quickly, leaving little opportunity to respond. A thick roast heating slowly may provide a considerably longer window.
You can estimate your own warning interval from the temperature graph in a compatible thermometer app. Observe how much the internal temperature increased over a recent period, then use that trend to estimate when the pull target might arrive.
For example, consider a purely hypothetical roast whose temperature has been rising at approximately 2°F every five minutes. At that observed rate, a 10°F difference would represent roughly 25 minutes. This is only a planning calculation: real cooking rates change, and a recent trend does not guarantee future behavior.
Carryover heat further complicates the calculation. The internal temperature of meat can continue rising after removal from the grill. A large roast, a hot searing surface, and a thin piece of meat may behave differently. The early warning should therefore be referenced to a properly chosen pull target, with food safety requirements considered separately.
When the warning arrives, follow a simple response routine rather than immediately changing the grill temperature.
- Verify the measurement. Check that the probe remains correctly inserted and has not shifted toward the surface, bone, a large fat pocket, or another unrepresentative location. Use an instant-read thermometer if the reading looks suspicious.
- Stabilize the cooking conditions. Close the lid after any necessary inspection and consider whether wind, fuel changes, or recent lid openings explain the temperature trend.
- Choose the next action. Prepare to pull and verify the food, continue cooking, or arrange an appropriate holding or resting setup based on the actual reading.
An early alert is also vulnerable to being set too conservatively. If it repeatedly fires long before you need to act, it becomes another notification you learn to disregard.
After the cook, compare the warning timestamp with the actual time the meat reached its pull target. Shorten or lengthen the offset next time according to the observed gap and the time you realistically needed.
For thin foods, that window may remain too short to be useful, which makes choosing between a temperature alert and a timer the next important decision.
Temperature Alerts or Timers: Which Works Better for Burgers vs Large Roasts?
Temperature alerts generally work better for thick cuts and long cooks because internal temperature is central to deciding when the food is ready. Timers are often more practical for thin burgers, quick-searing steaks, and vegetables because they prompt timely attention. A combined system uses a timer to trigger inspection and a temperature measurement to confirm doneness.
Neither method is inherently more accurate in every situation. Their usefulness depends on how rapidly the food changes temperature and whether your thermometer can measure the relevant portion of the food correctly.
Thin foods present a particular challenge. Probe size, placement, sensor response, and application notification delay can matter more when internal temperature changes quickly. Even a correctly configured alert may arrive with little time to respond.
For thicker cuts, a probe inserted into the appropriate internal location can provide continuous information without requiring constant visual checks. Cooking time can still vary because of weather, fuel distribution, grill temperature, and repeated lid openings.
The following comparison provides a practical starting point for selecting a monitoring method. The choices are recommendations for organizing attention, not experimentally established rankings of alert performance.
| Food | Primary alert | Best supporting check |
|---|---|---|
| Smash burgers and thin patties | Short cooking timer | Instant-read internal temperature check |
| Thin steaks | Timer to prompt inspection | Instant-read thermometer suited to the cut |
| Thick steaks | Internal temperature alert when probe placement is reliable | Timer for turning or searing stages |
| Large beef roasts | Continuous internal temperature alert | Periodic trend and instant-read verification |
| Brisket and pork shoulder | Internal temperature and cooking-environment monitoring | Scheduled bark, wrap, and tenderness checks |
| Grilled vegetables | Timer | Visual and texture checks |
For example, when cooking burgers alongside a large roast, use separate monitoring routines. A short timer can remind you to assess the burgers, while a probe tracks the roast’s slower internal-temperature changes.
Remember that a timer cannot verify safe internal temperature. For ground beef, pork, veal, and lamb, the USDA recommends a minimum internal temperature of 160°F. Poultry requires 165°F. Those safety endpoints are not interchangeable with preferred doneness temperatures for whole cuts.
The hybrid approach also offers a useful backup. If changing weather makes a timer unreliable, check the food’s actual temperature. If a wireless probe looks incorrectly positioned, confirm the reading manually rather than relying on the notification.
Once each food has an appropriate monitoring method, the next challenge is preventing several useful individual alerts from becoming an overwhelming stream of notifications.
The Too-Many-Alerts Mistake That Makes You Miss the Only One That Matters
A multi-probe grill setup can become harder to manage when every probe and system condition generates an audible warning. Target temperatures, grill-temperature limits, battery status, and connectivity messages may compete for attention. The solution is to prioritize notifications according to the action they require, not simply enable every available alert type.
Consider a cooking session with a roast, chicken, and an ambient grill probe. Each device or channel may produce different kinds of information. Some messages require immediate attention, while others are useful only for troubleshooting or planning.
If a roast reaches its pull target while several routine technical notifications are arriving, the important signal becomes more difficult to recognize.
Start by identifying the highest-priority decision alert for the cook. It might be a final meat-temperature warning, a dangerous grill-temperature excursion, or another event that needs a prompt response. There can be more than one genuinely safety-critical condition, so essential safety and equipment warnings should never be disabled indiscriminately.
Then organize the remaining notifications by their purpose:
- Immediate food or safety action: retain a prominent, recognizable notification.
- Upcoming cooking decision: use a distinct early warning or reminder when supported.
- Connection or battery issue: retain a visible warning and an appropriate escalation method without confusing it with doneness.
- Routine status information: check it in the application when needed rather than giving every update an audible signal.
Multi-device households introduce another source of potential confusion. If several people receive the same alerts on connected phones, multiple notifications may sound for one cooking event. Actual behavior varies by device and application.
Choose one person and one primary device to manage the cook. A second device can serve as a backup if supported, but it should not create uncertainty about who is responsible for responding.
Your Two-Minute Pre-Hosting Alert Checklist
- Identify active probes: open the app and confirm each active channel has the correct food or location label. Deliverable: a channel list matching the grill.
- Check decision thresholds: verify the intended pull target and any early warning for each relevant food. Deliverable: confirmed target values visible in the app.
- Review audible notifications: distinguish urgent cooking warnings from routine information wherever the app allows. Deliverable: a clearly identifiable priority alert.
- Test communication: check the monitoring connection from the location where you expect to spend time with guests. Deliverable: a confirmed usable signal and notification path.
- Assign responsibility: designate one primary phone and one person to respond to cooking alerts. Deliverable: an agreed alert owner before guests arrive.
Complete this check before food reaches the grill rather than adjusting notification settings while several items are cooking.
With notification priorities established, you can use reminders for the broader cooking schedule rather than relying on temperature alerts to manage every stage of an outdoor gathering.
When Should You Schedule Alerts So You Don’t Miss the Wrap or the Rest Window?
Schedule wrap and rest reminders around expected cooking milestones, but confirm each transition from the food’s actual condition. A temperature alert can tell you when a threshold is reached, while a timer reminds you to inspect bark, prepare wrapping materials, or start tracking the rest. Both are useful because wrapping and resting involve more than a temperature reading.
For long barbecue cooks, estimated finishing time is uncertain. Temperature can rise unevenly, and larger cuts may experience a stall during which the internal temperature changes slowly.
Instead of treating a predicted wrap time as a deadline, use it as a prompt to check whether the food is ready for that step. For brisket, for example, bark development and the intended cooking method matter alongside temperature.
A practical way to plan is to work backward from serving time:
- Decide when you want the food ready to serve.
- Allow an appropriate resting period for the cut and cooking method.
- Build in flexibility for a cook that progresses more slowly than expected.
- Schedule a preliminary reminder to evaluate the wrap stage.
- Use the verified finishing point to begin the rest timer rather than relying solely on a predicted clock time.
As a hypothetical hosting scenario, suppose dinner is planned for 6:00 p.m. The host might set a preliminary reminder to review the roast’s progress well before the planned serving time. The exact reminder time should come from the recipe, cut size, historical cook data, and realistic rest requirements rather than an assumed universal schedule.
When the meat is actually removed from the heat, start the rest reminder. This avoids a common scheduling error: beginning a timer according to the predicted finishing time even though the cook finished earlier or later.
Resting is part of the cooking process, not merely a pause before serving. Internal temperature may continue rising, particularly in larger cuts. Resting requirements also depend on food safety guidance, meat type, and cooking method.
For example, the USDA advises allowing certain whole cuts such as beef, pork, veal, and lamb steaks, chops, and roasts to rest for at least three minutes after reaching the recommended minimum internal temperature of 145°F. Other meats and cooking procedures have different requirements.
Scheduling reminders can also coordinate side dishes. When a roast enters its planned rest period, that notification can become the cue to finish vegetables, warm serving dishes, or organize the table.
This turns the alert system into a practical hosting tool: one set of signals monitors the food, while another keeps the surrounding meal organized.
However, even a well-planned reminder is only useful if the temperature data driving the cooking decisions accurately represents what is happening inside the meat.
How to Set Up Wireless Probes So Your Alerts Match Reality on the Grill?
Accurate wireless cooking alerts begin with correct probe placement, followed by reliable connectivity and a verified temperature reading. Insert the sensing portion into the thickest appropriate part of the food, away from bone and other areas that may give an unrepresentative reading. Then test the connection and cross-check the measurement before relying on remote notifications.
The probe is the foundation of the alert system. Changing thresholds cannot correct a sensor that is measuring the wrong part of the food.
According to the USDA guidance on food thermometer placement, thin foods such as sausage patties should be measured by inserting a thermometer from the side until the tip reaches the center.
In an FSIS test-kitchen observation involving 50 participants preparing raw breakfast sausage, 50% used a thermometer to measure the internal temperature. Among those who measured the patties, participants who measured the patties and did not insert the thermometer correctly: 92% did not insert the thermometer correctly. This finding concerns that specific observation, not a population-wide estimate of grilling behavior.
92%
Of participants who measured sausage patties in the reported FSIS observation did not place the thermometer correctly. The limited test-kitchen exercise involved 50 participants overall and does not establish a general error rate for outdoor grilling.
USDA Food Safety and Inspection Service, reported September 2023.
For large roasts, position the sensing area within the thickest relevant portion and avoid bone or gristle. For poultry thighs, check the thickest meaty region without touching bone. For thin burgers, a suitable instant-read thermometer inserted from the side is generally more practical than forcing a large continuous-monitoring probe into a shallow patty.
Probe-specific insertion marks, minimum insertion depths, and heat limits must follow the manufacturer’s instructions. Not every wireless sensor has its temperature-sensing element in the same position.
Connectivity matters independently from sensor placement. Bluetooth and Wi-Fi behave differently, and a closed metal grill, intervening walls, distance, and local radio interference can affect wireless communication.
ThermoWorks documents a 95–foot line-of-sight communication range for its Signals thermometer under specified conditions. That figure is product-specific, and obstacles or interference may reduce practical range. It should not be used as a universal expectation for wireless grilling thermometers.
A connection-loss warning is not a meat-temperature warning. It indicates that the monitoring system may no longer be receiving current measurements. Similarly, a battery warning concerns the equipment’s ability to keep monitoring, not necessarily the condition of the food.
When setting up a new probe, compare the displayed temperature against a suitable instant-read thermometer at the first practical checkpoint. Measure the same relevant internal area, allowing for sensor placement and response differences.
If the readings consistently disagree, investigate insertion depth, probe location, sensor condition, and the manufacturer’s calibration guidance. Do not apply an arbitrary temperature correction without confirming the cause.
Ambient monitoring deserves separate attention during long cooks. A properly positioned grill-temperature probe can reveal significant cooking-environment changes before the food’s internal temperature reflects them. Place the sensor according to its operating instructions, away from direct contact with the grate and other conditions that can distort its intended measurement.
Once the measurements are trustworthy, the next step is learning how to respond to them without treating the notification as automatic proof that the food is done.
Key Takeaways Before You Rely on Alerts
- A temperature notification is a measurement event, not a substitute for checking the food’s actual internal temperature and readiness.
- Pull temperature and final serving temperature can differ because internal temperature may continue rising during rest.
- When a cook runs early or late, respond to verified temperature and cooking conditions rather than blindly following the original schedule.
How to Use a Wireless Meat Thermometer Without Overcooking While You Wait for Alerts?
Use a wireless meat thermometer as a monitoring and decision system, not an automatic cooking controller. Set a suitable pull-temperature alert, keep the wireless connection dependable, and verify the food with an instant-read thermometer when the alert fires. Account for carryover heat and adjust the cooking plan when the actual temperature trend differs from expectations.
The biggest mistake is assuming that a notification makes further judgment unnecessary. A thermometer reports the temperature at its sensing location. It cannot independently guarantee correct placement, consistent doneness throughout the food, or compliance with the required safe internal temperature.
Carryover cooking makes that distinction especially important. Residual heat from a hot exterior can continue moving inward after food leaves the grill, raising its internal temperature.
The ThermoWorks Signals operating instructions recommend accounting for carryover cooking when setting meat temperature alarms. The manufacturer explains that the increase during resting varies according to cooking temperature and the size and thickness of the meat.
There is therefore no universal amount of carryover heat that can safely be subtracted from every target temperature.
Separate pull temperature from final temperature. For foods and methods where carryover is relevant, the pull point may be lower than the intended temperature after resting. However, the cooking process must still satisfy applicable food safety requirements, including minimum temperatures and holding or resting conditions where prescribed.
During a gathering, use an alert-response routine that avoids unnecessary visits to the grill:
- Early temperature warning: review the trend, prepare tools, and decide when to make a physical check.
- Final pull-temperature alert: go to the grill, verify the internal temperature in the appropriate locations, and determine whether the food is ready to remove.
- Routine connection update: monitor it without interrupting guests if the system remains functional.
- Connection-loss warning: restore monitoring or check the food manually rather than assuming its last displayed temperature remains current.
- Unexpected temperature excursion: investigate promptly, especially if it may affect food safety or indicate an unsafe grill condition.
When the food is behind schedule, resist repeatedly opening the lid for reassurance. Check the cooking environment and fuel or heat settings, then allow the system time to respond. If the food is ahead of schedule, consider whether an appropriate safe holding method is available rather than simply leaving it on active heat.
A missed alert is not automatically a ruined meal. The useful response is to confirm the current food temperature, assess its condition, and decide whether further cooking, removal, or safe holding is appropriate.
For anyone hosting outdoors, this replaces constant observation with periodic, meaningful intervention. You remain responsible for the cook, but your attention is concentrated at the moments that matter.
The final step is translating that monitoring approach into actual app settings that are understandable, testable, and easy to adjust after a cook.
How to Set Alerts 10°F Early So You Can Fix Problems Without Rushing (Setup Walkthrough)?
To configure an early warning, identify the correct meat-probe channel, enter the intended pull temperature, and create a warning 10°F below that value if your thermometer supports multiple thresholds. Label the alert clearly and test the notification before cooking. After the cook, compare its timing with the actual pull point and adjust the buffer for next time.
Cooking applications differ, so there is no universal screen path for an early-warning setting. Some devices provide separate high and low alarms; others offer cooking presets, target-temperature notifications, or custom alerts. Some support only one threshold per probe.
For a documented example, the ThermoWorks Signals setup and usage instructions explain how to open a channel and configure its high and low temperature alarms through the app or directly on the thermometer. These controls are specific to Signals and do not establish that every cooking app supports two upward-triggering warnings.
Use the following workflow, adapting the individual controls to the features your thermometer actually provides.
- Choose the correct meat channel. Open the probe associated with the food you want to monitor. Confirm that it is reporting internal meat temperature rather than ambient grill temperature.
- Establish the pull target. Select a temperature appropriate for the cut and cooking method, while respecting relevant food safety requirements. Do not automatically use the application’s default preset.
- Calculate the early threshold. As an initial experiment, subtract 10°F from the intended pull target. Use a smaller or larger offset only after considering the food’s cooking speed and the response time you need.
- Configure available notifications. If the app supports independent upward-crossing alerts, assign one to the early threshold and another to the pull threshold. If it supports only one threshold, use that for the most important decision and create a separate phone reminder or manual monitoring checkpoint as appropriate.
- Name and test the alerts. Use recognizable labels such as « Roast — Check Soon » and « Roast — Verify Pull, » where custom labeling is available. Confirm that the intended device receives a recognizable notification.
- Review the actual results. Record the interval between the warning and the verified pull point, then decide whether the offset was useful, too early, or too late.
For a clearly hypothetical calculation, suppose a roast has a predetermined pull target of 150°F. Subtracting the proposed 10°F warning buffer gives an early threshold of 140°F.
This example demonstrates the calculation only. It is not a recommended pull temperature for every roast or meat type, and the chosen cooking endpoint must be checked against the specific food’s safety requirements.
| Setting | Example value | Purpose |
|---|---|---|
| Planned pull temperature | 150°F | Hypothetical target selected for the example |
| Initial early-warning offset | 10°F | Experimental buffer to evaluate |
| Calculated early threshold | 140°F | Prompt to prepare and verify cooking progress |
| Notification at pull target | 150°F | Prompt to verify the food before removal |
Two configuration errors deserve particular attention. The first is assigning the early warning to the ambient probe instead of the meat probe. The second is using a default target that does not match the actual cut or intended cooking process.
There is also an important distinction between a low-temperature alarm and an early warning. On systems where a low alarm fires when temperature falls below a threshold, setting that alarm to 140°F will not necessarily produce the desired upward-crossing notification. Confirm the trigger behavior in the app or manufacturer’s instructions.
After the first cook, review the temperature graph or recorded alert times. If the warning arrived too close to the pull target, consider a larger offset or a different monitoring method. If the warning arrived so early that it required no meaningful action, reduce the offset.
Before your next gathering, configure one primary pull alert, add an early warning only where it provides useful reaction time, and test the system from the place where you’ll be spending time with guests. A cooking alert setup works best when it lets you step away confidently without treating the grill as something you can safely ignore.
Can I trust cooking alerts if my phone is inside the house?
Only if the thermometer’s communication system remains reliable from that location. Walls, distance, metal grill components, and wireless interference can affect connectivity. Check the connection before leaving the cooking area, verify that notifications can reach your device, and maintain a manual-check backup when signal reliability is uncertain.
Should grill temperature alerts stay enabled overnight?
Essential alerts should remain available when monitoring a long cook, but an app notification does not make an operating grill safe to leave unattended. Follow the grill manufacturer’s supervision and operating instructions, maintain appropriate fire-safety precautions, and never rely on wireless notifications as the sole protection against equipment or fire hazards.
What happens if my thermometer loses connection while food is cooking?
A connection loss means the remote display may no longer be receiving current measurements. Check the monitoring device, restore communication if possible, and verify the food temperature directly when needed. Some systems reconnect automatically, but that behavior depends on the product. Never assume the last displayed temperature represents the food’s current condition.
Do I need a separate thermometer for every item on the grill?
Not necessarily. Continuous probes are particularly useful for thicker cuts that require ongoing internal-temperature monitoring. Thin or rapidly cooking foods can often be checked using a suitable instant-read thermometer. When several large pieces are cooking independently, dedicated probes may help track their different rates of progress, provided each is positioned and configured correctly.
Can a cooking alert tell me when food is safe to serve?
An alert can indicate that a sensor has registered a specified temperature, but it cannot independently confirm that the reading represents the required internal location or that all applicable time-and-temperature conditions have been met. Verify the measurement with an appropriate thermometer and follow food-specific safety guidance. For example, USDA recommendations distinguish ground meats, poultry, and whole cuts because their minimum safe temperatures and preparation requirements differ.