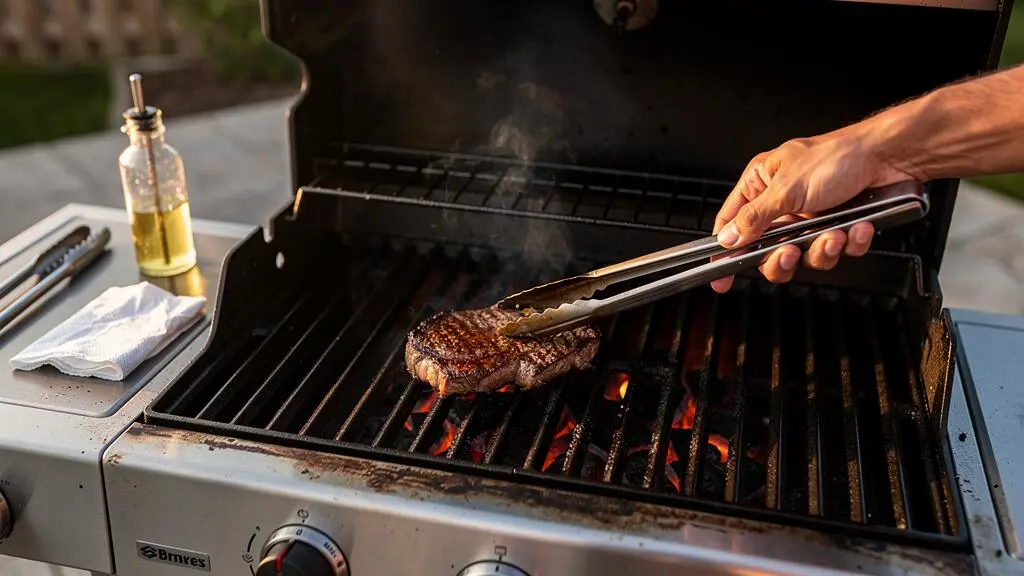
Cast-iron grill grates can produce excellent sear marks and a richly browned surface, but they are less forgiving than many grill owners expect. Food sticks when the surface is dirty, insufficiently preheated or coated with excess oil. Rust develops when exposed iron stays damp. Uneven heat becomes a problem when heavy grate bars sit over burners with different heat outputs.
The solution is not constant scrubbing or repeatedly adding thick layers of seasoning. It is a manageable routine: preheat deliberately, apply oil sparingly where appropriate, match foods to the heat available, and keep the grates clean and dry between uses.
For UK households grilling several times a week, particularly in a damp climate, choosing the right grate material matters almost as much as cooking technique. Bare cast iron and porcelain-enamelled cast iron also need different treatment, so check the manufacturer’s instructions before oiling, stripping or re-seasoning a grate.
Cast-iron grate essentials
- Preheat gradually and use the thinnest practical oil film on compatible bare cast iron to reduce sticking and gummy deposits.
- Manage hot spots by adjusting burner zones and moving food rather than relying on cast iron to distribute all heat evenly.
- Remove residues, dry exposed iron thoroughly and protect it from moisture; re-season when the existing coating shows actual wear.
- Why Do Cast-Iron Grates Sear Better but Also Burn Food Faster?
- How to Preheat and Oil Cast-Iron Grates in 10 Minutes Without Creating Sticky Build-Up?
- How to Apply Oil to Hot Cast-Iron Grates So It Seasons Instead of Turning Gummy?
- Cast Iron or Stainless Grates: Which Makes Sense if You Grill 2–3 Times a Week?
- The Cleaning Mistake That Makes Cast-Iron Grates Rust After One Rainy Week
- When Should You Re-Season Cast-Iron Grates to Keep Them Non-Stick Without Overdoing It?
- How to Season Cast Iron in 3 Thin Coats Without Smoking Out Your Kitchen?
- How to Season Cast Iron for Grilling So It Survives 500°F Without Flaking
Why Do Cast-Iron Grates Sear Better but Also Burn Food Faster?
Heavy cast-iron grates can sear effectively because their substantial thermal mass stores heat and supplies energy to food at the contact points. That encourages rapid surface browning, but it can also burn food if the bars are excessively hot or the food remains stationary too long. Cast iron offers strong contact heat, not automatic temperature control.
The important distinction is between storing heat and distributing it evenly. Thick cast-iron bars lose less temperature when cold meat first touches them than lighter bars of otherwise comparable design. Their stored energy helps establish strong contact browning before the metal cools significantly.
The browned flavour and crust are partly associated with the Maillard reaction, in which amino acids react with reducing sugars during cooking. Texas A&M’s barbecue science resource explains the underlying food chemistry, although it does not establish that cast iron outperforms stainless steel in controlled grilling tests.
Cast iron does not make every part of a barbecue equally hot. Burner layout, air circulation, grate thickness, accumulated deposits and local wear can all influence the heat delivered to different areas. On a modular grate, joints and variations in bar geometry may also affect contact temperatures.
A practical way to investigate uneven cooking is to place similarly sized pieces of bread across a preheated grate briefly, then compare their browning. Use a controlled moderate setting, observe closely and remove the bread before it burns. This is a qualitative kitchen check, not a calibrated temperature test. Avoid scattering loose flour onto a lit barbecue because it can burn and create unnecessary airborne particles.
Once the hotter areas are identified, use them selectively:
- Steaks and burgers: benefit from strong initial contact heat, followed by movement to a cooler zone when necessary.
- Firm vegetables: can develop attractive browning but may need turning or repositioning to prevent scorching.
- Delicate fish: is more vulnerable to tearing and may be better suited to a fish basket, cooking plate or less aggressive surface.
- Sugar-heavy marinades: can blacken quickly, so apply them later or cook at lower heat.
Strong searing does not require leaving food untouched until the grate marks become dark. Watch the whole surface of the food, not just the lines where it contacts the iron.
The next step is controlling that stored heat through preheating and careful oil application, rather than allowing it to work against the cook.
How to Preheat and Oil Cast-Iron Grates in 10 Minutes Without Creating Sticky Build-Up?
A practical 10-minute preparation routine starts with clean grates, moderate burner heat and a very small amount of oil on compatible bare cast iron. Warm the grates progressively, wipe away nearly all visible oil and finish preheating to the cooking temperature. Ten minutes is a preparation target, not a guaranteed heating time or a complete seasoning cycle.
Starting with maximum burner output is not necessarily the best approach. A moderate initial setting gives the cook an opportunity to check for leftover grease, assess the grate condition and avoid immediately overheating any oil already on the surface. Heavy grates may require longer to reach a stable temperature, especially in cold or windy weather.
Before following a routine, distinguish uncoated iron from porcelain-enamelled grates. Enamelled cooking surfaces generally do not require the same seasoning treatment as bare cast iron, and abrasive methods can damage their coating.
For a compatible bare-iron grate, the following is a practical sequence:
- Minutes 0–3: inspect the grates, remove loose cooking debris and begin heating at a moderate setting with the lid positioned according to the barbecue manufacturer’s instructions.
- Minutes 3–5: check that the bars are warming and remove any remaining loose residue using a suitable grill-cleaning tool.
- Minutes 5–7: if oiling is appropriate, lightly wipe the grate with oil using a folded, lint-free cloth held in long tongs. Avoid direct pouring or spraying.
- Minutes 7–10: complete preheating towards the required cooking setting while monitoring smoke and surface condition.
The timings are illustrative. Actual preheating depends on grate mass, burner output, ambient conditions and the grill model. If the grate is not ready after ten minutes, allow more time rather than compensating with an uncontrolled blast of heat.
Oil thickness is especially important. A heavy application can leave sticky deposits because the layer does not cure consistently. More oil does not automatically produce better release or greater rust protection.
There is also a difference between preparing a surface for cooking and creating a durable seasoning layer. Weber‘s cast-iron grate maintenance instructions describe an initial preparation that includes 15 minutes of preheating followed by approximately 1–1.5 hours of controlled heating for specified grates. That manufacturer-specific process should not be confused with the shorter routine described here.
When the grate is ready, oil management becomes more important than adding another generous coating. The application technique determines whether the surface stays usable or develops unwanted residue.
How to Apply Oil to Hot Cast-Iron Grates So It Seasons Instead of Turning Gummy?
Apply oil to compatible cast-iron grates as an extremely thin film, never a visible puddle. Use long tongs and a suitable folded cloth or firmly secured, heat-tolerant applicator, working over a controlled heat source. Excess oil can form sticky residue, while oil applied to an excessively hot grate may smoke immediately or ignite.
First, distinguish light maintenance oiling from full seasoning. A thin protective wipe can help limit moisture exposure on bare iron, but a durable polymerised coating requires sufficient controlled heating. Simply wiping oil across a hot surface does not guarantee that it has bonded into a stable seasoning layer.
The choice of oil should account for its smoke behaviour, availability and the manufacturer’s guidance. Refined oils are often more convenient for high-temperature cooking than oils with relatively low smoke points, but a high smoke point alone does not prove superior seasoning performance.
The U.S. Canola Association‘s cooking oil comparison provides illustrative smoke-point figures:
| Oil | Reported smoke point | Practical consideration |
|---|---|---|
| High-oleic canola oil | 246°C / 475°F | Relatively high reported smoke point; check the specific formulation. |
| Canola oil | 242°C / 468°F | Commonly available refined cooking oil. |
| Sunflower oil | 240°C / 464°F | Suitable for consideration where the oil specification permits. |
| Soybean oil | 234°C / 453°F | Another refined vegetable-oil option. |
| Refined olive oil | 220°C / 428°F | Different heat behaviour from extra virgin olive oil. |
| Extra virgin olive oil | 166°C / 331°F | May smoke earlier in high-heat applications. |
These are published comparison values, not guaranteed limits for every brand or batch. They also describe smoking, not the precise time or temperature required for reliable polymerisation on a barbecue grate.
For light maintenance oiling, turn the heat down or off when necessary, and keep hands well away from hot surfaces. Apply a small amount of oil to the cloth before approaching the grill. Wipe along accessible grate bars without allowing the material to touch flames or become loose. Stop immediately if the applicator begins smoking heavily or charring.
Never spray aerosol oil directly over an operating burner, pour oil into the grill or attempt to extinguish a flare-up with water. Use an applicator suitable for the temperature and follow the barbecue’s safety instructions.
A visually sound result is a restrained, reasonably uniform sheen without droplets collecting at intersections or between bars. If oily patches remain, remove the excess once the grate can be handled safely.
Specialist seasoning oils can be considered, but claims of superior bonding or longevity require product-specific evidence. For routine care, technique and surface preparation are more actionable than marketing claims.
Even a well-oiled cast-iron grate requires continued attention. Whether that effort makes sense for frequent grilling depends on how much upkeep the owner is willing to accept.
Cast Iron or Stainless Grates: Which Makes Sense if You Grill 2–3 Times a Week?
For grilling two or three times a week, cast iron makes sense if strong contact searing is a priority and regular cleaning, drying and rust prevention are acceptable. Stainless steel may be the better choice when low-maintenance ownership matters more. Thick, well-preheated stainless grates can also sear effectively, so the decision is not simply about which material gets hotter.
Frequency of use changes the maintenance calculation. Someone grilling regularly may find it easy to keep bare iron clean and protected because the barbecue is inspected often. But frequent cooking also produces grease, residues and repeated thermal cycling, all of which require attention.
Stainless steel generally offers greater resistance to rust in ordinary outdoor use, although the alloy, construction and environment still matter. It is not maintenance-free: grease and burned-on deposits still affect cooking and cleaning.
Cast iron is particularly sensitive to storage conditions when the protective surface becomes compromised. In a damp UK garden, a barbecue that cools overnight and is repeatedly exposed to condensation may require more diligent drying and protection than one stored in a sheltered, dry space.
The following comparison focuses on everyday ownership rather than unsupported claims of universal cooking superiority.
| Decision factor | Cast iron | Stainless steel |
|---|---|---|
| Contact searing | Heavy bars retain substantial heat; performance depends on design and temperature. | Thick bars can deliver effective searing when properly preheated. |
| Rust management | Bare iron needs drying and protective care. | Generally more corrosion-resistant, depending on alloy and conditions. |
| Cleaning | Avoid unnecessary removal of sound seasoning. | Usually more tolerant of routine cleaning methods. |
| Outdoor storage | Benefits from particular attention to damp conditions. | Often a more forgiving option. |
| Long-term replacement | Fit, shape, coating and model compatibility must be checked. | Dimensions, design and mounting compatibility still matter. |
The familiar claim that cast iron always sears better overlooks grate geometry. A thick stainless bar with sufficient stored heat may outperform a lightweight cast-iron arrangement under particular conditions. Without a controlled comparison using the same grill and food, a universal ranking is not justified.
A practical compromise is a hybrid cooking layout: a removable cast-iron section for steaks and burgers, with compatible stainless grates elsewhere. This limits the amount of exposed iron requiring attention while retaining a dedicated contact-searing area.
Before buying replacement grates, check the exact model, dimensions, support points, lid clearance and any restrictions concerning mixed grate materials. Grill grates are not universally interchangeable, even when their nominal widths appear similar.
Whichever material is selected, poor cleaning and damp storage can undermine cooking performance. For bare cast iron, that combination is particularly unforgiving.
The Cleaning Mistake That Makes Cast-Iron Grates Rust After One Rainy Week
The mistake most likely to leave bare cast-iron grates rusty is removing their protective coating and then storing them damp or unprotected. Washing is not inherently the problem; leaving exposed iron wet is. Rain, condensation and trapped humidity can reach vulnerable areas, especially where scraping or corrosion has already damaged the seasoned surface.
Rust forms when iron reacts in the presence of moisture and oxygen. A sound protective coating reduces exposure, but it does not make uncoated cast iron permanently immune to corrosion.
After cooking, distinguish ordinary food residue from deposits that require more intensive removal. Loose char and grease should be dealt with using equipment appropriate to the grate and its coating. Cleaning to bright bare metal after every meal is unnecessary and can create additional maintenance for seasoned, uncoated iron.
A useful three-stage approach separates routine cleaning, occasional restoration and storage protection:
- Routine cleaning: remove loose food deposits with a suitable scraper or brush, observing the manufacturer’s instructions and allowing safe handling conditions.
- Occasional deeper cleaning: where persistent deposits require washing or softening, use a method approved for the grate, then rinse as appropriate and dry thoroughly. Do not assume prolonged soaking or aggressive steaming is suitable for every coating.
- Protection before storage: inspect for exposed bare iron and, where the manufacturer recommends it, apply a very light protective oil coating before placing the grate in a dry location.
Be cautious with wire brushes that can shed bristles. Inspect cleaning tools, check for detached fragments and replace damaged brushes. A suitable bristle-free scraper may be preferable for some grate designs.
Outdoor storage needs particular attention. A cover can keep direct rain off the barbecue, but a poorly ventilated cover may also trap humid air and condensation. Allow the equipment to cool and dry before covering it, use a cover suited to the grill, and inspect stored grates periodically. For prolonged wet-weather or winter storage, moving removable bare-iron grates into a dry, sheltered place may be worthwhile.
If rust has already appeared, determine whether the damage is superficial. Light orange-brown deposits on otherwise intact iron can often be removed, followed by thorough drying and renewed seasoning where appropriate. Extensive, deeply pitted corrosion requires more careful assessment.
Lodge‘s published cast-iron restoration guidance describes removing rust, washing and drying the metal, applying a very thin oil layer and heating it to restore seasoning. Its detailed oven method concerns cookware rather than a validated procedure for every barbecue grate.
A grate with severe loss of material, structural cracking, major deformation or a deteriorating porcelain coating may need replacement rather than further abrasive treatment.
Five checks before storing cast-iron grates
- Remove loose food debris and verify that the cooking bars have no substantial stuck-on deposits.
- Inspect the top and underside for orange rust and identify any exposed-iron patches.
- Ensure washed areas and hidden corners are fully dry, with no visible water remaining.
- Apply a minimal protective oil film where appropriate and confirm that no greasy pools remain.
- Choose a sheltered, ventilated storage arrangement and confirm that the grate is not resting on a wet surface.
Once cleaning and storage are under control, the remaining question is how often the seasoned surface genuinely needs rebuilding.
When Should You Re-Season Cast-Iron Grates to Keep Them Non-Stick Without Overdoing It?
Re-season bare cast-iron grates when their protective coating has visibly deteriorated, rust has been removed or food begins sticking despite proper cleaning, preheating and cooking technique. A fixed weekly or monthly schedule is unnecessary for every grill. The condition of the surface, the manufacturer’s instructions and the intensity of use are better guides.
A grate may need attention after aggressive cleaning, rust removal or repeated exposure to moisture. Conversely, a regularly used grate that remains protected and performs well may not need a complete seasoning cycle simply because a certain number of weeks has passed.
Look for several indicators together rather than relying on colour alone:
- New patches of exposed grey metal on previously seasoned bare iron.
- Light rust appearing after cleaning or storage.
- Persistent sticking that remains after correcting preheating, food preparation and surface cleanliness.
- Flaking, raised deposits or uneven built-up layers that interfere with the cooking surface.
A dark, reasonably uniform surface may indicate established seasoning, but black colour alone does not prove that the coating is sound. Burnt food residue can also look black, while a functioning seasoned surface need not display a perfectly uniform shade.
There is an opposite problem: adding oil too frequently or in excessive quantities can create thick, uneven deposits. These can remain tacky, accumulate char and eventually peel or flake during heating and cleaning. The solution is not to keep layering oil over unstable material.
Distinguish maintenance oiling from complete re-seasoning. Maintenance involves cleaning, drying and applying a minimal protective coating where appropriate. Re-seasoning deliberately heats a thin oil layer to develop a bonded protective film. The second operation requires more time and controlled conditions.
If a coating is visibly flaking, remove unstable material using a method suitable for the grate before attempting to restore the seasoning. Heavy scraping also risks removing sound protective layers, so restoration should be proportional to the damage.
A frequently used grill may need less intensive restoration when routine cleaning is gentle and consistent. Equally, corrosion after a single poorly protected storage period can create an immediate need for attention, irrespective of the last seasoning date.
When a full restoration is justified, applying multiple extremely thin coats is more sensible than trying to build one thick layer. The next challenge is doing that without unnecessary smoke.
How to Season Cast Iron in 3 Thin Coats Without Smoking Out Your Kitchen?
Three thin seasoning coats can be applied by cleaning and drying bare cast iron, wiping on a very small amount of oil, heating it under controlled conditions and repeating only after the surface is ready. For outdoor grill grates, an appropriately controlled barbecue may be more practical than an indoor oven. Three coats are an optional approach, not a proven universal requirement.
The central principle is thin application. Each coat should be wiped back until little visible liquid oil remains. Thick coatings are harder to cure consistently and are more likely to leave a sticky or uneven finish.
Before beginning, confirm that the grate is bare cast iron and that the manufacturer permits re-seasoning. Do not put grates into an oven without checking their dimensions, fittings, coating and compatibility with the appliance.
For suitable bare cast iron, a staged three-coat process is:
- First coat: remove loose rust and unstable deposits, wash if required, dry completely, apply a small amount of suitable oil and wipe away nearly all of it. Heat according to a validated method for the particular grate or appliance.
- Second coat: after the first layer has cured and the grate has cooled sufficiently for safe handling, inspect the surface. Apply another nearly invisible film and repeat the appropriate controlled heating cycle.
- Third coat: repeat only if additional coverage is useful and the previous coating is firm rather than tacky. Allow the finished grate to cool safely before checking for uneven deposits.
One documented reference point is Lodge’s cookware-restoration procedure, which uses 450–500 °F (approximately 232–260°C) for one hour before cooling. That is an example for cast-iron cookware, not an instruction that every barbecue grate should undergo the same treatment.
450–500°F
The oven-temperature range specified in Lodge’s cast-iron cookware restoration instructions. It is not a universal setting for grill-grate seasoning.
Lodge Cast Iron, cookware restoration guidance.
Controlling kitchen smoke requires more than selecting an oil with a high smoke point. A thin film, clean equipment, suitable ventilation and carefully controlled heating all matter. Some smoke or odour may still occur during seasoning, and keeping the oven below an oil’s smoke point does not guarantee a fully cured coating.
If indoor ventilation is inadequate or the process produces excessive smoke, stop rather than increasing heat. An outdoor barbecue may offer a more appropriate environment when its manufacturer permits the procedure. Do not operate a charcoal or gas barbecue indoors, in a garage or in another enclosed space.
Sticky seasoning usually indicates that the layer has not cured properly or that too much oil was applied. Allow the grate to cool, remove excess tacky material as appropriate, and reassess oil thickness and the heating procedure before attempting another coat.
The number of coats is less important than completing each stage successfully. A firm, thin layer is a better starting point for normal cooking than several layers of uncured residue.
Even a carefully cured coating has limits on a high-heat barbecue. It must withstand direct heating, burned-on food and repeated cleaning, which makes long-term maintenance more important than chasing a permanent finish.
Key takeaways before high-heat grilling
- A seasoning procedure must suit the actual grate material and barbecue, not simply copy an oven method intended for a frying pan.
- Finish curing one thin layer before considering another; adding oil over tacky deposits increases the risk of unstable build-up.
- Plan for inspection and occasional restoration because repeated high-heat cooking and cleaning will eventually affect the protective surface.
How to Season Cast Iron for Grilling So It Survives 500°F Without Flaking
To give bare cast-iron grill grates the best chance of retaining their seasoning near 500°F (260°C), start with a clean, dry surface, use exceptionally thin oil coats and follow a controlled heating procedure approved for the grate. No seasoning can be guaranteed never to flake at that temperature, particularly under direct flame exposure and repeated cleaning.
A barbecue grate experiences conditions that differ from ordinary stovetop cookware. Heat is delivered from burners or charcoal below the surface, while dripping fat, food residues and airflow create changing local conditions. The bars may also undergo repeated heating and cooling cycles during one cooking session.
Importantly, a cooking chamber displaying 500°F does not establish that every grate bar is at exactly 500°F. Contact temperatures can vary across the surface, and flare-ups may expose particular areas to more intense heating.
The main practical risk during seasoning is building a layer that is thicker or less stable than intended. Excess oil can form uneven deposits, and material that remains incompletely cured is more vulnerable to sticking, abrasion and visible deterioration.
For compatible bare cast-iron grates, a barbecue-based restoration approach can be considered:
- Remove loose rust, food debris and failing surface deposits using a manufacturer-approved method.
- Dry the grate thoroughly, paying attention to intersections, edges and the underside.
- Apply an exceptionally thin coating of suitable oil, wiping away any visible accumulation.
- Use the barbecue’s approved seasoning settings and duration rather than assuming maximum burner output is appropriate.
- After controlled cooling, inspect for tackiness, uncovered areas, flaking and uneven build-up before deciding whether another coat is necessary.
Seasoning on the barbecue itself can make practical sense because the grate is heated in its normal appliance. However, matching a grill’s operating environment does not establish that the resulting coating will withstand every future flare-up. Follow the manufacturer’s stated heating procedure rather than improvising a temperature or duration from the grill’s maximum setting.
At high cooking temperatures, some dark residue may be burned food or carbonised oil rather than stable seasoning. If loose material is flaking onto food, stop using the grate until the surface has been properly inspected and cleaned. Do not simply seal the flakes beneath another oil coat.
After cooking, allow safe cooling, remove problematic deposits, dry the grate and protect exposed bare iron as recommended. Treat these small interventions as part of the equipment’s normal life rather than evidence that the seasoning procedure has failed.
It is also worth distinguishing normal surface wear from damage to the grate itself. Extensive pitting, cracking, deformation or failure of an enamel coating calls for an equipment assessment, not merely more seasoning.
For the next cook, inspect the grate before lighting the barbecue, preheat it deliberately and use the minimum maintenance oil needed for its condition. A repeatable cleaning and storage routine is more valuable than trying to create a seasoning layer that will never need attention again.
Do porcelain-enamelled cast-iron grill grates need seasoning?
Not necessarily. Porcelain enamel provides a protective surface, and many enamelled grates do not require traditional bare-iron seasoning. Follow the manufacturer’s care instructions. Avoid abrasive stripping or high-temperature seasoning procedures unless expressly approved for that coating.
Should oil go on the steak or directly onto cast-iron grates?
Both approaches can be useful in different circumstances. Lightly oiling suitable food can limit the need to wipe oil onto an extremely hot grate. A minimal protective film may still be appropriate for bare cast iron. Avoid excess oil in either location because dripping fat and oil can contribute to flare-ups.
Can a rusty cast-iron grate still be used for cooking?
Light surface rust can often be removed from sound, uncoated cast iron, followed by thorough cleaning, drying and suitable re-seasoning. Do not cook directly on loose rust or deteriorating material. Deep pitting, cracks or damaged enamel may justify replacement.
Why does food still stick to a properly seasoned grate?
Seasoning reduces sticking but cannot eliminate it. An insufficiently preheated grate, residual sugar, burned-on deposits, delicate food structure or moving food before it releases can all contribute. Check surface cleanliness and cooking temperature before adding more seasoning.
Is it safe to leave cast-iron grill grates outside throughout winter?
Outdoor storage can expose bare cast iron to persistent humidity and condensation, even beneath a cover. If the barbecue manufacturer permits removal, storing cleaned, dry grates in a sheltered indoor location may reduce corrosion risk. Inspect their condition before the next grilling season.