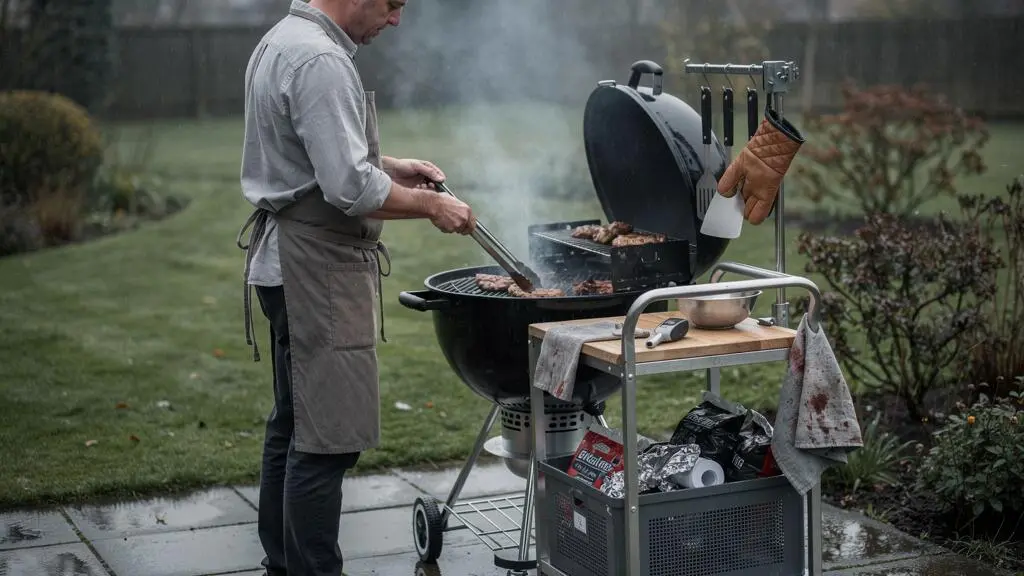
Rain-soaked tongs, a spatula buried beneath a barbecue cover and a missing thermometer can turn an otherwise straightforward cook into a frustrating search. In a UK garden, where showers, overnight condensation and damp patios are familiar problems, leaving grill tools wherever they land rarely works for long.
The solution is a weather-aware grill-side storage system built around three principles: keep frequently used tools within one arm’s reach, protect clean equipment from moisture, and position every storage fitting safely away from heat and grease.
That does not require a complete outdoor kitchen. A kettle barbecue can work with a stable metal trolley and a few hooks. A built-in cooking station may only need better tool placement and a ventilated storage box. Even a compact portable grill can benefit from a dedicated caddy.
The important distinction is between equipment needed while cooking and items that should remain in secondary storage. Once those roles are clear, the barbecue becomes easier to manage without covering every available surface in accessories.
Grill-side storage: the essentials
- Keep four to six frequently used tools in a fixed, one-reach zone, safely outside the grill’s heat and grease paths.
- Choose hooks for sheltered, ventilated locations and a suitable lidded box for more exposed gardens. Dry tools before storing them.
- Reset equipment after cooking, inspect fittings periodically and check everything before the next barbecue.
- Why Does Grill-Side Clutter Lead to Burnt Food and Minor Burns?
- How to Build a One-Reach Tool Zone So You Never Leave the Grill Unattended?
- Hooks or Tool Box: Which Keeps Grill Tools Drier in UK Rain and Humidity?
- The Storage Placement Mistake That Turns a Handy Shelf Into a Fire Risk
- When Should You Restock and Reset Storage So Next Weekend’s BBQ Starts Smooth?
- How to Build a One-Reach Tool Zone So You Never Leave the Grill Unattended?
- Hooks or Tool Box: Which Keeps Grill Tools Drier in UK Rain and Humidity?
- How to Set Up a Barbecue Cooking Station So You Stop Losing Time Mid-Cook
Why Does Grill-Side Clutter Lead to Burnt Food and Minor Burns?
Grill-side clutter creates two avoidable hazards: misplaced tools can make you leave food unattended, while equipment left on hot surfaces can cause direct contact burns. Wind, sudden flare-ups and wet ground make these interruptions more troublesome outdoors. Keeping essential tools accessible reduces unnecessary searching, although good organisation never replaces active supervision or safe barbecue handling.
Consider a familiar situation: burgers are cooking when the tongs disappear. You look beneath the grill, move a plate, then walk towards the kitchen. During that interruption, the food continues cooking, and a sudden flare-up may go unnoticed.
This illustrates missing-tool clutter. The danger comes from losing attention at the point when the cook needs it most.
Horizontal clutter works differently. A spatula resting on a hot lid may become dangerously hot to touch. Packaging, cloths or gloves left close to the firebox can be exposed to heat or ignition. Items piled on a side shelf may also conceal controls, interfere with access or fall onto the cooking area.
Outdoor conditions compound these problems:
- Wind: unexpected gusts can affect flames, carry lightweight packaging towards heat and complicate flare-up management.
- Rain: wet paving increases the likelihood of slipping when moving quickly between the grill and a storage area.
- Grease: dirty tools and contaminated surfaces can become slippery and introduce additional fire hazards.
- Restricted space: crowded patios leave little room to move safely around hot equipment.
The UK government outdoor fire safety guidance advises following the manufacturer’s safety instructions and keeping barbecues away from combustible materials. Its guidance applies to England and does not establish a specific grill-tool storage distance or demonstrate a quantified reduction in burns from better organisation.
A useful self-check is the next 30 seconds test. Imagine needing your tongs, food thermometer or heat-resistant glove immediately. Can you pick up each item in a single motion, without looking away from the cooking surface or reaching over heat?
If the answer is no, that tool deserves a better position. Prioritise anything you routinely search for during active cooking rather than rearranging equipment that rarely leaves its box.
Removing those hazards creates room for a practical tool zone, but the next challenge is making frequently used equipment accessible without creating fresh obstructions.
How to Build a One-Reach Tool Zone So You Never Leave the Grill Unattended?
A one-reach tool zone is the area you can access while standing in your normal cooking position, without moving your feet, turning your back or reaching across hot surfaces. Build it around four to six frequently used tools, assign each a permanent retrieval point and arrange them in cooking order. The aim is fewer unnecessary movements, not eliminating every reason to step away.
Stand in front of your barbecue as you would when turning food. Extend your arm naturally to the side and slightly forwards, keeping clear of the hot lid, exhaust and cooking surface. This comfortable arc defines where regularly used tools could sit, subject to the grill manufacturer’s clearance requirements.
Do not treat arm’s reach as permission to mount hooks immediately beside a firebox. If no safely positioned storage surface falls inside the arc, use a stable trolley or accessory compatible with your grill instead.
Start with equipment that genuinely earns its place:
- Long-handled tongs for turning and moving food.
- A spatula for burgers, fish or delicate ingredients.
- A food thermometer for checking cooking temperatures.
- Suitable heat-resistant gloves for handling hot equipment.
- A clean utensil or serving implement reserved for cooked food.
- One additional tool specific to your normal cooking routine.
Give every tool a single-contact retrieval point. A hook should allow the utensil to lift freely. A caddy should hold its contents upright without tangling handles. A suitable magnetic holder should retain compatible metal tools securely without requiring excessive force to remove them.
Arrange the tools in a predictable sequence, such as prep, flip, test and serve. The arrangement need not be identical for every cook. It should match your dominant hand, available space and actual workflow.
Adapt the physical setup to the barbecue:
- Kettle grill: position a stable freestanding metal trolley beside the cooking area, outside required heat clearances.
- Built-in station: use a rail, recessed tool holder or manufacturer-approved accessory attached to a suitable cool surface.
- Portable grill: use a portable caddy on a separate stable surface rather than overloading the grill or attaching unsuitable clamps.
Test the arrangement during an ordinary cook. Notice when your hand moves towards the wrong hook or when one tool obstructs another. Change the placement afterwards, once equipment is cool.
Build and verify your one-reach BBQ tool zone
- Stand at the cooking position and identify a comfortable, heat-safe reach area. Deliverable: a clearly identified storage location.
- Select the four to six tools used most often. Deliverable: a short essentials list.
- Assign each tool an individual hook, holder or caddy slot. Deliverable: one designated position per tool.
- Arrange the positions in cooking sequence and check they do not obstruct movement or hot components. Deliverable: an accessible, unobstructed layout.
- Complete one supervised cook and record any awkward reaches or searches. Deliverable: a tested layout with necessary adjustments identified.
Once every essential tool has a home, decide how to protect those positions from rain, condensation and the moisture that remains after cleaning.
Hooks or Tool Box: Which Keeps Grill Tools Drier in UK Rain and Humidity?
Neither hooks nor a closed tool box always keeps barbecue utensils drier. Hooks encourage drainage and airflow but leave tools exposed to rain and humid air. A lidded box shields equipment from direct rainfall but can retain moisture through condensation or damp contents. For UK gardens, the better choice depends on shelter, ventilation and whether tools are dry before storage.
Open hooks make sense beneath a sufficiently protective patio roof or inside a sheltered outdoor cooking station. Water can drip away from utensils, surfaces remain visible, and early rust is relatively easy to spot.
However, hooks provide little protection against wind-driven rain. Even stainless steel can develop surface staining or corrosion under unsuitable environmental conditions, especially where deposits and moisture remain on the metal.
A closed container offers physical protection from splashes, dirt and direct rainfall. Yet a box is not necessarily dry inside. If the temperature falls overnight, moisture in the enclosed air can condense on cooler surfaces. Storing a wet spatula or damp cloth makes the problem worse.
The following comparison focuses on how each system behaves under typical outdoor conditions rather than assuming that an enclosed container automatically provides better protection.
| Consideration | Open hooks | Lidded storage box |
|---|---|---|
| Direct rain | Limited protection unless sheltered | Better protection with a weather-resistant lid |
| Drying | Good airflow when tools are spaced apart | Depends on ventilation and internal moisture |
| Rust inspection | Visible without opening storage | Requires regular internal checks |
| Daily access | Fast individual retrieval | Lid must be opened and contents organised |
| Outdoor installation | Requires secure mounting | Requires a stable, appropriately positioned surface |
| Best suited to | Sheltered, frequently used stations | Exposed gardens and longer storage intervals |
The most important habit works with either option: wipe, clean and allow tools to air-dry before putting them away. A moisture absorber can help manage humidity inside a suitable box, but it does not replace drying, ventilation or inspection.
Material selection also matters. Stainless steel is generally more corrosion-resistant than unprotected carbon steel, although the exact grade, finish and exposure determine performance. Carbon-steel utensils need particular attention to drying and appropriate surface care. Wooden handles can retain moisture and deteriorate if repeatedly stored wet; damaged protective coatings also expose underlying metal.
The BSSA guidance on stainless steel selection for exterior applications identifies grade 304 as suitable for many UK external environments, with grade 316 often preferable in more demanding coastal or heavily polluted conditions. This guidance addresses external stainless-steel applications, not a direct performance test of barbecue tools or storage boxes.
For hooks and fittings, properly finished stainless steel, galvanised steel or suitable powder-coated metal are sensible candidates. Coating quality, exposed edges and maintenance remain important.
Whether you select open or enclosed storage, its position around the barbecue matters just as much as its resistance to damp conditions.
The Storage Placement Mistake That Turns a Handy Shelf Into a Fire Risk
The most dangerous grill-side storage mistake is installing a shelf, hook rail or caddy directly above or too close to the firebox, hot exhaust or grease collection route. A conveniently placed shelf can expose paper towels, cleaning sprays, packaging and other combustible items to intense heat. Safe positioning must follow the specific barbecue manufacturer’s instructions rather than an assumed universal clearance.
A shelf mounted just behind the lid might look practical when the barbecue is cold. During cooking, however, rising heat and exhaust can affect stored items and mounting hardware. A gust of wind may also change where heat or flames travel.
Items that require particular separation include spare fuel, charcoal bags, disposable cloths, paper towels, packaging and aerosol products. Keep them away from the grill’s heat and ignition sources, following their own storage instructions.
There is also a less obvious hazard beneath the cooking surface. Grease may run into trays, channels and collection containers. Storing equipment where grease can drip or accumulate leaves utensils dirty and may contribute to combustible deposits.
Clearance requirements depend on the equipment. For example, the Weber Spirit grill owner’s manual for specified older Spirit gas models instructs users to keep flammable materials approximately 60 cm away, including above and around the appliance.
Approximately 60 cm
Clearance from flammable materials stated in the referenced Weber Spirit manual for specified models. This is not a universal clearance requirement for every gas, charcoal or portable barbecue.
Weber-Stephen Products LLC, Spirit Owner’s Guide, document 48660.
The correct clearance for your installation is the one specified for your particular grill and any approved accessories. Never adopt the Weber figure as a substitute for another manufacturer’s instructions.
Before mounting or positioning storage, check the following:
- Heat clearance: keep fittings and contents outside the manufacturer’s required separation distances.
- Exhaust route: do not place shelves or stored objects where hot air or combustion gases discharge.
- Grease route: avoid drip trays, grease channels and areas vulnerable to fat accumulation.
- Combustible separation: keep fuel, aerosols and other flammable supplies out of the active tool-storage area.
- Mounting integrity: use appropriate materials and fixings, and ensure the installation remains stable.
Repeated heating and cooling can affect adhesives, coatings, plastic fittings and the security of some mounts. Metal components are generally preferable to unsuitable plastics in locations that may become warm, but metal also conducts heat and must not be assumed safe simply because it will not melt.
Inspect hooks, rails and shelves periodically for movement, corrosion, deformation and heat damage. Never rely on an untested adhesive hook or improvised attachment close to cooking equipment.
A safely positioned storage system still needs maintenance. Without a simple reset routine, even a well-designed setup gradually fills with dirty, missing or deteriorating equipment.
When Should You Restock and Reset Storage So Next Weekend’s BBQ Starts Smooth?
Reset grill-side storage after every cook, once tools can be handled safely, and inspect the system more thoroughly about once a month during regular use. Before each barbecue, verify that essential tools, fuel and clean serving equipment are ready. In damp UK conditions, add seasonal checks for condensation, corrosion and weather damage, particularly before winter and the main barbecue season.
The most effective routine begins as the barbecue is finishing. Do not put off cleaning until the next time you cook, when dried grease and misplaced utensils will be harder to deal with.
Clean utensils appropriately, wipe away moisture and allow everything to dry before returning it to the assigned holder. The grill itself must remain supervised as required until safely extinguished or shut down and cooled according to its instructions. Do not store hot equipment or move hot coals into storage containers.
A useful maintenance rhythm separates daily operational problems from slower structural deterioration.
| When | What to check | Why it matters |
|---|---|---|
| After each cook | Clean and dry tools, remove waste, return equipment | Prevents dirty or missing utensils accumulating |
| Before each barbecue | Tools, fuel, gloves, clean plates and clear surfaces | Reduces unnecessary searches and interruptions |
| Monthly during regular use | Rust, fittings, hinges, hooks, ventilation and supplies | Identifies wear and hidden moisture |
| Before winter | Dry and protect stored contents; assess exposed equipment | Limits prolonged damp exposure |
| Before peak season | Deep-clean storage, check fixings and review contents | Restores a reliable setup after reduced use |
These intervals are practical household routines rather than manufacturer-certified maintenance schedules. Always follow any more frequent checks prescribed for your appliance.
Consumables and structural items need different attention. Fuel, foil, suitable gloves and cleaning materials may run out without obvious warning. Check them before the next planned cook. Loose fixings, corrosion and damaged hinges develop more gradually but can affect safety; inspect these during routine maintenance and whenever damage becomes visible.
For gas barbecues, check the available fuel supply and follow the manufacturer’s instructions for cylinder handling, leak checks and storage. Do not bring gas cylinders indoors or keep them in an enclosed tool box. Charcoal and other fuels should likewise be stored according to their packaging and the appliance instructions, away from heat and ignition sources.
The five-minute pre-cook check is deliberately straightforward: confirm the tongs and thermometer are present, verify clean utensils and serving plates, check the fuel supply, inspect storage for moisture and remove anything obstructing the working area.
During winter, consider moving cleaned and fully dried utensils indoors to a suitable dry location. Before the next busy season, empty and clean the caddy or box, clear ventilation openings and replace damaged fittings.
A reset routine preserves the system over time. The next improvement is deciding which storage adjustments are genuinely necessary, especially where garden space or equipment budgets are limited.
How to Build a One-Reach Tool Zone So You Never Leave the Grill Unattended?
Before buying hooks, rails or a new barbecue trolley, audit how you actually cook. Record which tools you search for, where you step away and which surfaces become overcrowded. Build the one-reach zone around those observations, keep frequently used items on the safest accessible side and move rarely needed accessories into secondary storage.
The first attempt at organising grill tools often fails because the cook buys more storage than necessary. Extra hooks quickly fill with brushes, skewers, spare utensils and accessories that are only used occasionally. The result is a crowded rail that recreates the original problem.
Instead, observe one ordinary barbecue. After cooking, write down each occasion when you had to retrieve something unexpectedly. Include the tool involved, where it was stored and whether a better location could have prevented the interruption.
For example, suppose your notes show that you searched for tongs twice, walked inside for a thermometer and moved three unused utensils off the side shelf. Those observations suggest three changes: give the tongs a permanent hook, place the thermometer safely within reach and remove the unused utensils from the primary zone.
This is a hypothetical example of a practical self-audit, not a measured study of cooking efficiency.
In compact or shared gardens, the zone may need an asymmetrical layout. If a walkway passes behind the barbecue, avoid positioning projecting handles where someone could catch them. Concentrating storage on the cook’s dominant side may reduce interference with other garden users.
Vertical space can be useful, provided the mounting point is structurally suitable and safely outside heat clearances. A rail on a stable trolley may work better than a crowded worktop. A fence-mounted system needs additional consideration of combustible materials, fixing strength and proximity to the grill.
When several people share cooking duties, consistent labels or agreed tool positions can be helpful. However, tools must remain accessible to both right- and left-handed users without awkward reaching across heat.
Apply a simple capacity filter: only equipment used in the last three cooks should normally remain in the immediate tool zone. Exceptions are essential safety equipment and items required for a specific upcoming menu.
Move everything else to a labelled secondary box, cupboard or suitable dry storage location. Leave enough space between hanging tools to remove one without dislodging another.
Once the primary zone contains only genuinely useful equipment, the remaining decision is whether its storage format suits the way your garden is exposed and used throughout the year.
Hooks or Tool Box: Which Keeps Grill Tools Drier in UK Rain and Humidity?
Choose between hooks and a tool box by considering more than rainfall. Security, portability, available mounting surfaces, wind exposure and the maintenance you will realistically perform all matter. Hooks are convenient for sheltered, regularly used stations; ventilated boxes can suit exposed or shared gardens. Both require dry tools, sound fittings and occasional inspection to prevent moisture-related damage.
A sheltered patio and an open garden present different practical problems. Under a substantial roof, hooks may give everyday access with relatively little upkeep. On an uncovered patio, wind-driven rain can reach hanging utensils even if they sit close to a wall.
A lidded box offers better protection against direct exposure, but its design must suit outdoor use. Look for a weather-resistant lid, controlled ventilation and a construction that prevents water pooling inside. Position it where runoff cannot enter through the lid or ventilation openings.
In shared or accessible spaces, a lockable box may help deter casual interference or unauthorised access. A lock is not a substitute for safe storage, particularly where children could reach sharp tools, fuel or hazardous cleaning products.
Portability is another deciding factor. If the barbecue moves between the patio and a sheltered area, a separate portable caddy may be easier to manage than fixed wall hooks. Ensure it is stable, comfortable to carry and never loaded with hot utensils.
Consider the available mounting surface before purchasing anything:
- Brick walls: suitable mechanical fixings may provide a secure installation when used correctly for the wall and expected load.
- Timber fences: check strength and movement, and maintain appropriate separation from all grill heat sources.
- Metal trolley rails: compatible clamps may avoid drilling, provided the trolley remains stable and the attachment is rated for the load.
- Freestanding boxes: place on level, stable surfaces where wind, movement and rainwater cannot easily displace or flood them.
Over a full year, the maintenance differs. Hooks need periodic cleaning, corrosion inspection and checks that dripping water can escape freely. Boxes need internal cleaning, airing, checks for hidden rust and, where used, replacement or regeneration of moisture absorbers according to their instructions.
Condensation deserves particular attention. A container may remain dry during a shower but collect moisture internally when temperature and humidity change. Ventilation and properly maintained desiccant packs can help control this, although their effectiveness depends on the box design and surrounding conditions.
On a suitable dry day, opening and airing a box can help remove trapped moisture. Do not leave it open unattended where rain, dirt or animals may enter, and never combine moisture absorbers with exposed food-contact equipment in a way that could contaminate utensils.
The most robust arrangement is often hybrid storage: clean, dry everyday utensils on protected hooks during frequent use, with occasional-use tools in a ventilated box or dry indoor cupboard. After the cook, return everything according to its exposure and material requirements.
With access, weather protection and maintenance addressed, the storage system can become part of a complete barbecue workstation that keeps the entire cooking process moving smoothly.
Key takeaways before arranging your full BBQ station
- Protect the cook’s attention first: make essential tools accessible without placing them within unsafe heat clearances.
- Treat cleanliness and moisture control as part of storage design, not chores to address only when rust appears.
- Keep the active cooking area deliberately small; relocate spare supplies and infrequently used accessories to appropriate support storage.
How to Set Up a Barbecue Cooking Station So You Stop Losing Time Mid-Cook
A fast barbecue cooking station separates active cooking, ingredient preparation and supporting supplies into clearly defined zones. Put safe, frequently needed equipment within comfortable reach, prepare clean plates and ingredients before lighting the grill, and keep raw and cooked food handling separate. This layout reduces avoidable movement while preserving the clearances, ventilation and hygiene required for safe outdoor cooking.
The best workstation is not necessarily the largest. A compact kettle barbecue beside a suitable trolley can be easier to use than a long outdoor counter where every important item sits several steps away.
Think about how food moves through the cooking process. Raw ingredients arrive at the preparation area, move to the hot cooking surface and eventually reach a clean serving area. Equipment should support that movement rather than forcing utensils and plates to cross backwards and forwards.
Zone 1: Active cooking
This is the immediate operating area around the grill. Keep tongs, a spatula, a suitable thermometer and necessary heat-protective equipment accessible from the normal cooking position, subject to safe clearance.
Keep the work surface free of spare packaging, unused dishes and unnecessary accessories. Leave grill controls, vents, handles and grease collection components unobstructed.
Zone 2: Preparation and serving
Use a separate clean surface for seasoning, plates and food preparation. Keep raw meat, its juices and utensils used for raw food apart from cooked and ready-to-eat items.
Where space is tight, prepare raw ingredients before cooking and clean and sanitise the relevant surfaces and equipment appropriately before using them for cooked food. Separate utensils and clean serving plates make this easier.
Position the serving area so cooked food can move away from the grill without crossing raw preparation materials.
Zone 3: Support and supplies
This contains backup utensils, foil, appropriate cleaning equipment and other supplies that are useful but not constantly needed. Check fuel and lighting requirements before the cook begins, then store fuel and ignition materials safely away from the active hot zone.
Do not place charcoal bags, spare gas cylinders, firelighters or cleaning aerosols inside an ordinary grill-side tool box simply to keep everything together. Follow the relevant fuel and equipment storage instructions.
The aim is to compress foreseeable tasks into preparation, rather than moving all possible accessories within arm’s reach while flames are present.
One useful timing exercise is to recall your most recent barbecue. List the items you touched, from opening the ingredients to serving the meal. For each item, ask whether it was ready when needed, whether retrieving it interrupted supervision and whether its storage position created a hygiene or heat problem.
Do not assume every interruption is a storage failure. Some tasks, such as fetching chilled ingredients, washing hands after handling raw meat or safely managing fuel, require movement away from the grill. Arrange for another competent adult to supervise the cooking area when you must leave it, or manage the cooking process safely according to the appliance instructions.
Finally, connect all three zones to the maintenance routine. Dry tools go back to their designated holders, clean plates stay protected from contamination, support supplies are checked and exposed storage is inspected for moisture.
Before your next barbecue, clear the working surfaces, assign permanent positions to the essential utensils and check that each storage location is both weather-appropriate and safely separated from heat. A small, repeatable arrangement will do more for a smooth cook than another drawer full of tools you cannot find.
Can I leave stainless steel BBQ tools outside all year?
Stainless steel resists corrosion, but it is not completely immune to staining or rust. Its performance depends on grade, finish, contamination, exposure and maintenance. In a damp or coastal location, clean and dry tools after use and preferably store them in a sheltered, ventilated location. Moving them into suitable dry indoor storage during long periods of non-use may provide additional protection.
Should I use silica gel packs inside an outdoor BBQ tool box?
Silica gel packs can help absorb moisture inside a suitable storage box, provided they are used and maintained according to their instructions. They have limited capacity and cannot compensate for water entering through a damaged lid or for putting wet utensils straight into storage. Keep sachets intact and away from food preparation and children, and replace or regenerate them when required.
Are magnetic tool holders safe beside a barbecue?
A magnetic holder may be suitable if it is designed for the equipment, securely mounted on an appropriate surface and positioned outside the grill’s heat and clearance zones. Check that your utensils are magnetically compatible and cannot slip or fall. Do not assume a magnet will perform reliably when exposed to high temperatures or that an adhesive-backed holder is suitable near a hot barbecue.
How can I stop wooden BBQ tool handles from becoming mouldy?
Clean wooden handles according to the utensil manufacturer’s care instructions, dry them thoroughly and avoid leaving them in damp, enclosed containers. Inspect them for persistent moisture, cracks, mould and deterioration. Do not store wet wooden utensils beneath a barbecue cover or in a box that regularly collects condensation. Replace utensils that cannot be cleaned safely or have deteriorated beyond reliable use.
What is the simplest grill-side storage setup for a small UK patio?
A stable, suitably positioned metal trolley with a small tool caddy or compatible hook rail is a practical starting point. Keep the essential utensils accessible, use separate dry storage for spare accessories and check the grill manufacturer’s clearance requirements before positioning anything. In exposed locations, a ventilated, weather-resistant box or dry indoor storage can protect tools between cooking sessions.