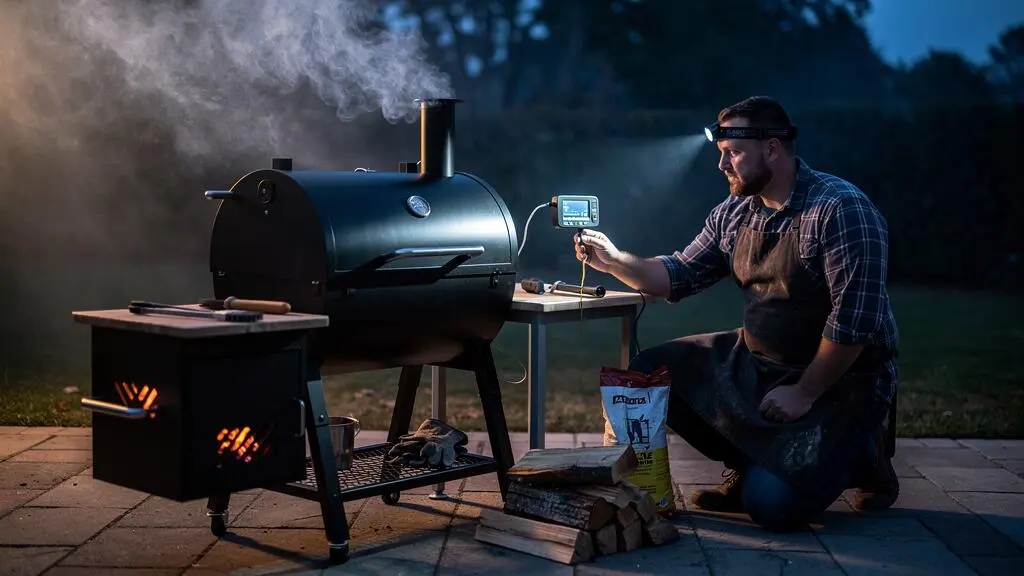
A pork shoulder can spend most of a Saturday in the smoker and emerge beautifully tender. It can also finish late, retain rubbery fat or become unsafe after an unnoticed fire failure. The difference is not simply how many hours the meat spends over charcoal.
Successful low-and-slow barbecue requires control of three separate variables: the cooking chamber temperature, the meat’s internal temperature and the time spent under those conditions. At 225–250°F (107–121°C), tough connective tissue can soften gradually while smoke develops flavour. But a stable smoker does not automatically prove that the meat is safe, and a safe internal temperature does not automatically mean the meat is tender.
For UK barbecue cooks, the practical challenge is managing those variables through changing weather, charcoal consumption, temperature stalls and sometimes an entire night. Reliable thermometers, suitable cuts and a realistic finishing plan matter more than an exact cooking-hour target.
Low-and-slow barbecue: the essentials
- Keep the cooking chamber reliably hot, monitor the meat independently and distinguish safe cooking temperatures from tenderness targets.
- Choose collagen-rich cuts for lengthy smoking, and use temperature, probe resistance and texture rather than elapsed hours to judge readiness.
- Prepare fuel, alarms and contingency plans before overnight cooks. Never assume an unknown temperature history becomes safe simply because the fire is restarted.
- Why Does Meat Get Tender at Low Temperatures After 8+ Hours of Cooking?
- How to Choose Between 225°F and 250°F When You Have Only 9 Hours to Cook?
- Pork Shoulder or Sirloin: Which One Actually Improves With Low-Temperature Cooking?
- The Temperature Mistake That Leaves Fat Rubbery Even After 12 Hours
- How to Keep a Low-Temperature Cook Stable for 6 Hours Without Constant Lid Checks?
- How to Set Your Vents for a Steady 225°F Without Constant Tweaks?
- Why Does Internal Temperature Stop Rising for 2 Hours During a Long Cook?
- How to Run a Low-and-Slow Smoke Overnight Without Waking Up Every Hour
Why Does Meat Get Tender at Low Temperatures After 8+ Hours of Cooking?
Meat becomes tender during prolonged low-temperature cooking because sustained heat gradually changes its connective tissue. Collagen softens and converts towards gelatin, while fat renders and muscle fibres change structure. These processes depend on both temperature and duration. Eight hours is not a universal threshold: the cut, thickness and actual internal temperature determine how much tenderisation occurs.
Working muscles such as pork shoulder and beef brisket contain relatively substantial connective tissue. During a brief hot cook, muscle proteins can contract before enough collagen has softened. The result may be fully cooked meat that remains chewy.
With sustained heating, collagen-rich structures gradually weaken and gelatin contributes to the moist, yielding texture associated with pulled pork and properly finished brisket. The process is progressive rather than an abrupt reaction at one precise thermometer reading.
Collagen breakdown and fat rendering are not the same process. Fat can begin liquefying at internal temperatures around 130–140°F (54–60°C), yet complete rendering may take considerably longer. Collagen-rich meat often needs higher internal temperatures and additional time to reach the desired texture.
Specialist barbecue publisher AmazingRibs explains these distinctions in its guide to basic meat science, collagen and fat rendering. It identifies approximately 200–205°F (93–96°C) as a useful finishing region for connective-tissue-rich barbecue cuts, not a mandatory endpoint for every roast.
A temperature stall during cooking is another part of the picture. Surface evaporation absorbs energy and can temporarily slow the rise in internal temperature. However, a stall does not prove that collagen has reached a particular stage of breakdown; it mainly indicates the changing balance between heat entering the meat and cooling at its surface.
Food safety follows different criteria from tenderness. Under USDA consumer guidance, whole-muscle beef and pork roasts reach a recommended minimum internal temperature of 145 °F (63°C), followed by at least three minutes’ rest. Higher pulled-pork finishing temperatures are predominantly about texture, not a separate USDA safety requirement.
Time-at-temperature also matters microbiologically, but lower-temperature safety processes need specific validation. The fact that meat will eventually reach a high finishing temperature does not justify leaving it under uncontrolled conditions for hours. During ordinary domestic smoking, maintain a reliably heated cooker and verify a suitable safe endpoint.
Once tenderness is understood as a time-and-temperature process, choosing the correct pit temperature becomes a matter of matching the meat to the available cooking window rather than simply selecting the lowest setting.
How to Choose Between 225°F and 250°F When You Have Only 9 Hours to Cook?
When only nine hours are available, 250°F (121°C) is usually the more practical starting point for a substantial collagen-rich cut. It supplies heat faster and may shorten the stall, although completion cannot be guaranteed. Choose according to thickness, fat content, desired tenderness and the time needed for resting, with a wrapped finish available when necessary.
Both 225°F (107°C) and 250°F fall within the 225–300°F smoking range recommended by the USDA Food Safety and Inspection Service. Its guidance on thermometers for smoking meat recommends monitoring the food and cooking chamber separately.
For a nine-hour session, the following decision grid is more useful than treating the two temperatures as interchangeable.
| Decision factor | 225°F (107°C) | 250°F (121°C) |
|---|---|---|
| Thick pork shoulder or brisket | Greater risk of exceeding a short schedule | More practical, but still no guaranteed finish |
| Smaller collagen-rich cut | Reasonable with generous spare time | Useful when serving time is fixed |
| Fat and connective tissue | Gradual heating and rendering | Faster heating while still allowing extended rendering |
| Bark development | More potential exposure before finishing | Can still develop substantial bark before wrapping |
| Late start | Higher scheduling risk | Better option alongside a contingency plan |
The real variable to follow is the meat’s internal temperature trajectory. A temperature logger can show whether it is climbing, flattening or recovering after a stall. Calculating the recent average rise in degrees per hour may help describe progress, but it is not a reliable standalone prediction of finishing time. Evaporation, thickness, cooker design, airflow and British weather can change the rate dramatically.
A hybrid strategy can also help. Begin near 250°F to establish momentum and bark, then reduce towards 225°F if the meat is progressing comfortably and time allows. Alternatively, continue at 250°F and wrap after adequate bark develops. Lowering the pit too early may simply consume the remaining time without improving the result.
For an explicitly hypothetical Saturday barbecue, a cook who must serve in nine hours might choose a modestly sized pork shoulder, begin early at 250°F, monitor its internal progress and reserve time for resting. If the stall threatens the schedule, wrapping and maintaining controlled heat offers a practical response.
The mistake is choosing 225°F because it seems inherently safer. Both temperatures can support a controlled cook; unfinished meat left under unsafe storage conditions is a more serious concern than cooking properly at 250°F.
Even the best schedule depends on the cut. A shoulder built for long cooking behaves very differently from a comparatively lean sirloin.
Pork Shoulder or Sirloin: Which One Actually Improves With Low-Temperature Cooking?
Pork shoulder usually benefits far more from six to fourteen hours of low-and-slow cooking than sirloin. Shoulder contains connective tissue and fat that respond well to sustained heating. Sirloin is naturally more tender and relatively lean, so prolonged cooking towards pulled-meat temperatures can remove moisture without providing an equivalent improvement in texture.
The structure of each cut explains the difference. Shoulder muscles perform substantial work and contain connective tissue that becomes more palatable after extended heating. Sirloin generally starts with less of that tough collagen, making long exposure unnecessary for tenderness.
For a genuine long barbecue cook, assess the cut before buying:
- Marbling: Look for intramuscular fat in pork shoulder, while recognising that visible marbling alone does not guarantee juiciness.
- Fat cap: A manageable covering can protect the exterior, but an excessively thick cap may need trimming.
- Bone-in or boneless: Either can work; shape and thickness affect probe placement and cooking behaviour.
- Weight and thickness: A thicker roast usually introduces more scheduling uncertainty than a thinner piece, even where total weight is similar.
- Intended serving style: Choose shoulder for pulling and leaner tender cuts for slicing when suitable internal temperatures have been achieved.
At UK butcher counters, ask whether a shoulder has been boned, rolled, trimmed or prepared with added liquid. Supermarket labels may identify added water, seasoning or other ingredients. These details can affect surface moisture, saltiness, shape and how the meat cooks.
Skin-on shoulder also needs attention. Skin intended for crackling behaves differently from a fat cap intended to render slowly in a humid smoker. Removing or separately preparing the skin may better suit pulled pork.
Sirloin has a narrower margin for error. Its muscle fibres progressively lose moisture as cooking continues, particularly at the elevated internal temperatures used for shredding tougher cuts. Wrapping can limit surface drying, but it cannot reverse severe internal moisture loss.
If a lean roast is already approaching its intended doneness, shorten the cook rather than waiting for an arbitrary six-hour milestone. Choose the internal endpoint appropriate to the meat, use a thermometer and rest it before carving.
Choosing a suitable cut solves only part of the tenderness problem. Even a collagen-rich shoulder can emerge with unpleasant fat if its internal cooking progress is misunderstood.
The Temperature Mistake That Leaves Fat Rubbery Even After 12 Hours
Rubbery fat after twelve hours often means the cook has been judged by smoker temperature or elapsed time rather than by the meat’s internal condition. A smoker holding 225°F does not guarantee that thick fat deposits have rendered adequately. Diagnose the result through internal temperature, probe resistance and texture before deciding whether additional controlled cooking is needed.
A pit thermometer describes the environment surrounding the meat, not what is happening deep inside it. Thick, cold or unevenly shaped cuts can heat slowly, especially during a prolonged stall.
Rendered fat tends to feel softer and more yielding, while insufficiently rendered deposits may remain pale, waxy or chewy. However, not every firm strip can be transformed into pleasant eating texture through additional cooking; some outer fat or connective material may require trimming.
When testing a pork shoulder, insert the thermometer probe into the thickest muscle, away from bone and large fat pockets. Once the roast is in the expected finishing region, test tenderness at several locations. A probe that enters with little resistance is a more useful texture check than a single number alone.
Carving and resting also influence perceived texture. Slicing across the muscle grain shortens fibres and makes many sliced meats easier to chew. Resting allows temperatures and juices to redistribute, although it will not magically finish rendering a thick, cold fat cap.
If the roast is safe but still firm and unfinished, there are three practical adjustments:
- Increase the smoker temperature within an appropriate controlled cooking range to add heat more quickly.
- Wrap the roast in suitable foil or butcher paper if enough bark has already formed and the remaining time is limited.
- Continue cooking until the required texture develops, then allow a suitable rest while maintaining safe temperature control.
These are finishing methods, not ways to rescue meat that has undergone an unsafe temperature interruption. Nor should cooking continue indefinitely simply because an isolated fatty section feels tough.
Good rendering requires sustained heat delivery. Maintaining that delivery without repeatedly opening the lid is the next practical challenge.
How to Keep a Low-Temperature Cook Stable for 6 Hours Without Constant Lid Checks?
Keep a six-hour low-and-slow cook stable by preheating the smoker, loading sufficient fuel, protecting it from wind and monitoring both chamber and meat temperatures with leave-in probes. Use alarms to detect meaningful changes rather than opening the lid repeatedly. Temperature stability depends more on controlled airflow, predictable fuel consumption and reliable measurements than on constant visual inspection.
Each lid opening releases heated air and disturbs the cooking environment. The smoker must recover afterwards, particularly when the fire is small and running near 225°F. Recovery time depends on cooker construction, weather and how long the lid remains open.
Position a chamber probe near the cooking grate, with clearance from the meat and direct radiant heat. Place the food probe in the thickest relevant section of muscle. Together, they reveal whether the cooker is stable and whether the roast is progressing.
Before lighting charcoal, consider the environment. Wind can alter airflow through vents and exhausts. Cold conditions may increase fuel requirements. Rain and poorly protected fuel can introduce further variability. Use a stable, sheltered outdoor position without enclosing the smoker or compromising ventilation.
A water pan can moderate temperature fluctuations by adding thermal mass and evaporation. It may also influence surface moisture and bark formation. However, it consumes space, can require refilling and is not essential in every well-insulated or temperature-controlled cooker.
For charcoal smokers, a properly arranged fuel load and gradual ignition are often more valuable than frequent top-ups. For offset smokers, fuel management may require scheduled attention because wood combustion behaves differently.
Routine lid openings should have a clear purpose: inspecting bark, wrapping, repositioning a probe or checking a suspected equipment problem. Otherwise, observe the instruments and allow the cooker to settle.
Once probe monitoring and fuel planning are in place, vent calibration becomes the main skill for maintaining steady heat on a manually controlled charcoal smoker.
How to Set Your Vents for a Steady 225°F Without Constant Tweaks?
To maintain approximately 225°F (107°C) in a charcoal smoker, establish a controlled fire and adjust the intake gradually while keeping a suitable exhaust path open. Oxygen availability influences combustion intensity, but vent changes take time to affect the chamber thermometer. The objective is a stable burning rate, not a fixed vent opening that works on every cooker.
Airflow enters through the intake, supports combustion and exits through the exhaust. In a typical charcoal smoker, adjusting the intake provides the primary control of fire intensity. Restricting the exhaust excessively can impair combustion and smoke quality.
A sensible initial calibration uses approximately the first 45 minutes as a settling period. Treat this as a practical routine rather than a guaranteed stabilisation time:
- Light the intended starter fuel and establish a clean, controlled burn according to the cooker’s instructions.
- Allow the smoker to warm while observing the grate-level thermometer.
- As the chamber approaches the desired range, make a small intake adjustment rather than a drastic closure.
- Wait for the temperature response before making another change.
- Record the resulting settings as a starting reference for similar weather and fuel conditions.
A small initial overshoot or fluctuation is not necessarily evidence that the vents need immediate further adjustment. Repeatedly changing them before the previous adjustment takes effect can create temperature oscillations.
Stick-burning offset smokers follow a different logic. They generally need adequate airflow for clean wood combustion, with heat controlled through fuel size, fuel addition and fire management. Applying aggressive intake restriction from a charcoal kettle to a wood-fired offset can encourage inefficient burning.
When the thermometer dips, first assess whether the change is temporary or sustained. Check fuel condition, ash accumulation, probe position and wind exposure. Opening the intake can help an oxygen-starved fire, but it cannot replace exhausted fuel, and unnecessary adjustments may worsen instability.
Stable chamber temperature does not guarantee a steadily rising internal temperature. A two-hour plateau can occur even when the smoker is functioning properly.
Why Does Internal Temperature Stop Rising for 2 Hours During a Long Cook?
A two-hour pause in rising internal temperature is commonly the barbecue stall. As moisture evaporates from the meat’s surface, it absorbs energy and counteracts some of the heat entering the roast. The smoker may remain stable while the internal probe barely moves. This is often a normal cooking phenomenon, not evidence of a failed fire.
The stall commonly appears around 150–165°F (66–74°C) in substantial barbecue cuts, although its timing and duration vary. Moisture, airflow, meat geometry and surface conditions influence how pronounced it becomes.
For the cook, the important distinction is between a genuine evaporative stall and an equipment problem. If chamber temperature remains stable and the probe is correctly positioned, patience may be appropriate. If the chamber has fallen sharply, investigate the heat source instead.
There are three practical responses, each with consequences for bark, timing and texture.
| Strategy | Practical advantage | Main trade-off |
|---|---|---|
| Wait without wrapping | Preserves continued exposure of the bark | Less predictable finishing time |
| Wrap in foil or butcher paper | Reduces surface evaporation and may speed finishing | Foil can soften bark; paper generally retains more breathability |
| Raise the pit temperature | Increases heat delivery | May change exterior development and requires closer finishing checks |
Wrapping is especially useful after bark has developed sufficiently. Butcher paper and foil behave differently, and neither guarantees that the roast will finish at a precise hour.
A second period of slow temperature rise may happen after wrapping, particularly with a large roast or a cooker operating near its lower temperature limit. Before increasing heat again, verify that the probe is working and the chamber is genuinely delivering the expected temperature.
Carryover cooking complicates the final decision. Internal temperature can continue rising after removal from the smoker because heat moves from warmer outer layers towards the centre. The amount of carryover depends on the cut, temperature gradient and resting conditions.
For collagen-rich barbecue, assess tenderness at several points rather than insisting on an exact final number. Rest the meat appropriately and monitor its temperature if it will be held before serving.
Once the stall is predictable rather than alarming, the remaining challenge is ensuring that the smoker, meat and monitoring equipment remain dependable through an overnight session.
Key takeaways before an overnight cook
- A stable chamber temperature and a documented internal temperature history provide different, complementary information.
- Overnight cooking is only sensible when fuel management, active monitoring and equipment alarms match the cooker’s capabilities.
- A planned response to power loss, probe failure or an extinguished fire is more valuable than assuming an unattended smoker will recover safely.
How to Run a Low-and-Slow Smoke Overnight Without Waking Up Every Hour
An overnight smoke requires a cooker capable of maintaining controlled heat, dependable chamber and meat probes, effective alarms and a clear response plan. Remote monitoring can reduce unnecessary lid checks, but it does not eliminate the need for supervision or prompt intervention. If the equipment cannot reliably maintain safe cooking conditions while unattended, use a supervised daytime cook instead.
The USDA describes 40–140 °F (4.4–60°C) as the food-safety danger zone, where harmful bacteria can multiply rapidly. Its explanation of the food-safety danger zone distinguishes safe cold and hot holding from prolonged exposure to conditions that permit bacterial growth.
For UK cooks, that US guidance is useful background rather than a substitute for applicable UK food-safety recommendations. Critically, the danger-zone range is not a complete safety model for continuously heating raw meat. A controlled smoking process differs from simply leaving food to sit at an unsafe holding temperature.
The meat’s temperature history, the cooking environment and the condition of the food all matter. A single thermometer reading the following morning cannot establish what happened during an unrecorded interruption.
Overnight risks are best considered separately:
- Fire extinction: Fuel exhaustion, ash blockage or power failure can stop heat delivery and leave the temperature history uncertain.
- Temperature spikes: Excessive airflow or a controller problem can accelerate cooking, dry the meat or create an equipment hazard.
- Probe or alarm failure: A disconnected probe, exhausted battery or lost wireless connection may prevent a genuine problem from being detected.
Alarm thresholds should be chosen for the cooker and cooking stage, with separate monitoring of chamber and meat temperatures where possible. Wireless connectivity is useful only when alerts are actually received. Combustion equipment must remain outdoors in a properly ventilated, fire-safe position; a garage, shed or enclosed structure is not a substitute for weather protection.
Five checks before starting an overnight smoke
- Inspect the cooker, clear obstructive ash and prepare the required fuel arrangement. Verify that the fire and fuel system are ready.
- Stabilise the chamber before committing to the overnight phase. Record the grate-level temperature and vent or controller settings.
- Place and test both monitoring probes. Confirm that the displayed chamber and meat readings respond correctly.
- Configure temperature and connectivity alarms, then perform a test alert. Verify that the intended supervising person can hear or receive it.
- Prepare a contingency for equipment failure, including access to a suitable oven and a plan for rejecting meat whose safety cannot be established. Confirm that the plan is understood before the cook continues.
In the morning, examine the recorded temperatures before changing anything. If the smoker remained controlled and the meat is progressing normally, continue cooking or finish in an oven as appropriate. An oven can supply controlled heat after a properly managed smoke; the transfer itself does not make an unsafe cook safe.
If the fire went out, establish when it failed, how the meat temperature behaved and whether reliable records exist. A documented, brief and controlled interruption must be assessed differently from several hours of unknown exposure.
When the temperature history is unknown or indicates potentially unsafe conditions, discard the meat rather than relying on reheating. Restarting the fire cannot necessarily reverse bacterial growth or heat-stable toxins associated with temperature abuse.
When the meat finishes ahead of serving time, use controlled hot holding or appropriate rapid cooling and refrigeration rather than leaving it wrapped on a worktop. USDA consumer guidance identifies 140°F (60°C) as the hot-holding boundary; UK food-service hot-holding requirements can differ, so follow the applicable local guidance for your setting.
For the next long cook, select a suitable collagen-rich cut, establish reliable monitoring and plan the finish before lighting the fire. If safe temperature control cannot be maintained throughout the intended session, shorten the schedule or choose a cooking method that can be actively supervised.
Can meat be safe to eat before it becomes tender enough to pull?
Yes. Microbiological safety and pulling tenderness are different outcomes. USDA guidance gives a minimum of 145°F (63°C) with a three-minute rest for whole-muscle pork and beef roasts, whereas collagen-rich pulled barbecue often benefits from considerably higher finishing temperatures. Applicable UK guidance and the specific preparation method should also be considered.
Is a digital lid thermometer enough for a twelve-hour smoke?
No. A lid thermometer cannot directly confirm the internal temperature of the meat and may not represent the temperature at grate level. Use a suitable chamber thermometer and a separate food probe, particularly when the cook extends over many hours.
Can a wrapped pork shoulder go straight into the fridge after cooking?
Cooked pork should be cooled promptly and refrigerated safely if it will not be served or held hot. A large tightly wrapped shoulder can retain substantial heat, slowing cooling at its centre. Divide it into smaller portions and use suitable shallow containers or other controlled cooling methods rather than placing a large insulated hot package into storage and assuming it will chill quickly.
Does a water pan make low-and-slow smoking safer?
A water pan may help moderate chamber temperature changes in some smokers, but it does not independently guarantee food safety. The essential controls remain adequate cooking heat, correct internal temperature measurement, safe food handling and reliable monitoring throughout the cook.
Can an overnight smoke be rescued if the thermometer stopped recording?
Not reliably when a significant period of temperature history is missing. The current internal temperature cannot reveal how long the meat may have remained under unsafe conditions. If there is credible uncertainty about temperature abuse, the safe decision is to discard the food rather than assume that further cooking resolves the risk.