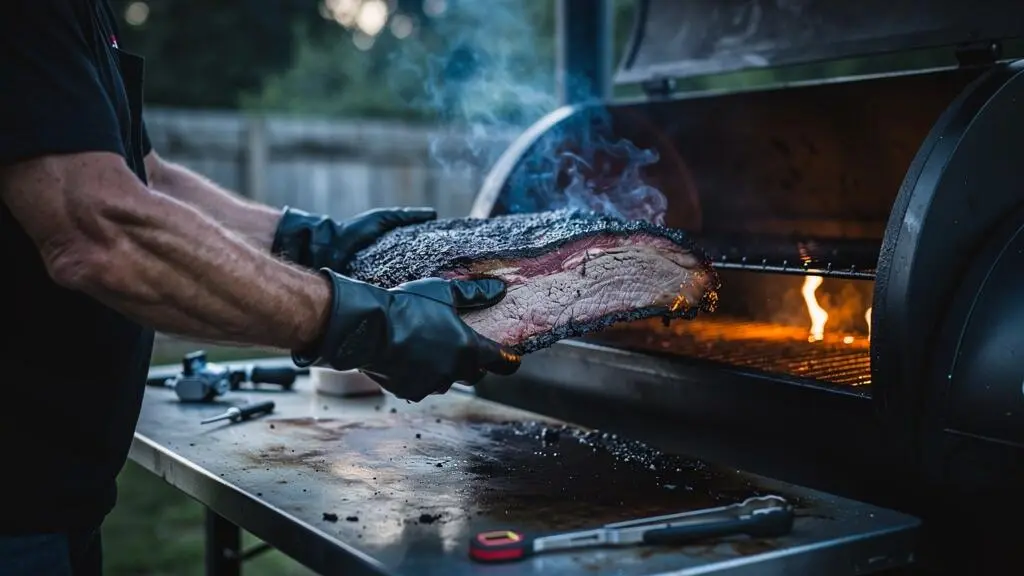
A beef brisket can reach 91°C (195°F) and still resist your knife. A cheaper chuck roast can spend hours in the oven and remain chewy. Neither result necessarily means the meat needs a higher target temperature. The problem may be connective tissue that has not softened enough, or tough membranes that cooking will never dissolve.
The way to make tough cuts tender is to identify which tissues need removing, give collagen sufficient heat and time to turn into gelatin, and stop cooking before the muscle fibres lose their appealing structure. That means treating temperature as one measurement rather than the final verdict.
For UK home cooks choosing economical cuts such as brisket, beef shin, chuck and pork shoulder, this distinction makes smoking, slow roasting and braising much more predictable. A sharp knife, a reliable thermometer and a few texture checks can tell you whether to trim, add moisture, continue cooking or begin resting.
The essentials of turning tough meat tender
- Collagen gradually softens with heat and time; elastin-rich membranes remain chewy and may need trimming.
- Choose smoking for bark and smoke flavour, or covered braising when retaining moisture around connective tissue is the priority.
- Use safe internal temperatures, probe resistance, resting and slicing direction together rather than relying on one finishing number.
- Why Does Meat Stay Chewy Even When It Reaches the Right Internal Temperature?
- How to Spot and Trim Tough Connective Tissue in 10 Minutes Before You Smoke
- Smoking or Braising: Which Works Better When a Cut Feels Full of Gristle?
- The Early-Slicing Error That Makes Tough Cuts Seem ‘Undercooked’ at 195°F
- How to Use the Probe-Feel Test to Time Tenderness Without Chasing Exact Numbers
- How to Cook for Collagen Conversion Using 3 Milestones Instead of One Target Temp
- How to Trim and Position the Fat Cap so It Renders Evenly Without Washing Out Flavour
- How Collagen Breaks Down Over Time So You Stop Chasing a Single Magic Number
Why Does Meat Stay Chewy Even When It Reaches the Right Internal Temperature?
Meat can remain chewy at the expected finishing temperature because temperature measures heat, not the completion of collagen breakdown. Muscle proteins and connective tissues respond to cooking at different rates. A brisket reading 91°C (195°F) may still contain resistant collagen, while another brisket at that temperature may already be tender after sufficient cooking time.
Most meat tenderness problems become easier to diagnose once three types of connective tissue are distinguished:
- Collagen: Found around muscle fibres and within connective-tissue seams. Prolonged heating can weaken and solubilise it, producing gelatin that contributes to the characteristic texture of slow-cooked meat.
- Elastin: An elastic protein found in certain membranes and structural tissues. It does not convert into gelatin during normal cooking and retains much of its rubbery character.
- Dense gristle: A kitchen description rather than one specific protein. A tough white lump or seam may contain collagen-rich tissue, elastin, cartilage or a combination, so its cooking behaviour depends on its composition.
Collagen does not instantly melt at a particular reading. Douglas Baldwin‘s scientific review of sous-vide cooking describes how collagen changes during heating while elastin remains comparatively resistant. It also explains why duration matters alongside temperature. These principles are relevant to meat cooking generally, although the review’s controlled sous-vide timings should not be copied directly into smoker recipes.
The distinction between muscle and connective tissue explains a seemingly contradictory result. A tenderloin cooked until well done may be dry and firm but still contain little troublesome connective tissue. A rare chuck roast can retain substantial collagen and feel extremely tough despite its juicier muscle fibres.
Cooking chuck longer can soften its collagen, but continuing indefinitely brings a second problem: muscle fibres lose moisture and eventually separate excessively. The result may shred easily without delivering a pleasantly juicy bite.
There is also a food-safety distinction. USDA FSIS minimum safe cooking temperatures specify 63°C (145°F) followed by at least three minutes’ rest for qualifying whole beef, pork, lamb and veal cuts, with different requirements for minced meat and poultry. These are safety benchmarks, not guarantees that collagen-rich meat will be tender. UK cooks should also follow applicable UK food-safety guidance, particularly for vulnerable diners.
Once you know which tissue is causing resistance, the next decision is whether it belongs in the cooking pot or in the trimming pile.
How to Spot and Trim Tough Connective Tissue in 10 Minutes Before You Smoke
To identify tough connective tissue quickly, inspect chilled meat under good light, lift suspicious membranes with a sharp boning knife and feel how they resist gentle pressure. Remove obvious silverskin, preserve useful internal collagen seams for long cooking, and trim dense, inedible-looking material selectively. Ten minutes is a practical inspection routine, not a guaranteed preparation time for every cut.
Three visual cues are especially useful when preparing a chuck roast or brisket:
- Silverskin: A shiny, pearlescent surface membrane that feels taut, stretches reluctantly and resists the knife. Lift and remove accessible sections rather than expecting them to dissolve.
- Collagen-rich seams: Often pale, slightly translucent connective tissue running between muscles. Leave manageable seams in place when planning a long, moist cook, because some of that collagen can soften.
- Dense white nodules: Firm gristle-like areas that may represent different tissue types. Trim clearly obstructive surface nodules, while recognising that appearance alone cannot establish whether all the material will gelatinise.
Meat is easier to trim when properly chilled. Warm fat becomes slippery and soft, making accurate knife placement harder. A sharp, narrow blade can separate membrane from muscle, whereas a dull edge is more likely to tear and waste usable meat.
Begin with the fat cap, removing hard or excessive external fat while leaving an appropriate covering for your chosen recipe. Next, lift surface membranes and slide the blade shallowly beneath them, angling towards the membrane rather than the muscle. Work along the membrane in short strokes instead of digging across the meat. Finally, inspect the internal seams exposed by the trimming.
There is an important difference between trimming for a quick cook and trimming for a long smoke. For a short cooking method, remove more persistent membranes and gristle that the available cooking time will not soften. For a long cook, retain collagen-rich seams that can contribute to the final texture.
For brisket-specific guidance, Meathead‘s Texas-style smoked brisket recipe describes removing surface silverskin and leaving approximately 6 mm (¼ inch) of exterior fat. That thickness belongs to the recipe’s method; it is not a universal rule for every roast.
Your five-step connective-tissue trimming check
- Chill the cut properly and dry its surface; the result is a piece of meat you can grip without slipping.
- Identify the fat cap and thick external deposits; the result is a clear map of fat to reduce or preserve.
- Lift one edge of each shiny membrane and trim shallowly beneath it; the result is a visibly cleaner muscle surface.
- Inspect the pale internal seams and dense white nodules; the result is a deliberate keep-or-remove decision for each exposed area.
- Check the finished cut for gouges, dangling membranes and uneven fat; the result is a prepared piece that retains useful meat and collagen.
The aim is not to remove every pale line. It is to eliminate persistent obstacles while preserving the connective tissue that the chosen cooking method can actually soften.
Smoking or Braising: Which Works Better When a Cut Feels Full of Gristle?
Braising is generally the more forgiving choice for a cut with thick collagen-rich seams, little marbling and a substantial amount of connective tissue. Smoking is particularly useful when the cut also benefits from bark, rendered exterior fat and smoke flavour. Neither method removes elastin: what matters is the type of tissue, the available cooking time and moisture management.
To make the choice practical, compare the cooking environment as well as the cut itself.
| Decision factor | Smoking | Braising |
|---|---|---|
| Suitable examples | Brisket, pork shoulder, well-marbled chuck | Beef shin, neck, oxtail, leaner chuck |
| Heat and moisture | Hot air and smoke, with surface evaporation unless wrapped | Covered, humid environment with liquid and steam |
| Main texture advantage | Firm bark surrounding softened interior tissue | Moist surface conditions and gentle softening of collagen-rich sections |
| Main flavour advantage | Smoke character and roasted surface flavours | Rich cooking liquid and integrated aromatics |
| Typical failure | Dry exterior before the thickest connective tissue softens | Over-softened, stringy muscle fibres after excessive cooking |
| Best finishing check | Resistance through the thickest meat sections | Fork or probe resistance and whether the meat still holds its intended shape |
Braising surrounds the exposed meat with a humid environment and limits evaporation. That often makes it easier to soften connective tissue without drying the surface. However, liquid does not automatically cause collagen to transform faster at the same tissue temperature. Conversion still depends on heat penetration, time and the collagen’s characteristics. Full submersion is also unnecessary for many covered braises.
Smoking trades some moisture protection for qualities that a conventional braise cannot produce in the same way: a seasoned bark, smoke aroma and surface browning. A brisket’s marbling and internal connective-tissue distribution can make that trade-off worthwhile.
For an especially connective-tissue-heavy cut, a hybrid approach can combine the two environments. Smoke the meat until it has the colour and surface character you want, then transfer it to a covered vessel with some liquid or wrap it with a small amount of moisture. Continue until the resistant muscle sections soften.
The switch should be based on conditions, not solely on a thermometer reading. If the bark is established but the centre still resists probing, adding moisture protection can be more useful than continuing unwrapped smoking.
Neither method is immune to overcooking. Prolonged smoking can desiccate the outside, while excessive braising can leave fibres separated and dry-tasting even when surrounded by liquid. Rendered fat and dissolved gelatin cannot fully reverse moisture lost from the muscle itself.
Once the cooking method has softened the meat, handling becomes the next variable. A perfectly cooked cut can still seem tough if it is carved too soon or in the wrong direction.
The Early-Slicing Error That Makes Tough Cuts Seem ‘Undercooked’ at 195°F
Slicing brisket immediately after it reaches 91°C (195°F) can make it seem tougher and drier than it should. The meat may not have completed collagen conversion, and cutting before an appropriate rest allows more liquid to escape. Slicing along the grain then leaves long muscle fibres that are difficult to chew, even if the meat was properly cooked.
Resting and collagen conversion solve different problems. Cooking allows collagen to soften over time; resting moderates the meat’s temperature, limits further rapid cooking and can improve liquid retention during carving. Gelatin-containing juices become more viscous as they cool, but resting does not magically convert every remaining collagen seam.
Carryover cooking is also relevant. A large, hot roast may continue rising in internal temperature after leaving the heat, depending on its size and cooking conditions. This makes it important to check tenderness before removing the meat rather than assuming the rest will correct an underconverted centre.
Grain direction matters because meat is organised into long bundles of muscle fibres. Cutting across those bundles shortens the fibres in each bite. Cutting parallel to them leaves long strands that require substantially more chewing. Although connective tissue also influences this sensation, slicing does not replace adequate collagen conversion.
Irregular cuts complicate the process. Beef chuck contains several muscles with differing grain directions, while whole brisket includes flat and point muscles whose fibres run in different directions. Look for the parallel lines on each exposed muscle surface before making a full series of slices.
A practical corrective sequence is:
- Confirm that the thickest meat sections are sufficiently tender before removing the cut from the heat.
- Rest the meat appropriately, using a loose cover or suitable insulated holding arrangement while maintaining food-safe temperatures.
- Identify the grain on the muscle you intend to carve, separating muscles if their directions differ substantially.
- Cut one test slice across the fibres with a sharp knife.
- Check the texture before continuing. Change the slicing angle where the grain changes rather than forcing every muscle into one cutting direction.
A cooked brisket that feels rubbery can therefore represent several different problems: collagen still resisting, inadequate resting, slicing with the grain or excessive moisture loss. Those causes require different remedies. Additional cooking is helpful only when meaningful connective-tissue resistance remains.
Carving should be the final confirmation of tenderness, not the first time it is assessed. A probe test while the meat is still cooking gives you the opportunity to make a better decision.
How to Use the Probe-Feel Test to Time Tenderness Without Chasing Exact Numbers
The probe-feel test judges tenderness by how easily a thin thermometer probe enters cooked meat. Insert it into the thickest collagen-rich muscle sections and compare resistance at several locations. When it moves smoothly with little resistance throughout the important sections, the cut is approaching its desired texture. Temperature remains essential for food safety, but probe feel helps judge collagen conversion.
To understand the sensation, begin by observing resistance rather than memorising somebody else’s ideal temperature. Cold, uncooked meat usually grips the probe differently from meat that has undergone prolonged cooking. During the final stage, compare the resistance you feel as the connective tissue softens.
Common descriptions include pushing into softened butter or passing a warm knife through thick jam. These are useful tactile comparisons, but they are not calibrated scientific measurements. Their purpose is to help you recognise a clear reduction in resistance.
Probe placement is critical. A tip passing through a melted fat pocket may slide effortlessly even when the neighbouring muscle remains tough. Bone can produce the opposite problem by obstructing the probe mechanically. Insert the probe into substantial muscle sections and collagen-heavy junctions, avoiding obvious pockets of fat and direct contact with bone.
One easy location is not enough to declare a large roast ready. Test two or three representative sections, particularly where the muscle is thick or the connective tissue is concentrated. The toughest relevant reading is generally the one that deserves attention, since different regions do not soften uniformly.
If a large portion still resists while the rest feels tender, give the cut additional controlled cooking time, protecting areas that are already drying. If resistance is consistently low and the structure remains intact, further cooking may do more harm than good.
“Elastin fibers, on the other hand, do not denature with heating and have rubber-like properties”
This distinction explains one limit of probing: a thin elastin-rich membrane can remain chewy even when surrounding collagen has softened. Do not continue cooking the entire roast indefinitely to eliminate a piece of tissue that heat cannot dissolve.
Small or very lean cuts may offer ambiguous tactile feedback, because there is less collagen-rich material to evaluate. Repeated puncturing can also release some juices and increase handling. Reserve multi-point probing primarily for the final cooking phase, keep the probe clean and minimise unnecessary openings of the cooker.
The probe is most informative when combined with visible changes in the meat. A simple three-milestone framework connects those observations into a repeatable cooking decision.
How to Cook for Collagen Conversion Using 3 Milestones Instead of One Target Temp
Cook collagen-rich meat by checking three developments: muscle fibres becoming cooked and firmer, surface fat beginning to render visibly, and the thickest connective-tissue-rich sections becoming easy to probe. These are observations rather than universal temperature thresholds. They overlap and may occur at different rates depending on the cut, cooking environment and internal fat distribution.
The first milestone concerns muscle proteins. As meat heats, its proteins change structure and the fibres contract, progressively affecting firmness and moisture retention. This transformation is distinct from the slower softening of much connective tissue.
The second milestone is visible fat rendering. The exterior may develop a sheen, and rendered fat can collect on the surface or drip into the cooker. This indicates that some fat is melting, but it does not prove collagen inside the muscle has finished breaking down.
The third milestone concerns mechanical tenderness. The probe enters the substantial muscle sections smoothly, with little remaining resistance from connective tissue. For a cut intended to be sliced, the goal is sufficient tenderness while retaining enough structure to carve. Meat intended for pulling can be taken to a softer texture.
These milestones should not be interpreted as three perfectly separate stages. Fat can begin rendering before muscle proteins finish changing, and internal collagen can soften while parts of the fat cap remain intact. Cooking temperature, humidity, tissue thickness and fat distribution all alter their timing.
A useful supporting distinction appears in the Foods review of sous-vide cooking and meat quality. The review describes muscle-fibre contraction beginning at approximately 35–40°C and collagen denaturation occurring over a range around 53–63°C. These are underlying protein changes, not temperatures at which a brisket automatically becomes tender. Longer heat exposure and subsequent collagen solubilisation remain important.
53–63°C
Approximate collagen denaturation range reported in the Foods scientific review. Denaturation is not the same as complete gelatin formation or a barbecue finishing temperature.
Latoch, Głuchowski and Czarniecka-Skubina, Foods, 2023.
At the middle stage, assess the surface before deciding whether to wrap. If the desired bark is established, fat is rendering and the interior still feels resistant, wrapping or adding a moist covered finishing stage may limit further evaporation. If the bark is still pale or wet, continuing unwrapped may better preserve the desired crust.
After the final milestone, avoid treating tenderness as permanent. Continuing to cook can weaken the meat’s structure and cause it to break into dry-tasting strands or become excessively soft. Gelatin formation does not protect muscle fibres from unlimited exposure to heat.
Once timing is judged by tissue condition, the next improvement is managing the outer layer of fat so that it protects the meat without interfering with the surface texture.
How to Trim and Position the Fat Cap so It Renders Evenly Without Washing Out Flavour
A fat cap influences heat transfer, surface moisture and bark formation, but it does not automatically baste the muscle beneath it. Melted exterior fat mostly runs over the surface rather than penetrating deeply into intact meat. Trim thick, hard deposits, retain a suitable covering for the cooking method and position the cut according to where the strongest heat reaches it.
The fat cap has two relevant roles. First, it can act as an insulating layer, changing how quickly heat reaches the meat beneath it. Second, some of the fat melts during cooking, coating exposed surfaces and contributing to surface flavour and mouthfeel.
Neither effect means that thicker is always better. A large cap can reduce direct seasoning contact with the meat, delay surface development and leave substantial unrendered fat at serving. Removing every trace can expose lean areas to drying, particularly during long smoking sessions.
For a brisket, a moderate, fairly even covering is usually easier to manage than irregular thick deposits. A small chuck roast destined for braising may need less exterior fat retained because the covered environment already limits surface evaporation.
Orientation should follow the cooker rather than a rigid fat-side-up or fat-side-down rule. In a setup with stronger direct heat from below, placing the fat towards that heat can provide some protection. In an offset smoker, the strongest radiant exposure may come from the firebox side, and airflow adds another source of variation.
Watch which face browns and dries first. If the lean side is darkening too quickly while the fat side remains comparatively protected, change the cut’s orientation where practical, adjust its position or introduce shielding. This is a more useful test than assuming all smokers heat meat in the same way.
Some cooks score a thick fat cap with shallow diagonal cuts or a lattice. Where used, the scoring should remain within the fat and stop before the underlying muscle. This can expose more fat surface and create drainage paths, but it is not an established requirement for improving tenderness or rendering, and it may be unnecessary on a cap already trimmed thin.
Pooling liquid creates a different problem. Rendered fat, water and meat juices can accumulate in low areas, softening seasoning and preventing a dry bark from developing. Air circulation, meat placement and drainage can therefore matter as much as the amount of fat retained.
A practical check is to inspect the cap for thickness, identify the cooker’s strongest heat direction, then monitor whether the surface is browning or remaining wet. Adjust only when those observations suggest a problem.
Exterior fat management improves control, but it cannot substitute for giving collagen enough time. Understanding how connective tissue changes throughout the cook brings all these decisions together.
Key takeaways before your next slow cook
- Plan the cooking window around the thickness and connective-tissue structure of the cut, not only its weight or target temperature.
- Recognise when further heat is useful for collagen conversion and when it is only drying already-tender muscle.
- Build flexibility into serving time through an appropriate food-safe hold followed by careful carving.
How Collagen Breaks Down Over Time So You Stop Chasing a Single Magic Number
Collagen softens progressively rather than switching from tough to tender at one universal temperature. Heat changes its structure, and continued exposure allows some collagen to become soluble gelatin. Higher temperatures can accelerate these transformations, while lower temperatures generally require longer exposure. The best stopping point is when the cut has reached the desired tenderness without excessive moisture loss or structural breakdown.
At the beginning of cooking, muscle proteins start responding to heat before much of the tougher connective tissue has softened. Muscle fibres contract and change their water-holding behaviour. A thermometer can show substantial cooking progress even while the meat still resists a fork or probe.
As heating continues, collagen denatures, contracts and gradually solubilises. The amount that converts depends on temperature, elapsed time and the collagen’s structure, including the strength of its cross-links. This explains why two apparently similar joints can require different cooking durations.
The scientific literature also makes clear that collagen does not behave identically at every temperature. Baldwin’s sous-vide review, discussed earlier, describes tough beef chuck and pork shoulder becoming fork-tender under different combinations of controlled temperature and prolonged cooking time. Those examples demonstrate the time–temperature relationship, not a transferable schedule for uncovered roasting or smoking.
During a long cook, the texture can therefore pass through several recognisable conditions:
- Firm and resistant: Muscle proteins have changed, but substantial connective tissue still resists cutting and chewing.
- Progressively tender: Collagen-rich regions soften and the probe meets less resistance, while the muscles retain useful structure.
- Ready for the intended finish: The meat can be sliced or pulled with the desired amount of resistance and moisture.
- Over-softened: Further cooking causes excessive fibre separation or moisture loss, producing a texture that may be mushy, crumbly or stringy.
This is not a fixed timeline. A thick connective-tissue seam takes longer to heat through and soften than a thin seam. Larger joints also develop temperature gradients, so the surface and centre experience different conditions during cooking.
A cook preparing beef shin for a stew might deliberately continue until the meat separates easily with a fork. Someone smoking a brisket for neat slices should usually stop earlier in the texture progression, while the muscle still holds together under the knife.
The most useful planning change is to separate cooking from serving. Once the desired tenderness is achieved, a properly controlled warm hold can provide scheduling flexibility. A hold is not the same as continued cooking at the original high temperature: that may keep breaking down the structure.
For extended hot holding, use equipment that can maintain and verify an appropriate food-safe temperature throughout the meat. UK food-business guidance commonly uses 63°C or above for hot holding; domestic arrangements should not assume that a towel-lined cool box or switched-off oven can safely maintain that condition for hours. If a safe hot hold cannot be maintained, follow appropriate chilling and reheating guidance instead. The source pack does not establish a validated multi-hour insulated holding method.
Resting before carving is still valuable, particularly for large roasts. It gives the meat time to settle from its peak cooking temperature and reduces the need to carve while very hot. However, rest duration should be adapted to the cut, equipment and food-safety conditions rather than treated as another magic number.
The underlying principle is straightforward: temperature tells you how hot the meat is, time determines how long its proteins have been exposed to that heat, and texture reveals whether the resulting transformation meets your goal. All three measurements serve different purposes.
On your next cook, record the cut, cooking method, approximate cooking conditions, observed fat rendering, probe feel and final slicing texture. That simple record will help you improve timing without relying on a single finishing number.
Can you soften tough meat after it has already cooled?
Sometimes. If the meat remains tough because collagen was insufficiently converted, additional gentle cooking in a covered, moist environment may improve tenderness. If it is already dry and falling apart, further heat is unlikely to restore the original muscle moisture. Handle leftovers safely, refrigerate promptly and reheat thoroughly using appropriate food-safety guidance.
Does adding vinegar, wine or lemon juice dissolve gristle during cooking?
Acidic ingredients can change the surface properties of meat and influence the cooking liquid, but they do not reliably dissolve elastin-rich membranes or replace the time needed for collagen softening. Use acidic ingredients primarily to balance flavour and complement the cooking method rather than as a guaranteed solution for gristle.
Why does a slow-cooked joint shred easily but still taste dry?
Collagen breakdown and muscle moisture retention are separate processes. Prolonged cooking may weaken the connective tissue enough for fibres to separate easily, even after the muscle has lost considerable water. A joint can therefore fall apart without feeling juicy. Reducing unnecessary cooking after the desired tenderness is reached can help prevent this.
Is a slow cooker always better than an oven for tough cuts?
No. A slow cooker provides a covered, humid environment that can be useful for connective-tissue-rich cuts. A covered casserole in the oven can offer comparable advantages, while an uncovered oven or smoker can create more developed surface browning. The choice depends on the cut, desired finish and available temperature control. Whichever appliance you use, follow its food-safety instructions.
Should you remove all the white connective tissue before cooking beef shin?
No. Beef shin contains collagen-rich connective tissue that contributes to the characteristic gelatinous texture of a successful slow braise. Remove obvious tough surface membranes or unsuitable gristle where accessible, but retaining useful internal collagen is often part of the reason to choose shin for prolonged moist cooking.