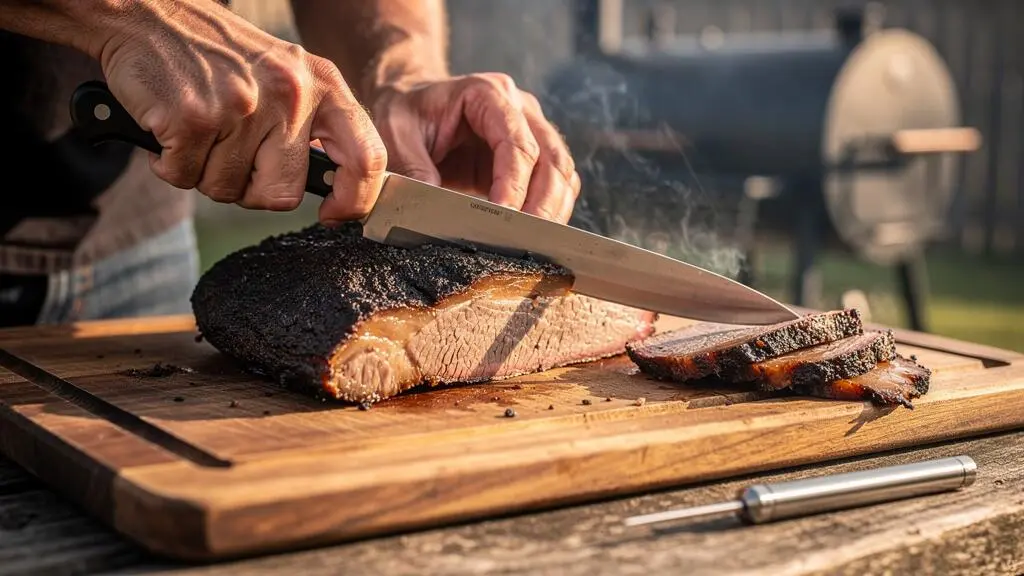
A beautiful smoke ring means little when the first bite leaves a waxy coating across your tongue. Smoked brisket can be tender yet greasy, while pork shoulder can pull apart perfectly and still contain stubborn pockets of hard fat. The problem is rarely a shortage of cooking time alone. It is how heat, fat thickness, airflow and moisture interact throughout the cook.
To render fat properly, give it enough sustained heat to soften and release, remove dense deposits that cannot reliably finish during smoking, and prevent liquid grease from soaking the bark. Clean-tasting barbecue is not fat-free barbecue. It is meat with enough well-rendered fat for richness, without the rubbery seams or oily coating that overwhelm the flavour.
For a UK kettle grill or backyard smoker, that means making decisions before lighting the charcoal, not just watching the thermometer at the end. The cut, fat-cap direction, wrapping method and final holding period all influence whether your slices feel succulent or heavy.
Fat rendering essentials for cleaner smoked meat
- Trim thick, hard deposits before smoking. Fat can begin softening at relatively low temperatures, but completing the process takes sustained heat and time.
- Manage indirect heat and wrapping so melted fat can escape rather than collect against the bark.
- Judge the finished meat by probe tenderness, fat texture and slice behaviour, then rest and hold it safely before carving.
- Why Does Fat Stay Waxy at 200°F Even After Hours of Cooking?
- How to Trim and Position the Fat Cap so It Renders Evenly Without Washing Out Flavour
- Fat Cap Up or Down: Which Choice Gives Cleaner Slices on a Kettle Grill?
- The Wrapping Mistake That Traps Grease and Ruins the Bite
- How to Finish a Cook so the Surface Fat Tightens in 10 Minutes Without Drying the Flat?
- [CONFLIT:aucun_cousin_disponible]
- How to Spot and Trim Tough Connective Tissue in 10 Minutes Before You Smoke
- How Collagen Breaks Down Over Time So You Stop Chasing a Single Magic Number
Why Does Fat Stay Waxy at 200°F Even After Hours of Cooking?
Fat can remain waxy during a long cook at 200°F (93°C) because the smoker’s air temperature is not the same as the temperature inside the fat. Evaporation cools the meat, thick deposits heat unevenly, and fat rendering takes time. Even when the meat becomes tender, its remaining fat may still feel firm and unpleasant.
The first distinction is between fat rendering and collagen conversion. Both respond to sustained heat, but they involve different tissues and do not finish on identical schedules. Fat progressively softens, liquefies and may escape from the meat. Collagen-rich connective tissue gradually changes structure, contributing to tenderness as cooking continues.
According to AmazingRibs‘ explanation of basic meat-cooking science, fats can begin liquefying at approximately 130–140 °F (54–60 °C), although rendering at those temperatures can take hours. This is an approximate starting range, not a guaranteed temperature for complete rendering.
Consider a hypothetical brisket spending hours in a smoker set to 200°F. While moisture evaporates from its surface, evaporative cooling can restrict the temperature rise of the outer meat. The thick fat seam between the point and flat may respond differently from the thin surface cap. Neither location is guaranteed to have experienced enough heat for long enough simply because the smoker’s display reads 200°F.
Wrapping reduces evaporation and can help the meat heat more quickly. A moderately hotter indirect cooking environment may also increase the rate of rendering. Neither method guarantees better texture: excessive heat can dry the flat, while poorly managed wrapping can leave grease collecting around the exterior.
Use the thermometer as a guide, then test the texture. Insert a temperature probe into the thick fat layer and assess whether it yields easily or feels stubborn and rubbery. This is a practical tactile check, not a calibrated scientific test. A probe passing through softened fat should meet little resistance, though very soft fat alone does not prove that the rest of the meat is ready.
When slicing, look for a thin, soft fat layer that bends with the meat rather than a thick strip that snaps back or demands prolonged chewing. A clean bite matters more than an attractive internal-temperature reading.
Temperature explains part of the problem, but the thickness and location of the remaining fat determine how difficult that problem will be to solve.
How to Trim and Position the Fat Cap so It Renders Evenly Without Washing Out Flavour
Trim the fat cap according to its thickness and density, not a rigid measurement applied to every cut. Remove bulky, hard deposits, leave a relatively even covering of softer fat and taper thick edges where practical. This reduces stubborn waxy sections while preserving enough surface fat to contribute richness and protect exposed areas during smoking.
Lay the raw brisket on a stable board and inspect the cap from different angles. A thin section that follows the meat’s contour behaves differently from a dense lump sitting above a shallow section of flat. Those thick patches are the ones most likely to remain unpleasant when the surrounding meat is already tender.
Start by shaving down the raised areas with a sharp boning knife, keeping the blade nearly parallel to the meat. Work in small cuts rather than removing large sections blindly. Near the thinner edges, leave a modest protective covering where possible without creating a bulky overhang.
The dense fat seam between the point and flat deserves particular attention. Unlike a thin layer of softer external fat, this hard deposit can remain unpleasantly chewy. Remove accessible excess without aggressively separating the muscles or damaging their structure. An uneven cut that exposes a large section of flat may create a new drying problem.
Shallow crosshatch scoring is an optional technique for a substantial fat cap. Cut through the fat surface without reaching the meat. This creates exposed edges and may help liquid fat escape, but there is no strong evidence in the supplied research that scoring always produces more complete rendering. On an already thin cap, scoring offers little advantage and increases the risk of cutting into the lean.
Fat does not need to penetrate the meat to influence its flavour. Rendered fat can coat the exterior, carry fat-soluble flavour compounds and affect how the bark tastes. However, the idea that a melting fat cap continuously bastes the interior of brisket is unreliable. Much of the liquid fat runs off rather than soaking into the muscle.
Trimming is therefore a balance between two practical goals: removing fat that will be unpleasant to eat and retaining an exterior that can withstand a long smoke. More fat is not automatically juicier, and removing every visible trace of fat is not automatically cleaner.
Five checks before the brisket reaches the smoker
- Run your fingertips across the cap and identify bulky ridges. The result should be a clear map of areas needing trimming.
- Shave the raised sections with shallow knife passes. Check that the remaining cap follows the contour of the meat without large protrusions.
- Inspect the point-to-flat junction and remove accessible hard deposits. Confirm that the two muscles remain intact.
- Check the thin corners for exposed lean or unnecessary overhangs. The finished trim should retain practical protection without oversized fat pockets.
- Make any optional shallow scoring cuts and examine the grooves. No red muscle should be exposed by the scoring.
Once the cut is prepared, the next decision is which side should face the stronger radiant heat inside a kettle grill.
Fat Cap Up or Down: Which Choice Gives Cleaner Slices on a Kettle Grill?
On a kettle grill, fat-cap direction should follow the location of the strongest heat rather than a universal up-or-down rule. Fat down can help shield the lean from stronger heat beneath it. Fat up may encourage different surface browning, but neither position guarantees cleaner slices. Indirect-fire placement and temperature control matter more.
A kettle grill is not simply a smaller offset smoker. Its charcoal may sit to one side, in baskets or around a central indirect zone. Heat reaches the meat through a combination of convection and radiation, with the exact balance changing according to charcoal placement, airflow and the lid configuration.
For a conventional kettle arrangement with charcoal concentrated below or beside the cooking area, the surface facing the hotter radiant zone receives a different heat load from the opposite side. If the lean flat is vulnerable to that heat, positioning the fat towards it may provide some protection.
However, facing the fat towards the heat does not guarantee complete rendering. A thick cap may still leave greasy deposits, while direct exposure to intense radiation can cause scorching before the underlying fat has softened sufficiently.
Fat cap up is sometimes recommended because melted fat supposedly runs down through the meat. In practice, most of that liquid travels over the exterior rather than deeply penetrating the muscle. It may affect the surface and bark, but it does not substitute for moisture retention within the meat.
For a more deliberate kettle setup:
- Keep the brisket in an indirect cooking zone, away from direct exposure to the charcoal.
- Use an appropriately positioned drip pan to collect rendered fat and reduce the risk of grease reaching hot coals.
- Use a heat deflector where the grill design permits it, without blocking necessary ventilation.
- Place the thicker point towards the stronger heat when that helps protect the thinner flat.
- Choose the fat-cap direction according to the strongest heat exposure, then check how the bark develops.
A common argument is that orientation stops mattering after wrapping. It certainly becomes less influential once the meat is enclosed, but the unwrapped phase already affects bark formation, surface moisture and fat movement. Wrapping cannot fully reverse a scorched flat or restore bark that never formed properly.
On slicing, cleaner results usually come from adequate trimming, properly rendered fat and a dry, set bark. A cap that faces upwards may retain a better presentation surface in some arrangements; in others, the hotter side may brown more effectively. Neither result is guaranteed by orientation alone.
Even the best grill placement can be undermined if the brisket is wrapped before its bark and surface fat are ready.
The Wrapping Mistake That Traps Grease and Ruins the Bite
Wrapping too early, especially in tightly sealed foil, can leave brisket or pork shoulder with a greasy, softened exterior. As fat melts, liquid collects around the meat rather than draining away. The humid environment softens bark and encourages the surface to behave more like braised meat than smoked meat with a defined crust.
The mistake is not wrapping itself. Wrapping can reduce evaporative cooling, move the cook through the stall and help protect exposed lean muscle from prolonged drying. The mistake is assuming that quicker cooking automatically means a cleaner texture.
Before wrapping, examine the bark. It should have developed a stable colour and texture and should not rub away easily when lightly touched with a suitable utensil. A wet, soft surface is more likely to suffer when enclosed.
Internal temperature can provide additional context. Many brisket cooks consider wrapping around the stall, often when the thickest section reads approximately 150–170°F (66–77°C). This is a practical working range rather than a validated universal wrapping threshold. The bark, moisture conditions and specific cut should determine the decision.
Foil and butcher paper create different environments. Foil is an effective moisture barrier, retaining steam and liquid fat. Food-grade unwaxed butcher paper is more permeable to vapour, although it can become saturated and still retain grease where it contacts the meat.
If grease management is the priority, use a wrap that contains the meat without allowing it to sit in a deep pool of liquid. When the meat is opened for finishing, carefully tilt the foil so liquid collects away from the surface, then transfer or drain it safely. For a foil-covered pan, a suitable rack can keep the cut elevated above collected fat, although this differs from a conventional tight wrap.
There is a meaningful timing trade-off:
| Factor | Earlier, tightly sealed wrap | Later, more breathable wrap |
|---|---|---|
| Cooking progress | Often faster because evaporation is restricted | May require a longer cook |
| Bark | More likely to soften | More opportunity to develop and remain defined |
| Liquid fat | Greater potential for pooling | Less pooling in some setups, but drainage is not guaranteed |
| Lean flat | Better protected from prolonged evaporation | Can lose more moisture if exposure continues too long |
The finishing step is to prevent the pooled fat from becoming the surface coating on every slice. Once the meat has reached the desired tenderness, unwrap carefully, allow excess liquid to drain and, if the surface needs recovery, give it a brief period of controlled indirect heat before the final rest. Avoid aggressive heating simply to compensate for an early wrap.
A carefully managed wrap protects moisture, but the last part of the cooking and resting process decides whether that moisture becomes juiciness or an oily surface.
How to Finish a Cook so the Surface Fat Tightens in 10 Minutes Without Drying the Flat?
For a cleaner surface in the final 10 minutes, rely on controlled heat, drainage and careful slicing rather than a burst of high-temperature grilling. Remove pooled grease, allow a softened bark to dry gently if necessary, and avoid exposing the lean flat to direct heat. Ten minutes can improve surface condition, but cannot fix deeply under-rendered fat.
Start by distinguishing three separate stages: finishing the cook, resting the meat and holding it warm. They serve related purposes but are not interchangeable. Finishing aims to achieve the desired tenderness and surface condition. Resting reduces the immediate loss of hot juices during carving. Holding maintains the cooked meat at a controlled temperature until service.
Residual heat can continue changing fat and connective-tissue texture during the early rest, especially in a large cut. But it is misleading to assume that the last stubborn fat seam will inevitably render just because the brisket is sitting in a cooler. A thick waxy deposit that survived the entire cook may remain unpleasant.
For an extended warm hold, food safety matters as much as texture. USDA FSIS guidance on safe hot-food holding temperatures advises keeping cooked food at or above 140 °F (60 °C). This is a hot-holding safety recommendation, not a fat-rendering target. In the UK, local food-safety guidance may specify different hot-holding requirements, so follow applicable local rules.
An oven capable of maintaining a stable, verified holding temperature is generally easier to control than an unheated cool box. If using an insulated cooler, monitor the meat’s temperature with a suitable thermometer. A cooler slows heat loss but does not actively maintain a safe temperature indefinitely.
Long holds sometimes used in competition barbecue are not a substitute for confirming that the meat was properly cooked beforehand. Continued holding may change texture, and an excessively hot hold may push already tender meat towards a soft or overcooked consistency.
A practical 10-minute pre-slice routine can be organised as follows:
- Check that the meat is already fully cooked and suitably tender. Do not use this final period to compensate for unfinished cooking.
- Open the wrap carefully and direct collected fat into the lower part of the foil or a suitable container.
- If the bark is damp, expose it briefly to gentle indirect heat, watching closely to prevent the flat from drying.
- Keep the meat in a safely controlled warm environment until carving, without allowing it to sit in accumulated grease.
- Use a long, sharp slicing knife and make smooth strokes across the grain rather than sawing through the fat layer.
The goal is a bark that holds together and a fat layer that cuts cleanly. Warm, properly rendered fat may remain soft rather than becoming rigid. That is desirable: the bite should be supple, not brittle or waxy.
Turning the kettle up sharply at the end can overcook the thin flat, scorch the bark and create flare-ups if fat reaches the coals. A short finish is best treated as a surface adjustment, not a replacement for a successful low-and-slow cook.
Once the meat is sliced, its texture provides useful evidence about which earlier decision worked and which one needs changing on the next cook.
[CONFLIT:aucun_cousin_disponible]
Greasy smoked meat is easier to correct when the problem is identified by touch and appearance rather than blamed on cooking temperature alone. Waxy fat, grease-soaked bark and fat smeared across freshly cut slices are different failures. Each points towards a particular stage of preparation or cooking, and each calls for a different response.
Fat rendering works as one continuous process. First, the cut is trimmed so thick deposits do not outlast the rest of the meat. Then the grill delivers controlled indirect heat, the wrapping method manages moisture and liquid fat, and the finish allows the bark and slices to retain their texture.
Skipping one stage can undermine the others. Perfect grill temperature will not reliably rescue an enormous hard fat seam. An excellent trim will not prevent a tightly sealed foil wrap from collecting liquid fat against the bark. And properly cooked meat can still look greasy when carved carelessly through pooled surface fat.
Use the condition of the first slice as a diagnostic tool:
| What you notice | Likely explanation | What to change next time |
|---|---|---|
| Thick, pale fat that chews like wax | Insufficient rendering, excessive fat thickness or dense hard fat | Trim more selectively and assess fat texture before ending the cook |
| Soft bark with visible liquid grease | Rendered fat collected around the exterior, often during wrapping | Let bark establish and improve grease drainage |
| Glossy smears across the cut face | Surface grease or fat carried across the slice during carving | Drain the surface and use clean, deliberate knife strokes |
These symptoms can overlap. A greasy-looking slice may contain perfectly softened fat, while a dry-looking surface can conceal a hard deposit beneath it. Check the mouthfeel before concluding that surface appearance tells the entire story.
Not every stubborn bite is a fat problem. A tough white membrane can resemble hard fat, and connective tissue between muscles may remain chewy even when the neighbouring fat has softened. The distinction matters because simply extending the cooking time cannot resolve every kind of unwanted tissue.
If the bite feels rubbery rather than oily, inspect the raw cut more carefully next time: the material causing resistance may be silverskin or connective tissue instead of fat.
How to Spot and Trim Tough Connective Tissue in 10 Minutes Before You Smoke
Inspect the raw cut for three materials: soft white fat, tough silverskin and dense connective tissue. Fat may soften and render during cooking; silverskin is a resistant membrane that often needs removing; collagen-rich connective tissue can become tender with sufficient cooking. A focused 10-minute inspection helps remove accessible membranes without stripping away useful fat.
Begin with the meat cold enough to handle safely and firmly. Cold fat is generally easier to distinguish and trim than warm, slippery fat. Use good lighting, a stable cutting board and a sharp, narrow boning knife.
Soft fat often feels pliable when pressed and may be trimmed down to a manageable thickness. Silverskin has a more shiny, fibrous appearance and resists stretching. Dense gristle or connective-tissue seams can feel tougher and more structured than the fat around them.
A brisket may contain combinations of these materials around the point and flat. Pork shoulder also contains seams between muscles, not all of which can or should be completely removed before smoking.
The distinction has a scientific basis. The Meat Science study on structural changes in highly marbled meat examined beef cooked using grilling, boiling and sous-vide methods at endpoint temperatures of 55°C and 77°C. Under its experimental conditions, connective tissue between fat cells was affected at 77°C but not at 55°C.
Those observations demonstrate that heat changes meat structures differently. They do not establish a universal rendering temperature for smoked brisket or prove that every connective-tissue layer will disappear during a long barbecue cook.
For a practical inspection, use the first few minutes to locate shiny membranes on exposed muscle. Lift an accessible edge using the tip of a knife, then angle the blade towards the membrane while pulling it taut. Work with short, controlled movements to minimise meat loss.
Next, feel around the thickest fat deposits for dense seams. Remove hard, accessible material that would obstruct carving or remain unpleasant in the finished bite. Avoid cutting deeply through the muscles simply to chase every connective-tissue strand.
Finally, check the smaller ends of the cut and remove any loose flaps or exposed membranes that could become leathery during smoking. Keep useful intramuscular connective tissue in place when removing it would damage the meat.
The goal is not to achieve a perfectly smooth anatomical specimen. It is to remove clearly resistant outer membranes while leaving intact the muscle structure that will become tender during cooking.
Once the membranes that need cutting are removed, the remaining collagen-rich tissue must be managed through sustained cooking rather than more trimming.
Key takeaways before the final tenderness check
- Do not equate a high internal temperature with completed fat rendering or collagen conversion: examine both textures independently.
- Keep accessible silverskin and dense gristle separate from collagen-rich tissue that can soften during cooking.
- Use probe resistance, the movement of the cut and slice behaviour together before deciding that the cook is finished.
How Collagen Breaks Down Over Time So You Stop Chasing a Single Magic Number
Collagen breaks down through a combination of temperature and time, not by instantly reaching one magic internal reading. As a large cut remains hot, its connective tissue gradually changes and tenderness develops. Two briskets reaching the same temperature can therefore feel very different, depending on how long they spent heating and how their fat and muscles responded.
Collagen is part of the structural framework holding muscle together. In collagen-rich cuts such as brisket and pork shoulder, prolonged cooking allows important changes that help tough connective tissue become more tender. The process is gradual, affected by the meat’s structure, moisture conditions and heating history.
This is why a brisket that reaches a particular internal temperature quickly may not feel the same as one that reaches it after a prolonged low-and-slow cook. The thermometer reports the temperature at its probe tip; it does not directly measure how much collagen has changed or how much fat has escaped.
The stall adds another variable. During smoking, moisture evaporating from the meat’s surface removes heat. The internal temperature rise can slow dramatically even while energy continues entering the cut. The stall is not necessarily evidence of a failing fire or an incorrectly positioned thermometer.
Wrapping reduces evaporative cooling and may accelerate progress, but it also changes the surface environment. Raising the cooking temperature can have a similar effect on the timeline while creating different risks for the exposed lean.
The right response depends on what the meat needs. If the bark is already well established but the centre remains firm, wrapping may be useful. If the bark is wet and the fat cap still feels bulky, more unwrapped cooking may improve the exterior, provided the flat is not drying excessively.
Near the end, use three complementary tenderness checks:
- Probe tenderness: Insert the probe into several areas of the flat and point. When the cut is ready, the probe should meet little resistance in the relevant muscle tissue, although density naturally varies between regions.
- The jiggle test: Gently move the supported brisket and observe whether the thick section moves with a soft, relaxed wobble. This is a subjective cue, not proof of complete rendering.
- Slice behaviour: Once rested and safely ready to carve, a slice should hold together yet yield easily when bent or pulled gently, without a stubborn waxy strip dominating the bite.
Fat deserves its own assessment. Well-converted collagen does not guarantee fully rendered fat, especially when thick external seams remain. Likewise, a soft cap does not establish that the flat has finished tenderising. Both processes need to reach a satisfactory texture together.
Do not keep raising the heat simply because the thermometer has stopped climbing. That may shorten the cook but can overheat the lean while leaving its thickest fat deposits less pleasant than expected. Controlled heat, adequate time and tactile feedback are more reliable guides than a single number.
On your next cook, record the trim, grill arrangement, wrapping decision and final texture alongside the temperature readings. Compare those observations with the first slice, then adjust the step that actually caused the problem. That is how a repeatable method replaces guesswork.
Can fat render completely at 200°F (93°C)?
Some fat can soften and render at temperatures well below 200°F, but complete rendering is not guaranteed by a 200°F smoker setting. Thickness, fat composition, evaporative cooling and cooking duration all influence the outcome. A thick, hard deposit may remain waxy even after a prolonged cook.
Should rendered fat be transparent or white when brisket is sliced?
Appearance alone is not a definitive test. Properly softened fat may look glossy or partly translucent when warm, but colour and opacity vary with temperature and fat composition. Judge it primarily by whether the layer feels soft, cuts cleanly and offers no unpleasant waxy resistance when eaten.
Can rendered brisket fat be saved instead of discarded?
Yes. Collected beef fat can be strained and kept as tallow for suitable cooking uses. Handle it hygienically, cool it promptly and store it under appropriate food-safe conditions. Removing excess liquid fat from the wrap does not mean that all its flavour needs to be wasted.
Does butcher paper prevent greasy brisket better than aluminium foil?
Butcher paper can allow more moisture to escape than sealed foil, which may help preserve bark texture. It does not guarantee grease-free meat: saturated paper can still hold liquid fat against the surface. The wrapping time, amount of rendered fat and finishing technique remain important.
Why does smoked fat taste waxier after the meat has cooled?
Fat becomes firmer as it cools, so even well-rendered meat can develop a more noticeable fatty texture at lower serving temperatures. Reheating gently may soften the fat again, but it will not necessarily correct a thick deposit that was inadequately rendered during the original cook. Reheat and hold cooked meat according to applicable food-safety guidance.