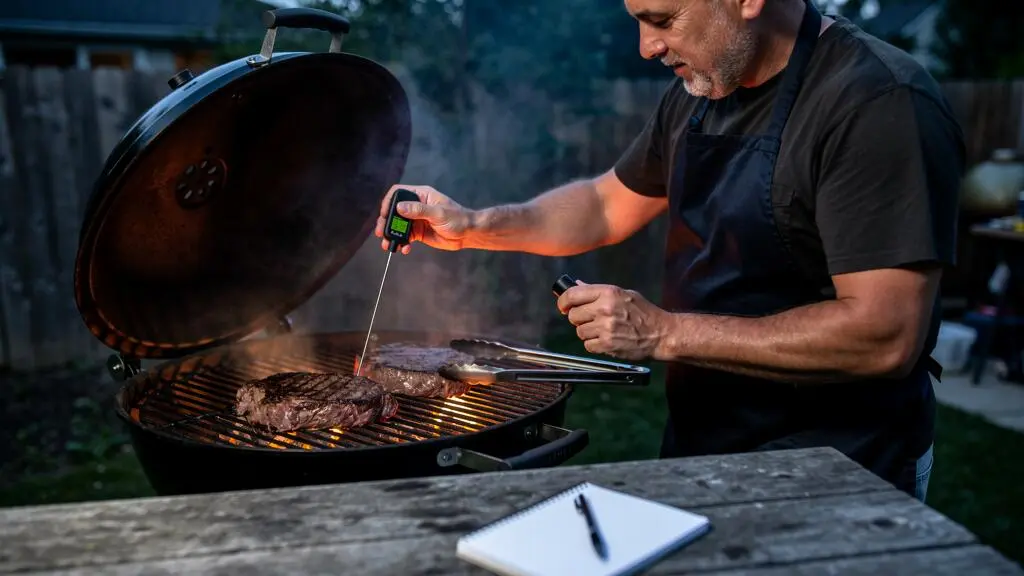
A 2 cm rump steak and a 4 cm ribeye can sit over the same barbecue, develop an equally convincing crust and finish at completely different levels of doneness. The problem is not necessarily the heat, the recipe or the cook. It is the assumption that identical grilling times produce identical internal results.
Consistent doneness starts by separating three decisions: the internal temperature you want, the temperature at which you remove the meat from the grill, and the temperature it reaches while resting. Thickness changes the relationship between those numbers.
A reliable method therefore measures the thickest part of each steak, accounts for the heat still travelling towards its centre and records what actually happened. Colour, firmness and cooking times remain useful observations, but they cannot replace an accurate internal reading.
Whether you prefer a pink centre, a more thoroughly cooked steak or several different results for guests, the goal is the same: make each cook measurable enough to repeat without sacrificing food-safety standards.
How to get consistent doneness
- Thickness changes timing: a 4 cm steak needs a different heat-management approach from a 2 cm steak, even when both have the same target temperature.
- Separate target and pull temperatures: account for expected carryover cooking, then confirm the temperature after resting.
- Measure the coolest part: check the thickest muscle, avoid bone and fat pockets, and use the result to improve your next cook.
- Why Does Doneness Change When Steak Thickness Jumps From 2 cm to 4 cm?
- How to Translate “I Like It Medium” Into a Pull Temperature and Rest Time?
- Thermometer or Touch Test: Which Is More Reliable When Cooking for Guests?
- The Colour-Based Doneness Mistake That Ruins Chicken and Steak Alike
- When Should You Take Meat Out of the Fridge to Hit Doneness on Time?
- How to Translate “I Like It Medium” Into a Pull Temperature and Rest Time?
- How to Place a Probe So Your Reading Isn’t 15°F Off Near Bone or Fat?
- How to Use Internal Temperature Without Overcooking Meat That “Looks Not Done Yet”?
Why Does Doneness Change When Steak Thickness Jumps From 2 cm to 4 cm?
Steak thickness changes doneness because heat must travel from the hot exterior towards the cooler centre. In a 2 cm steak, that journey is relatively short, so the centre heats quickly during searing. In a 4 cm steak, the surface can develop a dark crust while the centre remains much cooler. Identical cooking times therefore produce different internal temperatures.
The difference comes from the thermal gradient: the temperature gap between a steak’s outer layers and its centre. On a hot barbecue, the exterior heats first. Energy then moves inward through the meat.
For a thin steak, the distance from either surface to the centre is small. For a thick steak, that distance is greater. As a result, the relationship between crust development and internal doneness changes, even when grill temperature and turning frequency remain similar.
This is why a time chart designed around one thickness cannot reliably predict the result for another. A recipe stating a certain number of minutes per side is describing a particular cooking situation, not a universal rule.
Think in terms of distance to the centre, not steak weight. Two pieces of beef can weigh roughly the same but differ dramatically in thickness and shape. Their centres will not necessarily heat at the same rate.
The distinction also affects what happens after the steak leaves the grill. A thick cut can retain a substantial temperature gradient, allowing heat from its hotter exterior to continue travelling inward during resting. This is carryover cooking.
ThermoWorks explains this mechanism in its guide to measuring steak temperature. Its practical grilling guidance describes an approximate carryover rise of 3–6°F (2–3°C), while recognising that actual results depend on the steak and cooking conditions.
Thickness alone does not guarantee a particular rise. Grill intensity, cooking method and resting conditions also matter. A thick steak exposed to intense heat may retain a larger gradient than one brought gradually towards its target over gentler heat.
Counterintuitively, a thicker steak can be easier to control. Its centre usually changes temperature less rapidly than that of a very thin steak, providing more opportunity to measure and adjust. A thin steak can pass its intended doneness while the cook is still checking another piece.
For a thick steak, managing surface browning and internal heating separately can help. Begin with gentler heat to approach the desired internal temperature, then use hotter heat for the crust, or sear first and finish more gently. In either case, measure the centre rather than trusting elapsed time.
For a thin steak, have the thermometer ready before cooking. The smaller timing margin leaves little room for searching for equipment after the crust looks finished.
Once thickness is treated as a variable rather than an inconvenience, the next decision becomes clearer: which internal temperature should the steak actually reach?
How to Translate “I Like It Medium” Into a Pull Temperature and Rest Time?
Translate a preferred doneness into a cooking decision by choosing a final internal temperature, estimating how much the centre will rise during resting, and subtracting that expected rise to calculate the pull temperature. Then measure the actual post-rest result. The appropriate temperature also depends on the type of meat and applicable food-safety guidance, not preference alone.
The distinction matters because culinary doneness descriptions and official food-safety minimums are not interchangeable.
For example, ThermoWorks describes 60°C (140°F) as a culinary target for medium beef steak. That is a texture and doneness recommendation, not a public-health safety threshold.
By contrast, the FDA food-safety guidance on minimum cooking temperatures recommends that whole beef, pork, veal and lamb steaks, chops and roasts reach at least 62.8°C (145°F), followed by a three-minute rest.
The same guidance specifies higher minimum temperatures for minced meat and poultry. These differences are important when translating a guest’s preferred texture into a safe cooking decision.
| Cooking situation | Relevant temperature guidance | Practical decision |
|---|---|---|
| Whole beef steak | 62.8°C (145°F), followed by a three-minute rest, under FDA guidance | Distinguish culinary preference from the recommended safety minimum. |
| Minced beef or lamb | 71.1°C (160°F) under FDA guidance | Do not apply whole-steak doneness temperatures to mince. |
| Chicken or other poultry | 73.9°C (165°F) under FDA guidance | Use the appropriate poultry safety temperature rather than a steak doneness scale. |
| Pregnant guests, young children, older adults or immunocompromised guests | Applicable safety recommendations, with particular care for higher-risk diners | Prioritise food safety rather than a lower culinary doneness preference. |
For UK grilling, check the applicable UK food-safety advice as well. The FDA figures above are explicitly US recommendations; they should not be presented as UK regulatory requirements.
Next, distinguish the two temperature numbers that matter during cooking.
- Target temperature: the final internal temperature selected for the intended result, subject to relevant safety requirements.
- Pull temperature: the reading at which the steak leaves the heat, allowing for any subsequent temperature rise.
For a steak cooked over strong heat, carryover may be noticeable. A thin cut with a smaller remaining temperature gradient may show little rise after removal. Therefore, applying the same pull-temperature allowance to both cuts is unreliable.
Resting is part of this process, but a fixed instruction such as « rest for five minutes » cannot guarantee a final temperature. The centre’s temperature may continue rising, level off and eventually begin falling.
Where a food-safety guideline specifies both a minimum temperature and a minimum rest, the complete requirement matters. An estimated carryover rise should never be assumed to have delivered a safety threshold without verification.
The most useful habit is to record three observations: the temperature when the steak came off the grill, the highest centre temperature observed during resting, and the final eating result. A later cook can then be adjusted using the actual temperature difference rather than a generic allowance.
This provides a starting method. Its reliability improves when the same information is collected across several cooks, particularly when thickness and grill intensity change.
Thermometer or Touch Test: Which Is More Reliable When Cooking for Guests?
A properly used food thermometer is more reliable than a touch test for judging the internal temperature of steaks, particularly when guests want different levels of doneness. Firmness changes with cut, thickness and cooking conditions, while a thermometer gives a measurable reading. However, poor probe placement can mislead, so technique remains essential.
The familiar touch method compares the resistance of the steak to the fleshy area at the base of the thumb. It offers a quick sensory reference, but the comparison is not a calibrated temperature measurement.
A thick ribeye, a lean fillet and a thin rump steak do not necessarily feel alike at the same core temperature. Fat distribution, muscle structure and the thickness of the piece all affect resistance.
A cook who has repeatedly handled the same cut may develop useful tactile judgement. That experience does not automatically transfer to a different steak or to several pieces cooking simultaneously.
A thermometer has different failure modes. It can give an accurate reading at an unrepresentative location, especially if the tip sits close to a hot surface or touches bone. The problem is then measurement placement rather than the principle of temperature measurement.
| Criterion | Food thermometer | Touch test |
|---|---|---|
| What it measures | Temperature at the sensing tip | Perceived resistance and firmness |
| Consistency across different cuts | Good when positioned correctly | Variable without cut-specific experience |
| Main limitation | Incorrect probe placement or instrument error | Subjective interpretation |
| Use when cooking for guests | Primary decision method | Supplementary sensory check |
With several steaks on one barbecue, measure each piece individually. A 2 cm steak near the centre of the grate and a 4 cm steak near the edge may experience different heating conditions even if both were placed on the grill at the same moment.
A practical approach is to check the thicker pieces first, then monitor thinner steaks more frequently as they approach their intended temperatures. When necessary, move individual steaks to a gentler area of the grill rather than forcing everything to finish together.
The touch test can still be useful, provided it is treated as a skill to calibrate rather than an independent guarantee.
During an ordinary cook, note how a steak feels when the thermometer records a particular internal temperature. Repeat the observation with the same cut on later occasions. Over time, firmness can become a helpful secondary signal for recognising when another measurement may be worthwhile.
It should not replace thermometer verification when food safety is uncertain, especially with poultry or minced meat.
The same principle extends beyond firmness: a steak’s appearance can suggest what is happening at the surface without reliably establishing its internal temperature.
The Colour-Based Doneness Mistake That Ruins Chicken and Steak Alike
Meat colour is not a reliable measure of doneness or food safety. Beef can appear brown before its centre reaches the intended temperature, while chicken may retain a pink appearance after adequate cooking. Pigment chemistry, cooking conditions and bone proximity all influence appearance. Use an accurately positioned thermometer to decide whether meat is cooked sufficiently.
Steak colour depends partly on myoglobin, the oxygen-binding pigment in muscle. Its appearance changes with temperature and chemical conditions, but those changes do not provide a precise internal-temperature reading.
A brown centre is not automatically proof that a steak has reached the correct safety temperature. Equally, a red or pink appearance cannot independently establish its actual core temperature.
Chicken creates a similar problem. Meat close to bones may remain pinkish even after it has reached an appropriate internal temperature. Conversely, a pale or white-looking interior does not prove that every part has been cooked sufficiently.
These visual ambiguities can cause two opposite errors. One cook continues heating a properly cooked piece simply because it looks unexpectedly pink, producing drier meat. Another removes meat too soon because the surface or sliced interior appears sufficiently cooked.
Both errors come from treating appearance as a substitute for measurement.
73.9°C (165°F)
The FDA’s recommended minimum internal temperature for poultry, including chicken pieces, whole birds and minced poultry. The reading must represent the relevant thickest area of the meat.
U.S. Food and Drug Administration, Safe Food Handling.
When appearance and temperature disagree, start by checking the measurement rather than automatically extending cooking time.
- Confirm that the probe tip is inside the thickest relevant muscle, away from bone.
- Check another suitable location to identify a potentially cooler area.
- Compare the valid readings with the applicable food-safety temperature.
- Continue cooking if any relevant area has not met the required condition.
Near a chicken bone, a lingering pink tint may create understandable doubt. A second correctly placed temperature reading is more informative than repeatedly extending the cooking time solely to remove the colour.
With steak, crust colour is useful for judging browning and flavour development. It is not a trustworthy indicator of whether the centre has reached medium, medium-well or a particular safety threshold.
Once colour is no longer the deciding signal, preparation and starting temperature become useful variables for improving the timing of the entire meal.
When Should You Take Meat Out of the Fridge to Hit Doneness on Time?
Take meat out of the fridge when preparation and cooking require it, rather than relying on a universal room-temperature waiting period. A colder starting centre can increase the time needed to reach a chosen doneness, but a short countertop rest may barely change the centre of a thick steak. Measure the starting temperature and keep unrefrigerated handling within food-safety limits.
A thick steak taken directly from the fridge begins with a colder centre than one that has already warmed somewhat. Under otherwise comparable grilling conditions, that initial difference can influence the time needed to reach the final temperature.
However, the outside warms before the centre. A steak that feels less cold on its surface may still be close to its original refrigerated temperature inside.
This explains why the familiar instruction to leave every steak out for 30 minutes is an unreliable timing method. It does not account for steak thickness, kitchen temperature or the initial temperature of the meat.
It also does not establish how much the thermal centre has actually warmed.
Instead, treat the starting temperature as information. Insert a clean food thermometer into the thickest part of the meat and record the centre reading when preparing the barbecue. That provides a measurable starting point for the cook.
There is no need to hold raw meat on the counter for an extended period simply to achieve a particular starting temperature. Where the required preparation is complete, keeping the meat refrigerated until needed is the safer default.
Food safety places a clear boundary around countertop holding. The CDC guidance on preventing food poisoning advises against leaving perishable food at room temperature for more than two hours, reduced to one hour when the surrounding temperature exceeds 32.2°C (90°F).
Those are maximum handling limits under the cited US guidance, not recommended durations for warming steaks. They should not be interpreted as permission to leave meat out until a desired internal starting temperature is reached.
For UK households, follow the applicable UK storage and handling advice alongside the food-safety instructions relevant to the product.
The starting temperature is particularly useful when cooking several steaks for guests. It helps explain why a thicker, colder piece may require an earlier start or a longer period over gentler heat.
Rather than forcing every steak onto the grill simultaneously, plan the sequence around the cuts involved. Start monitoring thick pieces early enough to allow adjustment, and treat the final internal reading as the finishing criterion.
The grill’s heat distribution still matters. A colder thick steak placed directly over intense heat may develop excessive exterior browning before the centre reaches its target. Moving it to a gentler zone can give the centre more time to heat without continually darkening the crust.
Preparing the thermometer, deciding on the desired final temperatures and identifying a resting area before grilling will usually make the process easier to coordinate than attempting to compensate for every timing difference with countertop warming.
With the starting conditions identified, the remaining task is to turn a temperature preference into an executable sequence that can be refined after each cook.
How to Translate “I Like It Medium” Into a Pull Temperature and Rest Time?
A repeatable medium-steak method uses two written temperatures: the intended final centre temperature and the earlier reading at which cooking stops. Estimate carryover from the steak’s thickness and heating conditions, observe the actual rise while resting, and adjust the next cook accordingly. An estimated culinary target must always be distinguished from the applicable food-safety minimum.
Consider a hypothetical 4 cm boneless ribeye cooked on a charcoal barbecue. The diner describes the preferred result as medium.
A culinary reference such as ThermoWorks places medium at 60°C (140°F), but this sits below the FDA’s stated 62.8°C (145°F) minimum for whole beef cuts with a three-minute rest. It should therefore be labelled as a culinary preference reference, not as a recommended food-safe endpoint.
For a practical worked example using the FDA safety framework, suppose the cook selects 62.8°C (145°F) as the minimum final target and uses an observed carryover estimate of approximately 2°C. These numbers illustrate a calculation, not a universally validated method of achieving the required safety threshold.
Hypothetical example: converting a target into a pull-temperature estimate
A 4 cm boneless ribeye is grilled with a selected final target of 62.8°C. For planning purposes, the cook estimates a 2°C carryover rise, giving a provisional pull-temperature estimate of 60.8°C.
The cook monitors the steak through resting and verifies whether the centre actually reaches at least 62.8°C, observing the required three-minute rest under the FDA guidance. If the measured temperature does not reach the safety minimum, further cooking is needed. The provisional pull figure is not proof of safe completion.
The calculation is straightforward: estimated pull temperature = selected final target − estimated carryover rise. The uncertainty lies in the carryover estimate, not the arithmetic.
Grill intensity affects the temperature difference between the crust and the centre. Thickness changes the distance heat must travel. Resting uncovered or using foil can also alter the cooling conditions around the steak, although the supplied evidence does not establish a universal temperature adjustment for foil.
For that reason, the estimated pull temperature should be treated as an initial decision point. The actual temperature during resting must be measured, particularly when a minimum safety temperature has not yet been confirmed.
Resting time is another observation rather than an inflexible countdown. A steak may continue warming at its centre for part of the rest, and the pattern can differ from previous cooks.
The useful record is not simply « rested five minutes ». It is the combination of pull temperature, subsequent peak temperature, elapsed resting time and the finished result.
Suppose a later cook with the same cut produces a measured post-rest temperature higher than the intended result. That observation indicates the previous pull decision or heat-management approach needs adjustment.
If the recorded centre temperature finishes below the chosen target, the next cook may require a higher pull point, a different heating approach or a revised estimate of carryover. Where food-safety conditions have not been met, the immediate response is to continue cooking, not merely to revise the record.
Keep notes specific to the equipment and circumstances. A kettle barbecue operated with its lid closed may not generate the same thermal gradient as an open grill using intense direct heat.
Build your five-step doneness calibration record
- Write down the cut, thickness and starting internal temperature. Deliverable: a clearly identified cooking baseline.
- Record the final target and applicable safety minimum separately from the planned pull temperature. Deliverable: two distinct temperature decisions.
- Measure and write down the actual temperature when removing the steak from the heat. Deliverable: a verified pull reading.
- Monitor the centre during resting and record the highest measured temperature, resting duration and whether safety requirements were met. Deliverable: a completed temperature history.
- Compare the finished texture with the diner’s preference and note one adjustment for the next cook. Deliverable: a specific, testable calibration change.
After several comparable cooks, the record becomes a personalised reference. It does not eliminate measurement uncertainty, but it makes each adjustment observable rather than arbitrary.
The method depends on one crucial condition: the thermometer must be measuring the correct part of the steak. A precise-looking number from the wrong location can undermine the entire process.
How to Place a Probe So Your Reading Isn’t 15°F Off Near Bone or Fat?
Insert the thermometer into the thickest muscle, aiming for its coolest central region while avoiding contact with bone, gristle and large fat pockets. For thick steaks, inserting from the side can make depth easier to control. Check more than one location when necessary. A 15°F error is possible in principle, but the supplied sources do not establish it as a standard or predictable measurement difference.
The important distinction is between the number shown on the display and the temperature of the meat the cook intends to assess.
A thermometer measures temperature at its sensing region. If that region sits near the hot exterior, touches bone or lands in tissue that does not represent the main muscle, the displayed number can misrepresent the centre.
This becomes especially important with thick steaks because the thermal gradient can be substantial. A probe inserted too shallowly may read a warmer outer layer while a cooler region remains farther inside.
The USDA guidance on food thermometer placement recommends measuring the thickest part of the food and avoiding bone and gristle.
For a thick boneless steak, side insertion is a practical way to approach the geometric centre. Hold the thermometer so its sensing region reaches the interior of the thickest muscle rather than pointing down towards the hot cooking surface.
A useful technique described by ThermoWorks is to insert the probe beyond the estimated centre and withdraw it slowly while observing the temperature. The lowest stable valid reading encountered can help identify the coolest area along that path.
It is important to understand the limitation: the lowest number is meaningful only when the sensing region remains within the muscle being assessed. A reading from an irrelevant fat pocket, outside the meat or from an incorrectly positioned probe is not automatically the correct centre temperature.
When a cut has an irregular shape, one reading may not tell the whole story. Check additional thick muscle areas that could plausibly remain cooler, taking care to keep the probe within the meat and away from bone.
If valid readings vary, investigate the locations before choosing a cooking decision. A large difference may reflect genuine uneven heating or incorrect placement.
For a bone-in steak, position the probe in a substantial area of muscle away from the bone. Do not assume that the bone’s effect always produces a warmer or cooler result: the relationship depends on geometry and cooking conditions.
The same caution applies to fat. A substantial fat pocket is not the same measurement target as the central lean muscle, and its temperature should not be treated as an automatic substitute.
The quality of the thermometer matters, but even a fast, well-functioning model can give a misleading result when placed incorrectly. Conversely, careful positioning allows a suitable food thermometer to provide useful readings without relying on a particular brand.
For thin steaks, use an appropriate probe with a sufficiently small sensing area, where available, and insert from the side when that gives better control. The objective is to keep the sensing region in the meat’s interior rather than accidentally sampling the surface.
Once positioning is trustworthy, the final challenge is often psychological: accepting a temperature reading when the meat’s colour, juices or firmness seem to tell a different story.
Key takeaways before your next cook
- Use surface appearance to manage browning, but use valid internal-temperature readings to assess doneness and safety.
- When the thermometer and visual cues disagree, verify the probe location and take another reading rather than automatically extending the cooking time.
- Build confidence by recording the measured final temperature alongside the finished eating result, without treating visual appearance as proof of safety.
How to Use Internal Temperature Without Overcooking Meat That “Looks Not Done Yet”?
When meat looks underdone but a correctly placed thermometer indicates that it has met the chosen target and applicable safety requirements, verify the reading before cooking it longer. Surface colour, firmness and juices can contradict the internal measurement because they respond to different processes. A second valid reading provides a better basis for deciding than appearance alone.
The conflict often occurs just after a steak leaves the grill. Its crust looks convincing, but the centre appears pinker than expected when sliced. Alternatively, the exterior feels soft despite a temperature reading that suggests the desired result has been reached.
These signals are not equivalent.
Crust formation reflects reactions taking place at the surface under relatively intense heat. Internal temperature describes the thermal condition of the meat at the measurement point. Neither the darkness of the crust nor the resistance felt through tongs directly measures the centre.
Juices can also be misleading. Their colour and appearance are influenced by meat pigments and other factors, so they do not provide a dependable substitute for checking whether an appropriate temperature has been reached.
When the signals conflict, do not ignore the thermometer, but do not trust a questionable probe position without checking it either.
First, repeat the measurement in a validated part of the thickest muscle. If necessary, check another suitable region. Confirm that the thermometer is functioning properly and that the temperature is being compared with the correct standard for that food.
For a whole steak, a verified reading can then guide the decision about whether additional cooking is needed. For chicken and minced meat, the relevant safety temperatures remain decisive regardless of how the surface looks.
Serving guests adds a communication challenge. Some diners use words such as « medium » to describe colour, while others mean a particular firmness or eating texture. Those descriptions can disagree even when two steaks reach similar temperatures.
Rather than promising that every medium steak will display the same shade of pink, describe the result through the measured internal temperature and the chosen doneness reference.
A brief rest and clean slicing can improve the presentation of the finished steak, but neither changes the fundamental distinction between appearance and verified cooking conditions.
If a guest prefers a different texture, that preference can inform a future cooking target, provided the result remains consistent with applicable food-safety recommendations.
Over several barbecues, the relationship between measured temperatures and eating preferences becomes easier to recognise. The cook can then use visual cues for browning and presentation without allowing them to override a valid core-temperature reading.
The complete process is straightforward:
- Identify the cut, thickness and starting internal temperature.
- Select the intended final temperature with the relevant food-safety requirements in mind.
- Position the probe correctly and monitor the thickest muscle as the steak cooks.
- Estimate carryover when planning the pull, then verify the actual temperature during resting.
- Record the result and make a specific adjustment when cooking a comparable steak again.
For very thin steaks, the interval between checking and overshooting the target may be short. For thick steaks, monitoring the rise during resting may become more important. Neither situation is solved by applying a universal cooking time.
Repeatability comes from keeping the method consistent while allowing the cooking decisions to change with thickness, grill intensity and the measured result.
Choose one familiar cut for your next cook. Record its thickness, starting temperature, actual pull reading and highest resting temperature, then compare the finished result with the intended preference. That single record gives you a more useful starting point for the following barbecue than another attempt to judge doneness by eye.
Can two steaks with different thicknesses finish at the same temperature?
Yes. A 2 cm steak and a 4 cm steak can reach the same internal target, but they will generally need different cooking times or heat-management decisions. Measure each steak independently and account for its individual carryover behaviour rather than removing both after an identical number of minutes.
Does resting always make a steak’s internal temperature rise?
No. Carryover depends on the remaining temperature gradient, cooking intensity, thickness and resting conditions. A steak may continue warming internally after removal, but the size and duration of the rise are not guaranteed. Measure the centre during resting rather than assuming a fixed increase.
Should you cover a resting steak with foil?
Foil can alter the conditions under which a steak loses heat, potentially affecting its resting temperature profile. The supplied evidence does not establish a universal foil-related temperature increase. If using foil, keep that choice consistent in your cooking records and verify the final temperature rather than assuming an adjustment.
What if different areas of the same steak give different thermometer readings?
Check that the probe’s sensing region is properly positioned within the thickest muscle and not touching bone, gristle or a large fat pocket. Then assess additional relevant areas. Differences may reflect genuine uneven heating or placement errors. Do not rely on a warmer reading while a valid cooler area remains below the required safety temperature.
Can you use the same temperature targets for steak burgers and whole steaks?
No. Minced meat and whole-muscle steaks have different food-safety considerations. Under FDA guidance, minced meat requires a minimum internal temperature of 71.1°C (160°F), whereas whole beef steaks are listed at 62.8°C (145°F) with a three-minute rest. UK cooks should also follow applicable UK food-safety recommendations, rather than applying a whole-steak culinary doneness chart to burgers.